On Windows 10, Processes and Steps to Remove Restore Previous Version from Context Menu – Implementation of Right click on an application prompts several items included in a list. The rectangular-shaped list has been popular as a context menu of the right click. The context menu bears few meaningless options cluttering itself. Meaningless signifies that users seldom click the options. These options are Restore previous version, Run with the graphic processor, etc.
But the registry editor exists at the same time which can give significant assistance to remove the item. Hence, the article propounds steps Remove Restore Previous Version from Context Menu on Windows 10 exercising with registry key manipulations.
Before Starting the steps knowing what the option ‘Restore Previous Version’ is quite necessary. This option allows an application to retrieve its earlier version. This version comes from either restore point or File history backup. Oppositely, if a user creates a restore point or enables files history backup he possesses an option to restore an application to its previous version using this item on the Context menu.
Remove Restore Previous Version from Context Menu Windows 10
Using Registry Hack
Prior to beginning the process, ensure to export the concerned registry keys. The exported registry keys will prove a savior if a misshapen occurs to the operating system. In addition, remember that a good knowledge of Registry editor can only follow the steps accurately.
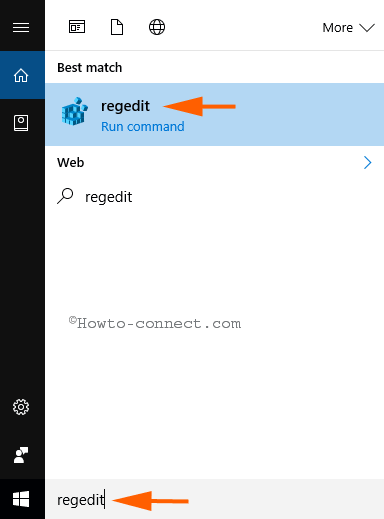
Step 1 – First of all, Open registry editor using a favorable method. Either you can write regdit in the search of the start menu and click the same in the result section.

Step 2 – Immediately, a UAC pop-up appears on the screen, click Yes for giving acceptance.
Step 3 – Go along with the underneath provided path
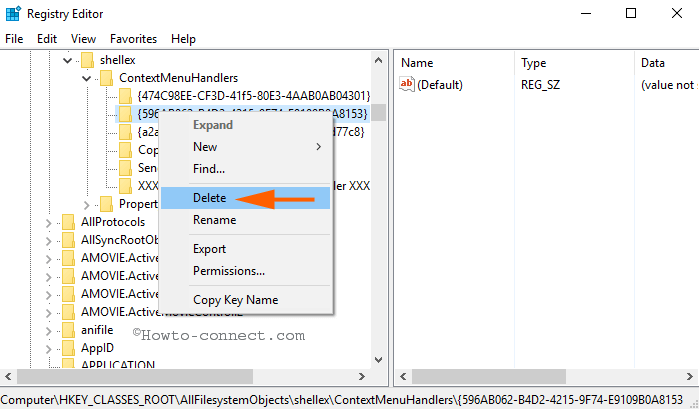
HKEY_CLASSES_ROOT\AllFileSystemObjects\ShellEx\ContextMenuHandlers
Step 4 – Locate the registry key {596AB062-B4D2-4215-9F74-E9109B0A8153}. Usually, the key lies in the second position, perform a right-click on it and select Delete.

Step 5 – A confirmation dialog prompts, hit on Yes.

Step 6 – Drive back to the Context menu and confirm whether the Restore Previous Version vanishes.
Step 7 – Furthermore, if you reconsider to add the Restore Previous Version in Context Menu Windows 10, simply import the registry key.
Via Group Policy Editor
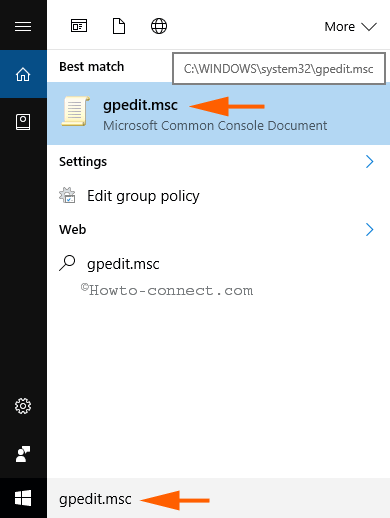
Step 1 – Access Group Policy Editor applying the technique with which you are quite comfortable. Either you can write gpedit.msc and in search of start menu and click the same at the top in the result segment.

Step 2 – Navigate to the subsequently provided path –
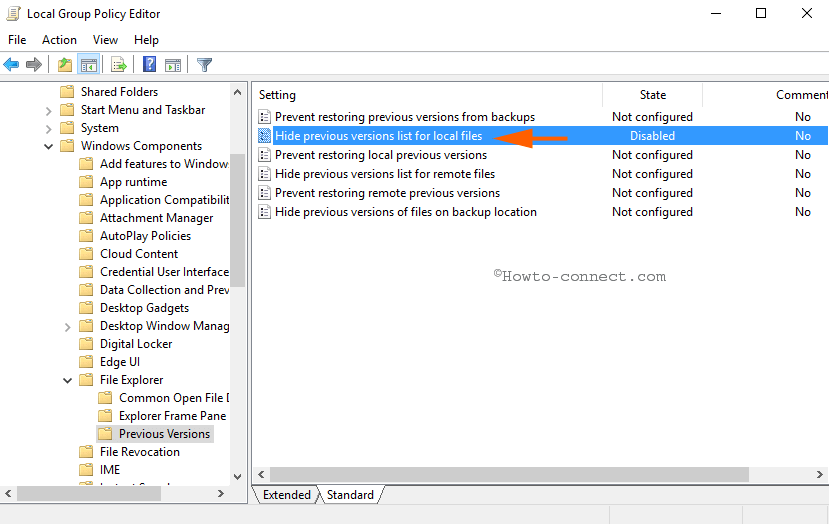
User Configuration => Administrative templates => Windows Components => File explorer => Previous Version
Step 3 – The adjacent Right flank includes Hide previous versions list for local files. Perform a double click on this specific policy setting to input your desired change.

Step 4 – Hide previous versions lists for local files window prompts, click the small round cell before Enabled.

Step 5 – Finally, Hit Apply thereafter OK button in order to Hide previous versions lists for local files.
Step 6 – If you like to add the items to see again, check the round cell before Disabled and click Apply afterward OK.
Remove Restore Previous Version from Context Menu Windows 10 in few clicks through .reg file
The user experiencing bothered with registry hacks and group policy editor modifications especially can follow an alternate way. They need to click the download button to grab a .reg file. Straightway running this file will Remove the option and once they change their mind run the other file to add the same again.
Conclusion
The ways are pretty helpful in the direction of deleting unnecessary items from the context menu. In addition, the tweakings also allow restoring the same in multiple ways.

