As the Windows Update arrives frequently, the excitement level of people is rising day by day. At the same time, users are also concerned because error-free upgradation of Windows OS is almost impossible. While installing the new version, often the system gets stuck. Usually, this happens due to Windows Update Database Corruption. Keeping this situation in mind, users are preparing to get the upcoming version hassle free. Therefore, here we have provided the easiest solutions that will help you to Repair Windows Update Database Corruption in Windows 10.
Generally, Microsoft keeps updating the operating system automatically but installing them frequently often causes interruption. As a result, the progress freezes and the user don’t find any way to resume it. In the beginning, it becomes difficult to know about this error unless you run the Windows Update Troubleshooter. In most of the cases, the troubleshooter can fix the errors related to Windows 10 Update, but in this particular situation, it’s not always successful. Read –
Repair Windows Update Database Corruption
Here is How to Repair Windows Update Database Corruption in Windows 10 –
There are multiple methods to repair Windows update database corruption error but before following either of these, create a restore point so that if anything unfortunate, you can return the PC to the previous state.
Run Windows Update Troubleshooter
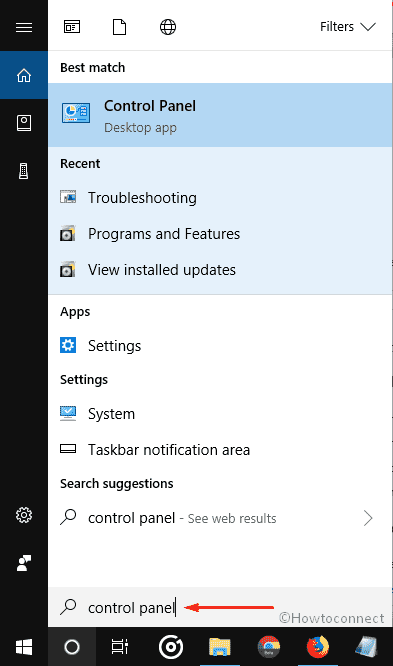
In the search box of your Taskbar, type control panel. When the result appears, hit Enter on your keyboard.
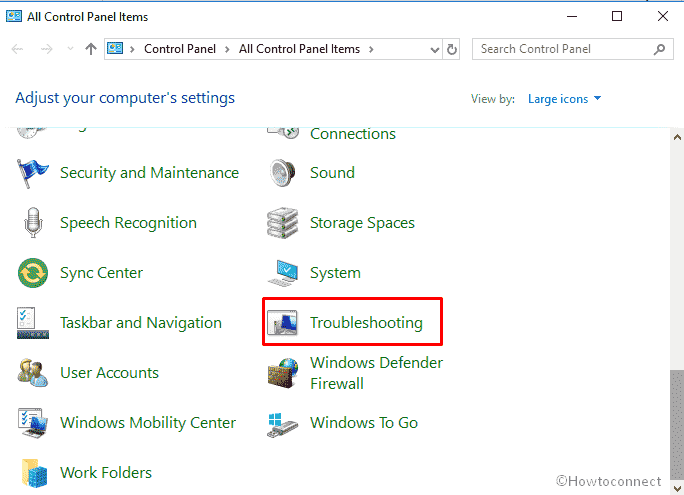
Once it comes into the view, locate Troubleshooting and then click on it.
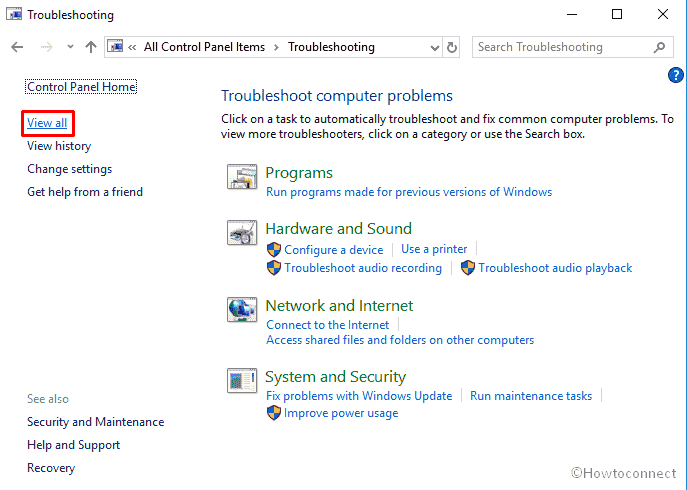
Thereafter, click on View all from the left column.
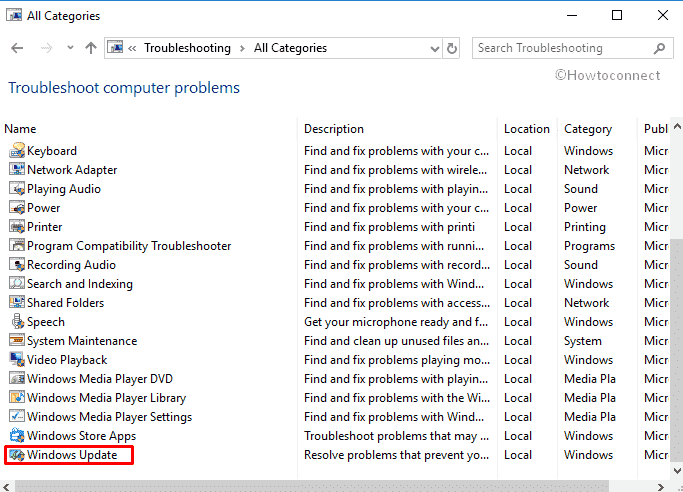
On the following page, select Windows Update.
Now, follow the on-screen messages and allow the Troubleshooter to run. In the end, you will see something like this –
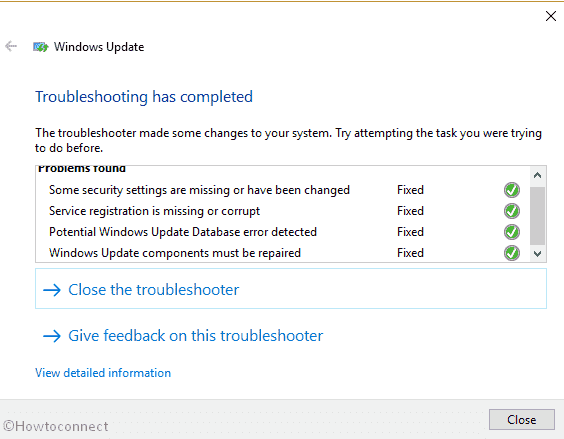
When the procedure gets over, reboot the system and try to install the update once more. If it doesn’t work, move to the other methods.
Try Updating Windows 10 after performing the Clean boot
Clean boot is one of the tools to Repair Windows Update Database Corruption as it avoids loading unnecessary programs that can cause conflicts.
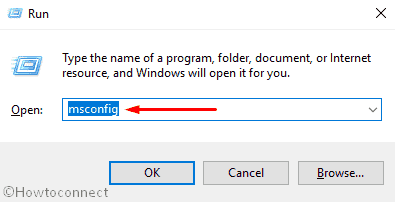
- Press Win + R simultaneously and let the Run Dialog box appear.
- Type msconfig in the text bar and then click on OK.
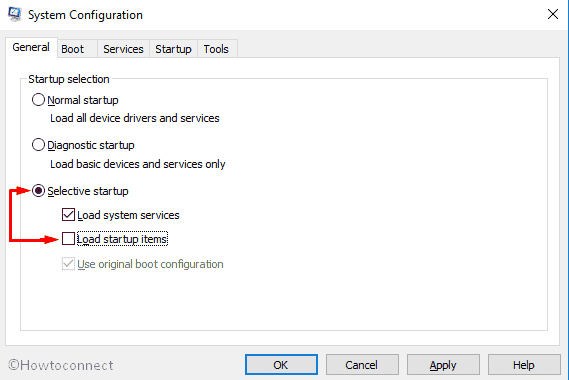
- Here, you will come to view System Configuration wizard. Click on “Selective startup” located and then untick the box against Load startup items.
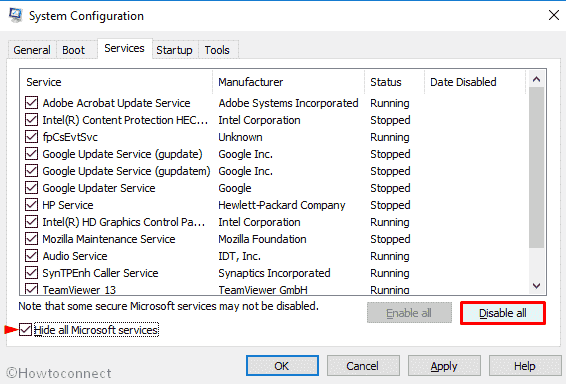
- Next, shift to the Services tab.
- Check the box of Hide all Microsoft services from the bottom left side of the wizard.
- Now, move your cursor towards the bottom right side of this window and click on Disable all.
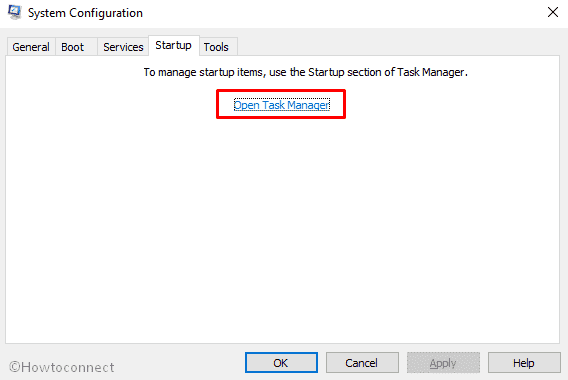
- This time, navigate to the Startup tab and click on Open Task Manager.
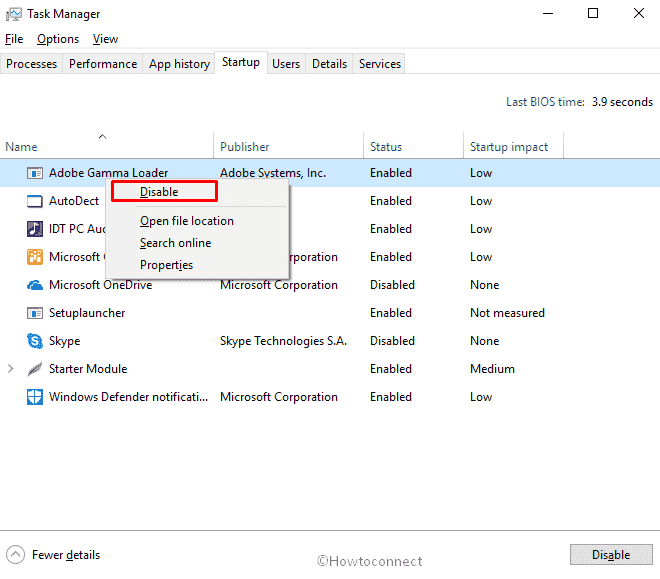
- When it shows up, disable all the enabled startup items available there.
- Now, click on OK on System Configuration and then close all the wizards.
- Finally, Restart your computer.
After this, most probably you will succeed in updating Windows 10.
When the upgrading process is done, again open the System Configuration wizard like earlier. This time select Normal Startup option from the General tab and then click on OK.
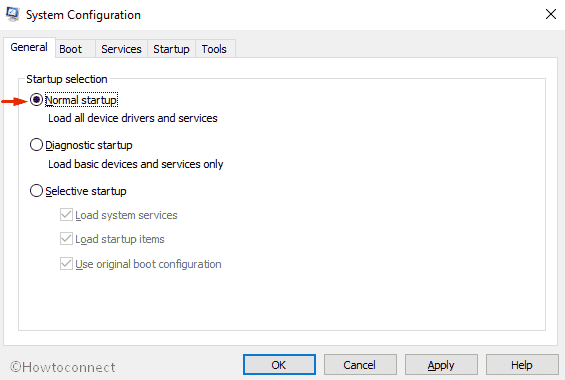
When a prompt appears, click on Restart. This is one of the most successful methods to repair Windows update database corruption mess up.
Run SFC and CHKDSK to Repair Windows Update Database Corruption
Press Win+S jointly and then type cmd.exe in the search box.
Once the result appears at the uppermost part, right click on Command Prompt (Desktop app) and choose the option Run as administrator from the list.
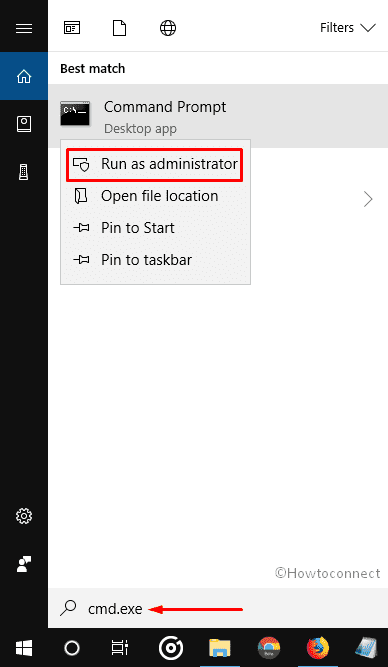
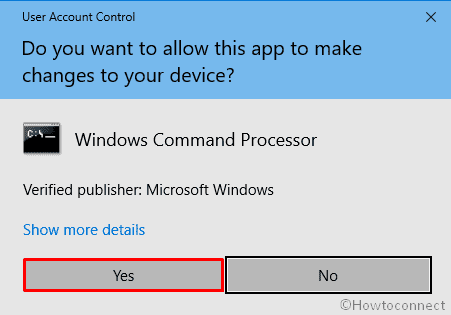
A UAC will prompt up locking your computer screen, click on Yes to give consent.
Now, type Sfc /scannow the blinking cursor and hit Enter.
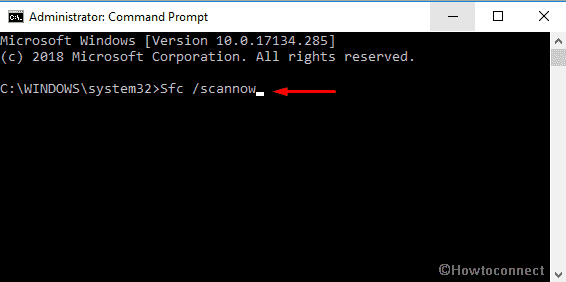
The system will start scanning in order to scrutinize and repair the corrupted file. As the process will take time, so wait patiently and don’t interrupt in between. When complete, run the installation again and check if it is working fine. Otherwise, you need to run CHKSDK. Follow to know the procedure.
Use DISM to Repair Windows Update Database Corruption
To Run DISM, you have to again open Command Prompt as Admin.
Note: It is important to note that while running DISM, the Windows Installation Media should be kept ready.
Now, in the Command Prompt window, type the following line and press the Enter button on your keyboard –
DISM.exe /Online /Cleanup-Image /RestoreHealth /Source:D:\RepairSource\Windows /LimitAccess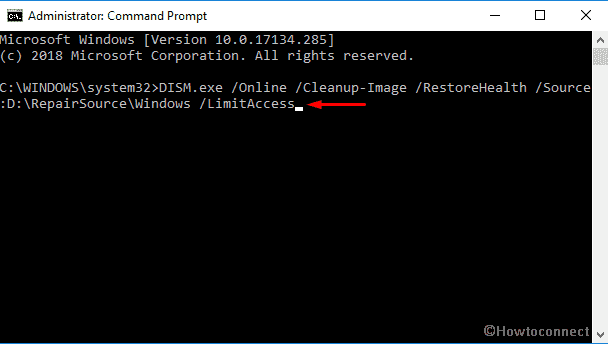
You need to replace the D:\RepairSource\Windows with your repair source’s location.
After allowing the above command to run by pressing the Enter button, you should wait for 15-20 mins. because the process will take this much time to finish.
Note: In rare cases, this command won’t work, that time you should try these –
Dism /Image:C:\offline /Cleanup-Image /RestoreHealth /Source:c:\test\mount\windows
Dism /Online /Cleanup-Image /RestoreHealth /Source:c:\test\mount\windows /LimitAccess
Again, don’t forget to include your repair source’s location.
Once the DISM process is over, type sfc /scannow in the same window and press Enter. Wait until the execution gets finished and then Reboot your PC.
Rename the SoftwareDistribution Folder
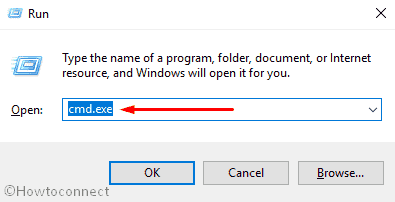
Right-click on Start button and select Run from the Win+X menu.
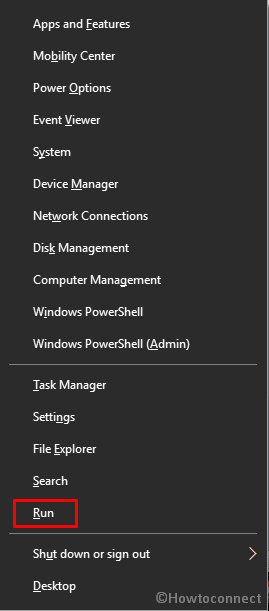
Write cmd.exe in the textbox and then Press Ctrl+shift+enter jointly to open Command Prompt as administration.
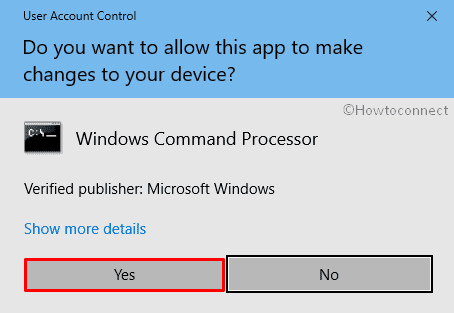
A UAC will pop-up, Click on Yes to proceed further.
Now, type the following commands and press Enter after each one. This method will stop the Windows Update Services immediately.
net stop wuauserv
net stop cryptSvc
net stop bits
net stop msiserver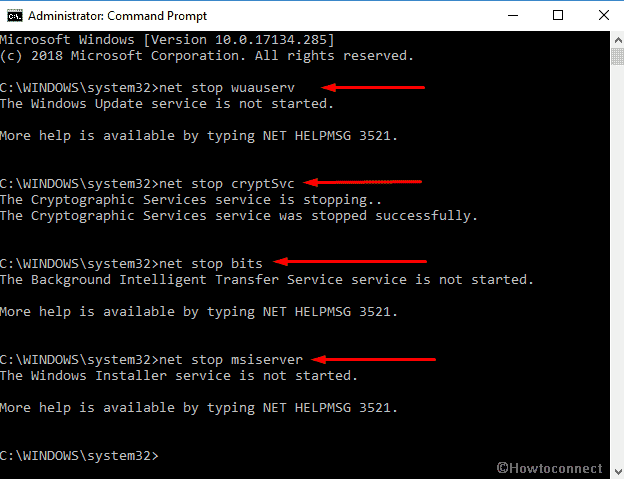
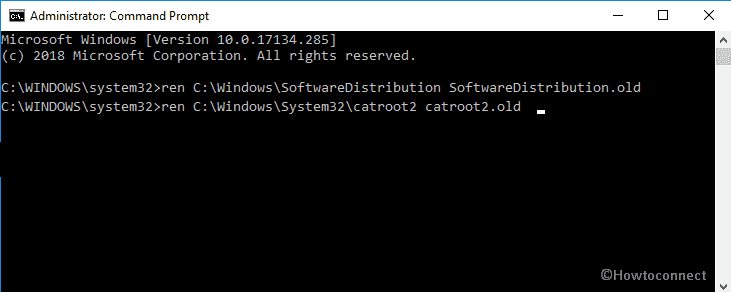
Hereafter, run the below commands to rename the Software Distribution Folder –
ren C:\Windows\SoftwareDistribution SoftwareDistribution.oldren C:\Windows\System32\catroot2 catroot2.old
You need to again start the Windows Update Services by running the underneath tools –
net start wuauservnet start cryptSvcnet start bitsnet start msiserver
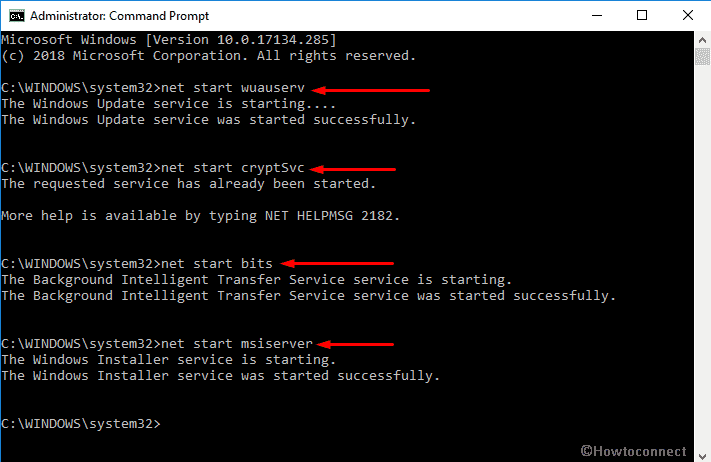
At last, Restart your computer to make the changes effective.
Important: If you don’t install the new Windows 10 update, your computer might get exposed to security threats, therefore it is necessary to repair Windows update database corruption.
That’s all!
