This context will show How to Reset the Print Spooler in Windows 10 and 11. You might have got different issues such as Printer Not Activated Error Code 30, Items Stuck in queue, Offline. Reset Spooler is the all-in-one solution for all these problems. This Spooler helps your computer to interact with the printer and orders the print jobs existing in the queue. But often the tool gets stuck and stops printing properly. This may happen when the spooler is corrupted itself or it is unable to interact with other software.
When you reset the Print Spooler in Windows 11 or 10, the process restarts after wiping out the jobs in queue. Print management organizes the whole operation including loading the driver, retrieving the location.
Ways to Reset the Print Spooler in Windows 11 and 10
Here is How to Reset the Print Spooler in Windows 11 or 10 –
Reset the Print Spooler through Command Prompt
Step-1: Type cmd.exe in the Taskbar search and when the result turns up on the display, click on Run as administrator.
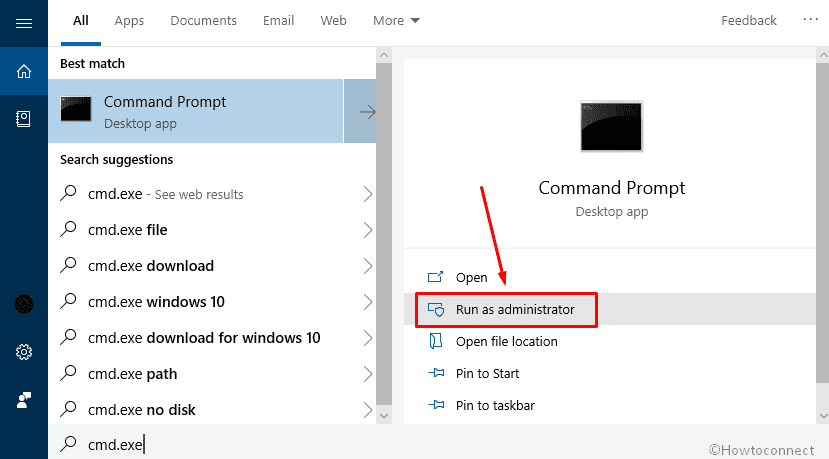
Step-2: When a UAC prompts up, click on Yes to give consent.
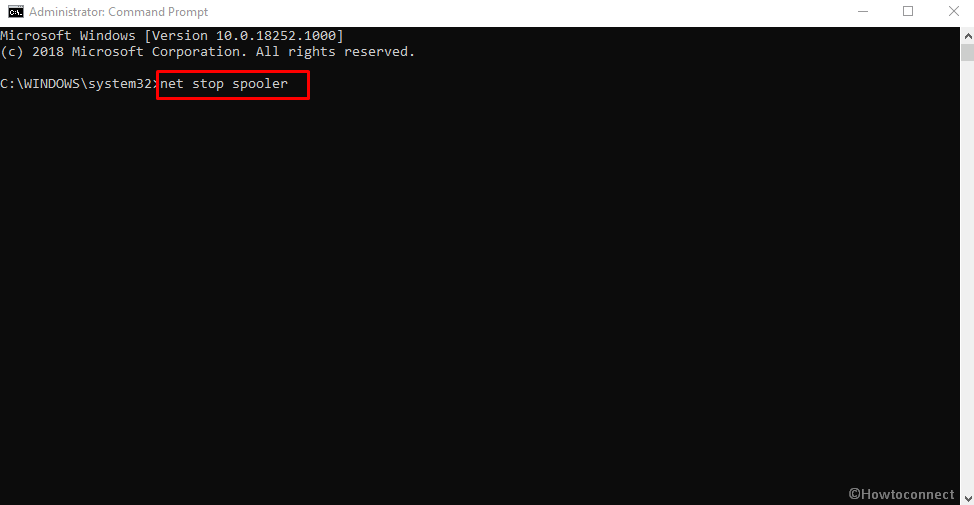
Step-3: On the succeeding Window, write down the below command and hit Enter in order to execute –
net stop spooler
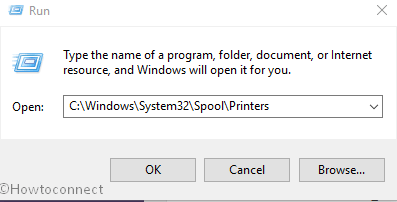
Step-4: To move forward, Press Win+E at the same time to launch File Explorer.
Step-5: Now, navigate the following path –
C:\Windows\System32\Spool\Printers
Step-6: Make a combined Press of Ctrl+A hotkey to select all items available there. Press Delete on the keyboard.
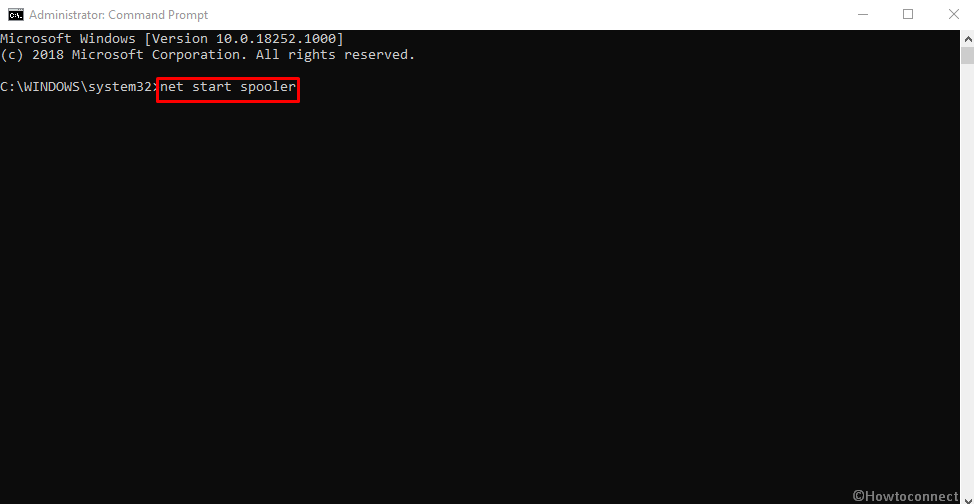
Step-7: Get back to Command Prompt again. This time type the following line after the blinking cursor and press Enter on your keyboard –
net start spooler
Reset the Print Spooler through Services
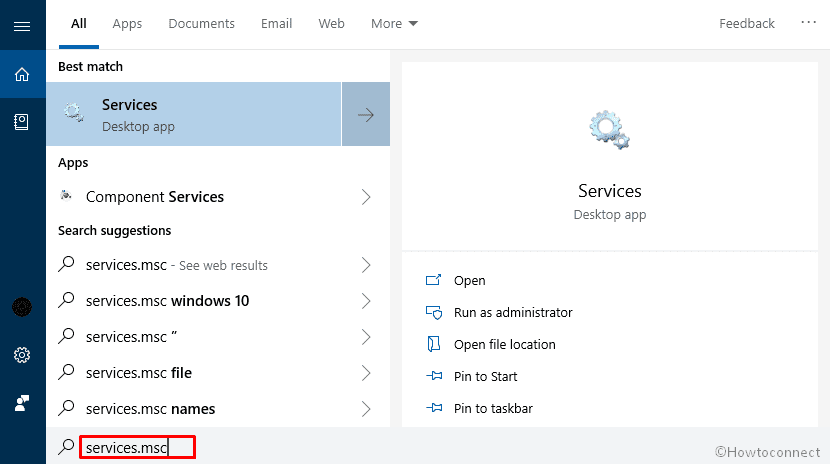
- Press Windows+Q shortcut, type “services.msc” and then hit Enter.
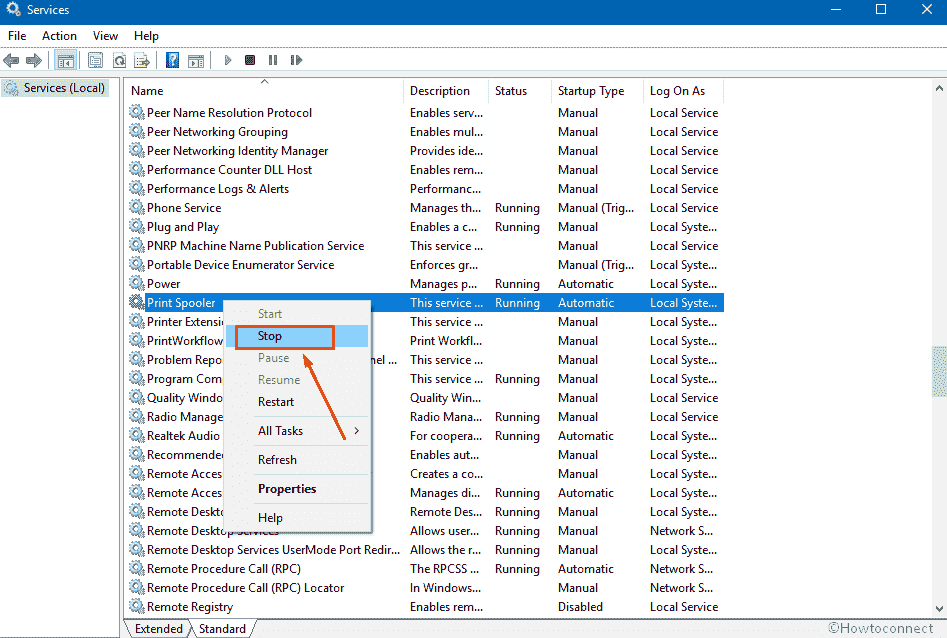
- When the Services window appears, locate Print Spooler, right-click on it and select Stop.
- Next, reach out to the printers directory. To do so, open Run dialog, type the following in the empty box and press Enter –
C:\Windows\System32\Spool\Printers - On the running window, select everything then press Delete button on your keyboard.
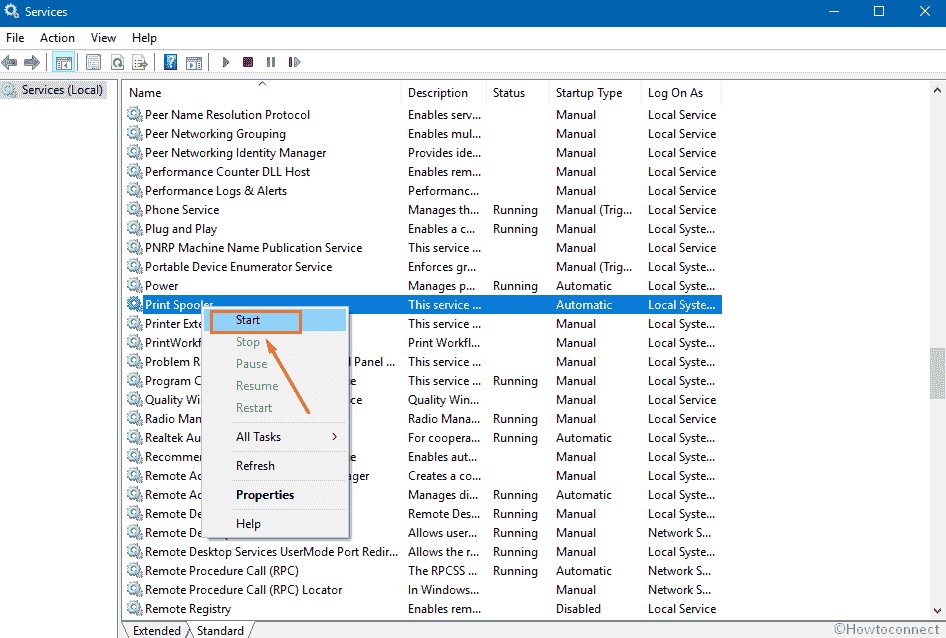
- Return back to Services console, make a right-click on “Print Spooler” and choose “Start” on the menu.
Above procedure will help you to Reset the Print Spooler in Windows 11 and 10 and this will start printer functioning smoothly.
That’s all!