It is genuinely a great idea to Schedule System Restore Point while your device starts up. Restore point provides more protection to your Windows 10 PC and acts as a savior when something goes wrong. You all know that System Restore is a very useful feature that helps in recovering from many different issues of the computer. To maintain a computer clutter free, you can Schedule Disk Cleanup in Windows 10.
But we strongly recommend to Schedule System Restore Point whenever Windows start up. This tutorial will help you generates restore points each week all by itself. But for that matter, it also permits you to schedule your own manual restore point. This helps you to go back to the good points when any problem occurs on your system. If you are an advanced user, try to Create Restore Point on Windows 10 Using PowerShell as an alternate option.
However, the only inconvenience with this utility is that while restoring to the previous restore point, it alters many changes made to the PC after the last restore point. Such changes to the restore point incorporate any sort of apps and drivers or Windows updates.
Well, you are completely in charge of the repetition of the restore points as per your needs.
Schedule System Restore Point to Create at Startup in Windows 10
It is noteworthy that to use Task Scheduler you need to have a password to your user account. This is so because Task Scheduler does not work on an unprotected user account.
Step 1 – Open Control Panel, reach out to Administrative Tools and click on the same. Or type the below given in the Run box and press Enter –
shell:common administrative tools
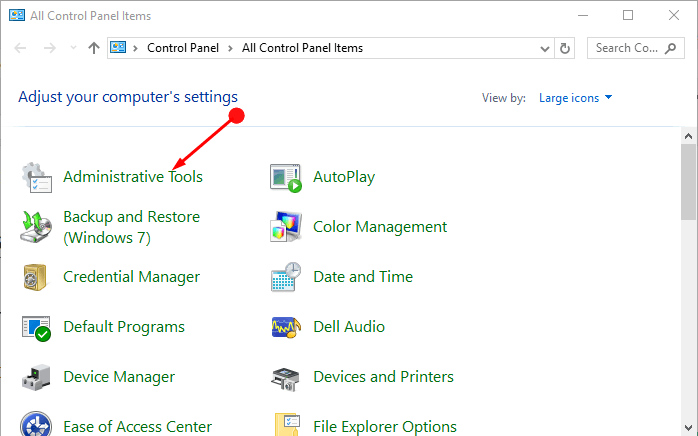
Step 2 – Now, select the Task Scheduler icon in the Administrative Tools.
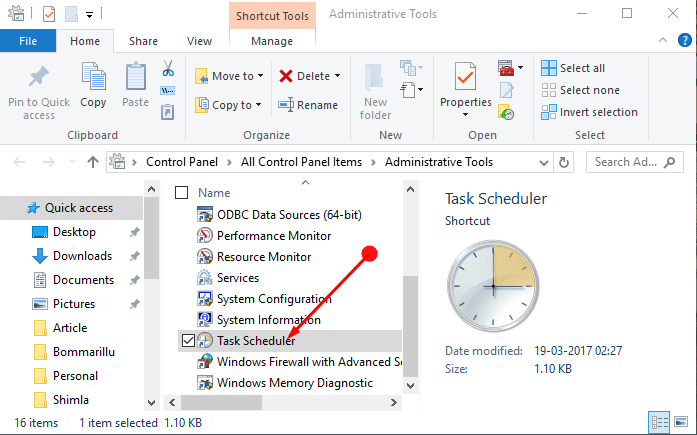
Note – As an alternative, you can also type Taskschd on Cortana text field and select Task Scheduler that shows as the result.
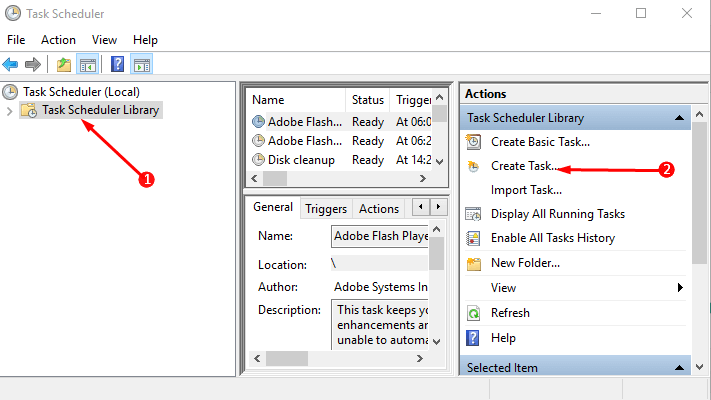
Step 3 – When Task Scheduler comes into view, click Task Scheduler Library on the left sidebar. Then move on the right panel and select the option Create Task.
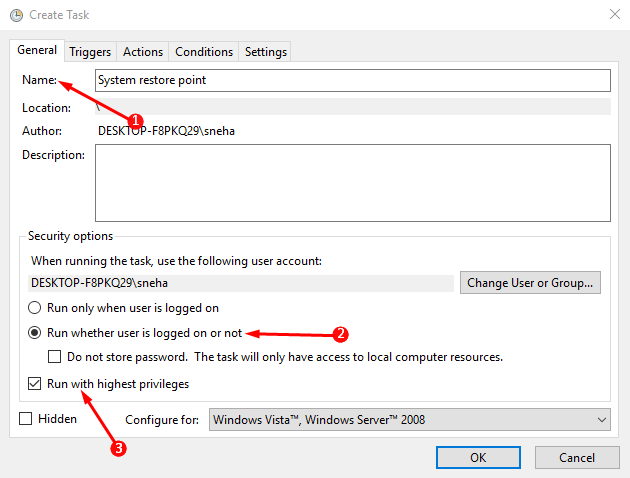
Step 4 – In the Name field, provide a name to the task as shown in the given picture. You can put any name to the task but we suggest to name it the same as the task. So, choose the boxes beside “Run with highest privileges“ and “Run whether the user is logged on or not“ respectively.
Step 5 – Switch to the Action Tab and click the New button.
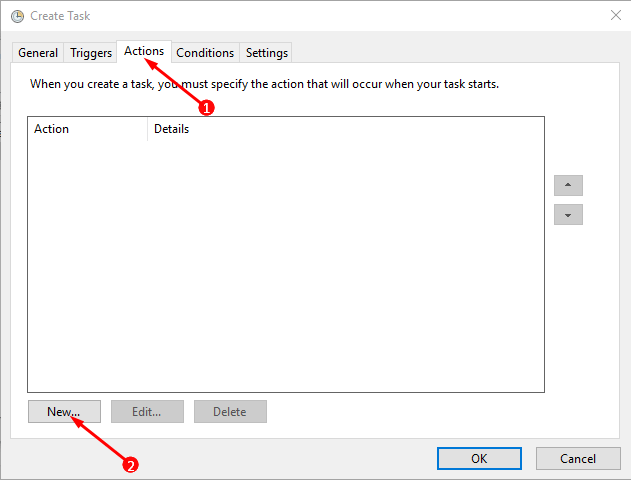
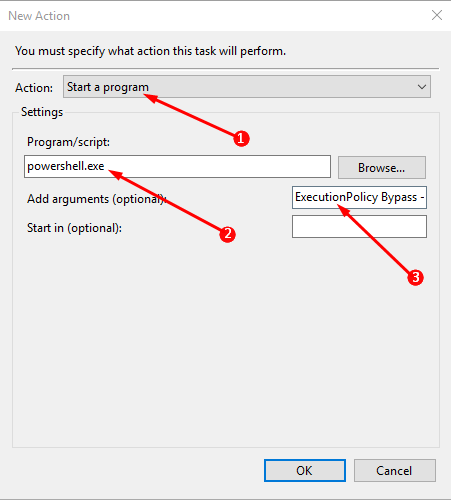
Step 6 – In the next window, add the data from below.
Action – Start a program
Program/script – powershell.exe
Add arguments(optional) -ExecutionPolicy Bypass -Command “Checkpoint-Computer -Description \”Restore Point (Automatic)\” -RestorePointType \”MODIFY_SETTINGS\””
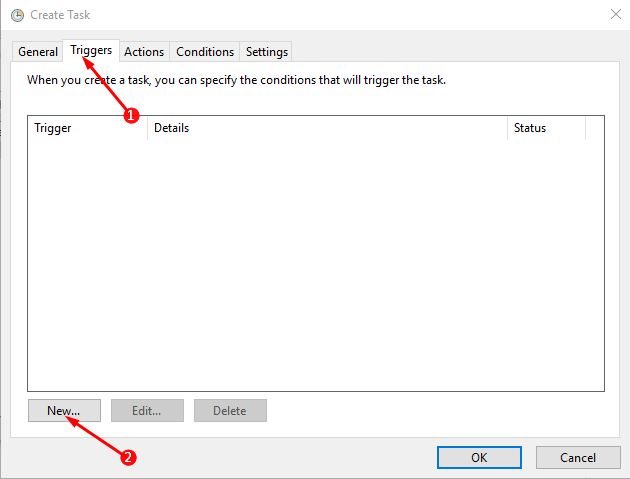
Step 7 – Then shift to the Triggers tab and click the New button.
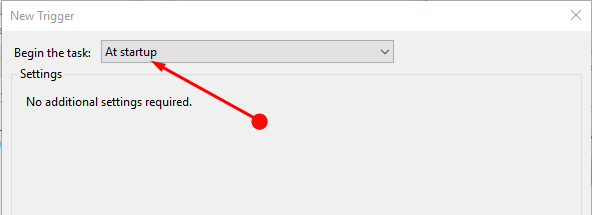
Step 8 – Use the arrow adjacent to Begin the Task and set the time as At Start Up. This helps to carry out the task every time the device starts.
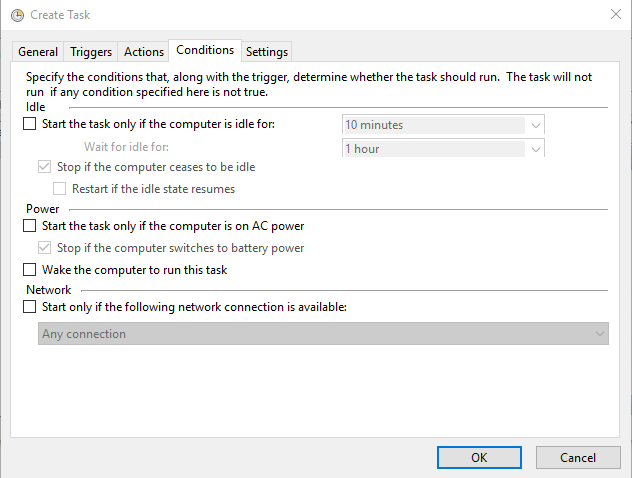
Step 9 – Finally, move to the Conditions Tab and unselect the options mentioned below –
1) Stop if the computer switches to battery power
2) Start the task only if the computer is on AC power.
Step 10 – Click on the OK button in the end to complete the creation of the task. To protect the task with a password set up a password when prompted.
Concluding Words
Following the above simple steps, you can pretty much effortlessly Schedule System Restore Point on Windows 10 PC. Once you set this, it will help later to restore your PC and settle all the mess. Though this feature is not a new one yet it a very important one till date. This helps in bringing back the OS to last restore point whenever Windows 10 turns unstable or unbootable.