You can Schedule Windows Defender Full or Quick Scan on Windows 10 PC to offer basic security against common threats and attacks. By default, this built-in malware protection does not provide an option to directly schedule a scan. So, the best way to run the scan automatically on configured date and time is by using Task Scheduler. You may also like to Scan Offline With Windows Defender to Eliminate Wicked Software in Windows 10.
But with Task Scheduler, you can Schedule Windows Defender either for a Full or a Quick Scan. Windows Defender Full Scan is quite comprehensive as it minutely scans your hard disk. This type of scan takes several hours to complete and thus it is best to schedule it at night. In contrast, Windows Defender Quick Scan inspects the sectors of your PC that possibly contain malware. The time for this type of scan also varies but you can schedule it to run on a daily basis. Well, let us now walk towards the steps and see how to plan a scan time and date.
Schedule Windows Defender Full or Quick Scan on Windows 10
Step 1 – To Schedule Windows Defender Full or Quick Scan, first, open Task Scheduler. So, on the Cortana search box, type Taskschd and select Task Scheduler that appears on the top.
You can also Use Z-Cron Task Scheduler for Windows.
Step 2 – On the right sidebar of Task Scheduler, click the option namely Create Basic Task.

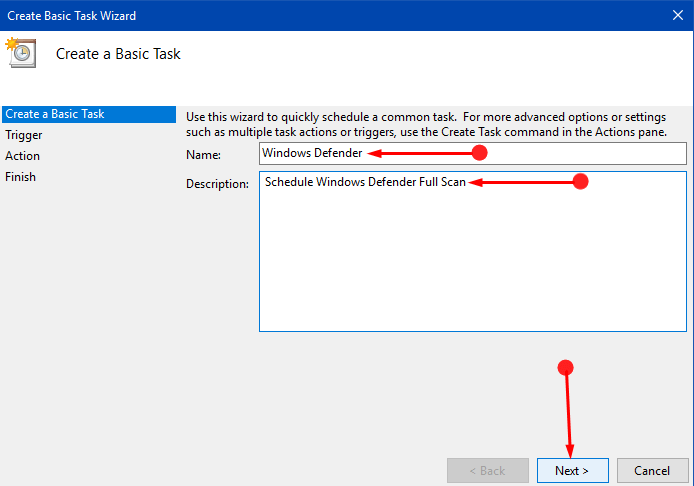
Step 3 – Create Basic Task Wizard will come into view. Here, enter a relevant Name and Description of the task as shown in the below image. By doing so, you can easily locate your task on the main window of Task Scheduler in future. After naming and describing the task, click Next.
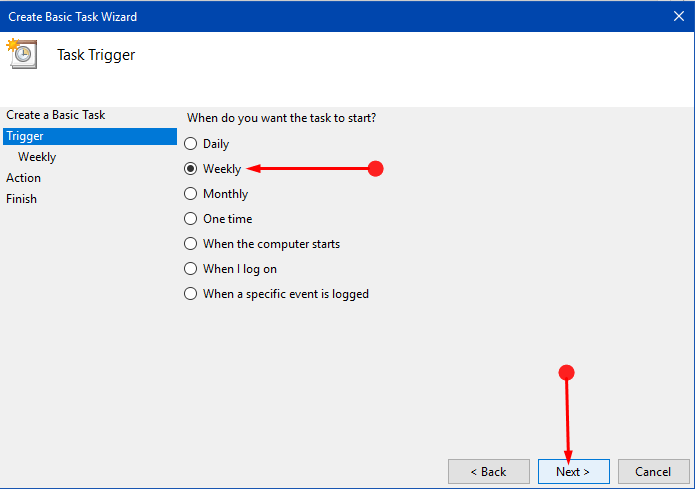
Step 4 – Moving on, select the Task Trigger such as Weekly, One time, Daily, Monthly and so on. For example, to run the scan once in a week, select Weekly dot and click Next.
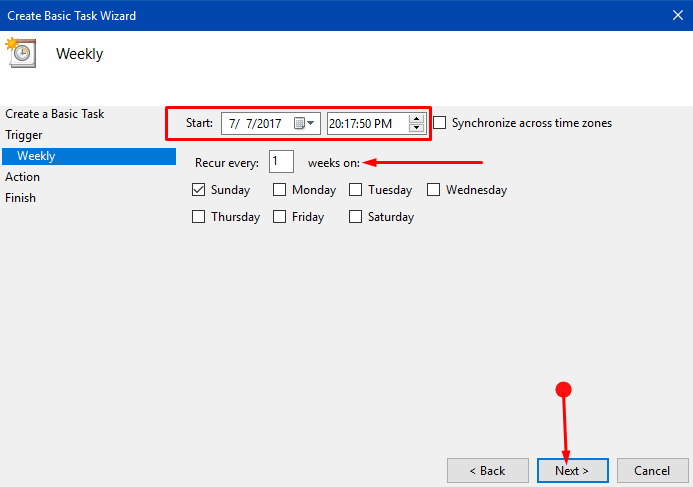
Step 5 – Choose the date, time and day for the task to occur and make sure that the option Recur every is set to 1. This will direct Task Scheduler to recur the task every week on the set day and time. After selecting everything, click Next.
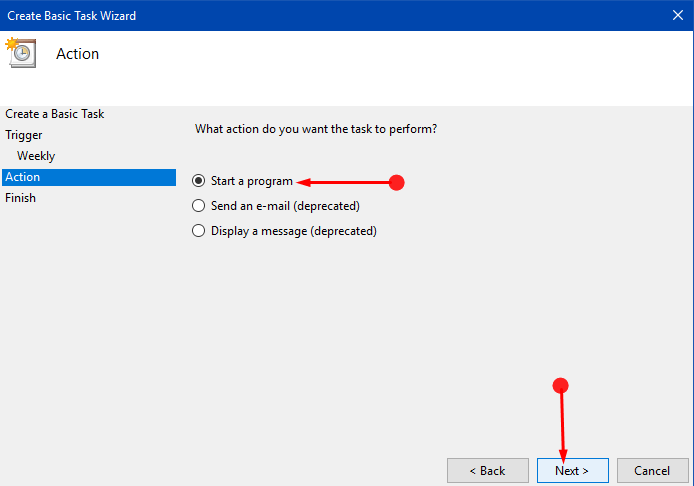
Step 6 – Select Start a program on the Action screen and furthermore click Next.
Step 7 – On the following screen, click Browse button and then go to C:\Program Files\Windows Defender. Here, locate and select MpCmdRun.exe file.
Step 8 – Depending on what scan you wish to schedule, enter its argument in the Add arguments field.
Full Scan
Scan -ScheduleJob -ScanType 2
Quick Scan
Scan -ScheduleJob
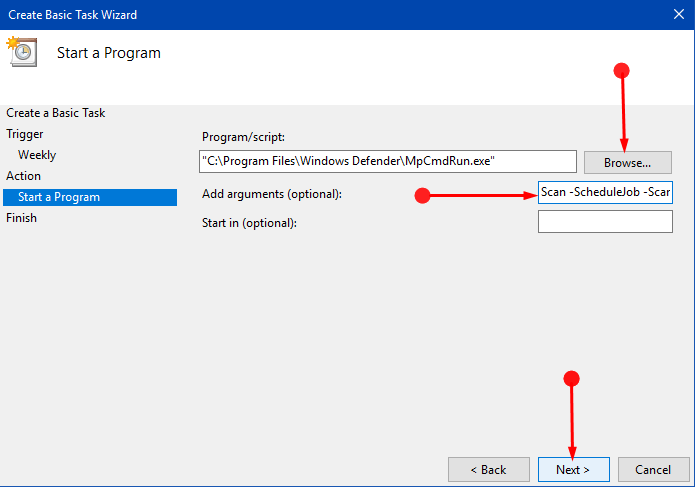
Step 9 – Once you are done with adding a program and preferable argument, click Next.
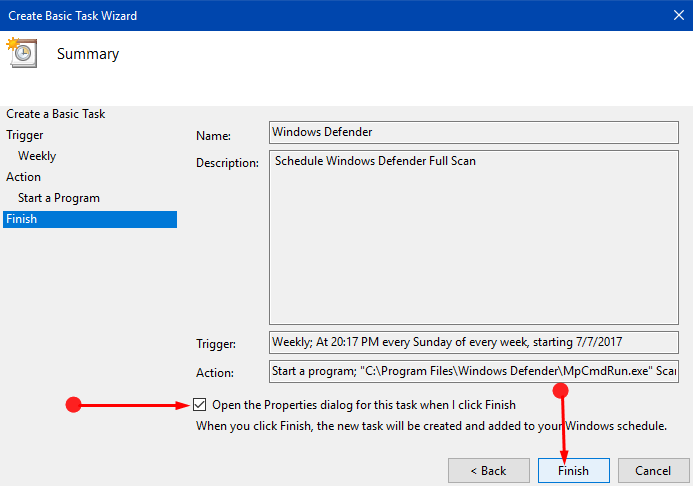
Step 10 – Finally, Summary window will appear, displaying all the configurations. Here, ensure to select the box against the option “Open the Properties dialog for this task when I click Finish“. To end the setup of Schedule Windows Defender Full or Quick Scan, click Finish.
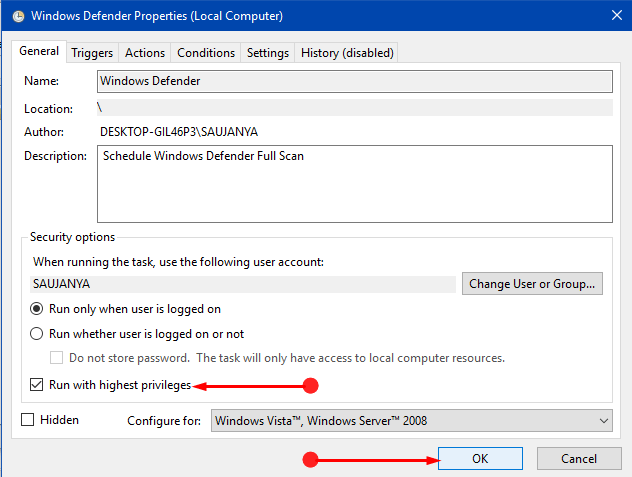
Step 11 – This will open Properties dialog of the task you have generated. Go through the settings and configure them as per need. For example – to run the task with highest privileges, go to the General tab and choose Run with high privileges. If you customize the settings of the task, save them by clicking OK button.
Conclusion
Hence, following the above series of steps will make you able to Schedule Windows Defender Full or Quick Scan in Windows 10 OS. With this, you can protect your PC by scanning the items on a regular or weekly basis. We hope that this helps you and if you have are aware of more procedures to make your PC invulnerable, please do write to them.

Hello Tom Palmer So many thanks for the compliment. Follow this one – How to Run Offline Scan from Window Defender Security Center in Windows 10
Thanks for the great article. Could you tell me what the argument is for an offline scan?
Thank you so much, Meili.
I look forward to having Windows Defender run weekly. The instructions you provided for implementing it were excellent. No problems.