Complete Guide and Procedures to Set Spotlight Lock Screen Image as Wallpaper on Windows 10. – Windows Spotlight offers super class images for your Lock screen and almost all of them are equally appealing. But do you know that you can also apply these delightful and attractive images as your desktop wallpaper?
Yes, 2 tiny size tools allow you Set Spotlight Lock Screen Image as Wallpaper on Windows 10. The first tool we are discussing here is Lock Screen Reflection that directly displays the present lock screen image on the desktop. Similarly, Windows Spotlight is once more a tiny application that sends total Lock Screen images to your suitable location. From this location, you can Set Spotlight Lock Screen Image as Wallpaper on Windows 10 quite straightway. Let us see the guide and steps now.
Set Spotlight Lock Screen Image as Wallpaper on Windows 10
Before you start with any procedure, ensure that Windows Spotlight is enabled.
Enable Windows Spotlight
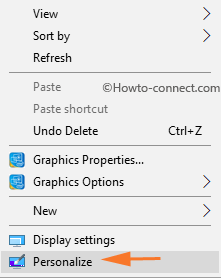
Step 1 – First of all, find a blank space on the desktop. Now, perform a right-click and from the list of options, select Personalize, the last one.
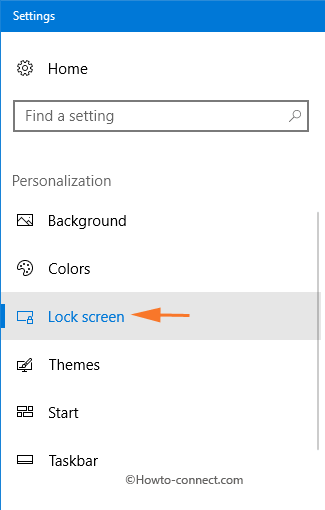
Step 2 – This will evoke Personalization Settings page on the screen. Click Lock screen segment on the left sidebar.
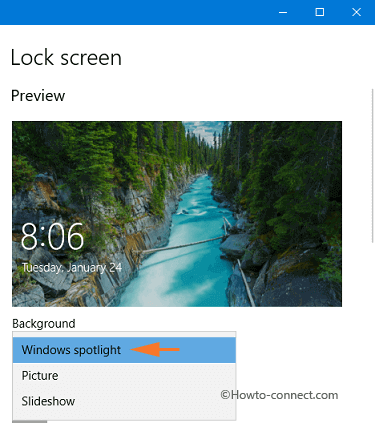
Step 3 – Next, on the right pane, select the drop-down that appears underneath the setting Background. Three options will show up, select Windows Spotlight.
Step 4 – Finally, test the background image by pressing Win and L keys. Depending on your internet speed, the picture will take the time to load.
Note – In case, you are encountering any issue regarding this, pursue the guide – Fix: Windows 10 Spotlight Not Available.
Now see the methods –
Method 1 – Through Lock Screen Reflection
Lock Screen Reflection is a considerably small size application and comes completely free. The significant feature of this utility is that the moment you run the .exe file, it will instantly grab the current Lock Screen picture. Within seconds you can pretty simply implement the same as the wallpaper.
Requirements
#1. A PC running Windows 10 OS.
#2. Install Microsoft .NET Framework 3.5.
Step 1 – To begin with, grab Lock Screen Reflection application by downloading it from .
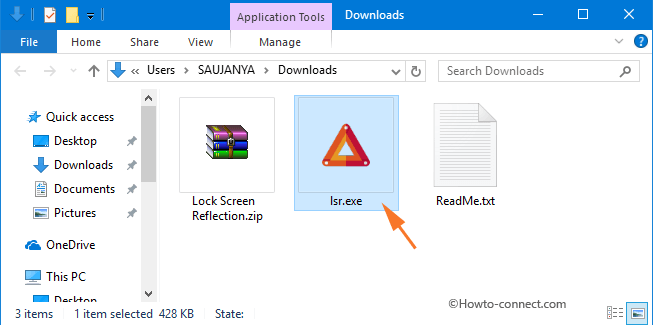
Step 2 – Now, a very small size zip file with a name Lock Screen Reflection will get downloaded. Moving on, make a right-click on the zip file and extract the items.
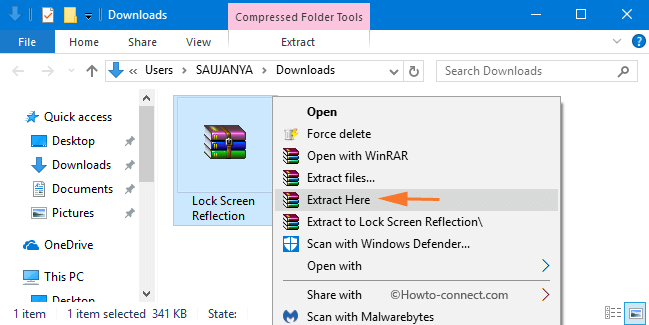
Step 3 – After extracting the contents, you will notice one lsr.exe and one ReadMe.txt file. Moving on, double-click the lsr.exe file and the very next moment you will see that the desktop wallpaper is changed and it is the same that is displayed on the Lock Screen.
Method 2 – Via Windows Spotlight Tool
Windows Spotlight Tool is a little different from the one that we discussed above. The special functionality of this utility is that it gathers all the images of Windows Spotlight. In addition, it lets you store them into a folder of your choice. Now, from the folder, you can pick up anyone as your desktop wallpaper.
Requirements
*1. A PC should have Windows 10 OS.
*2. Also, ensure to install Microsoft .NET Framework 4.0.
Step 1 – First and foremost, obtain Windows Spotlight Tool by visiting this page.
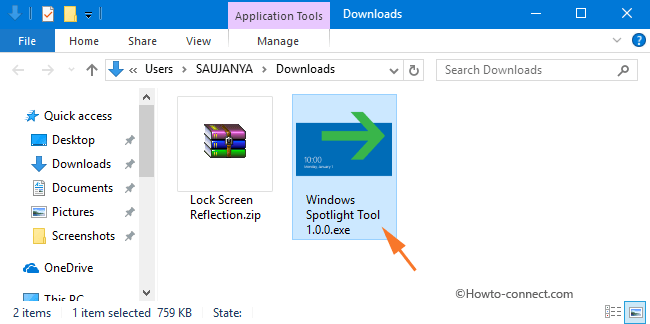
Step 2 – The file is very small and soon the download will get over. So, double-click Windows Spotlight Tool.exe file.
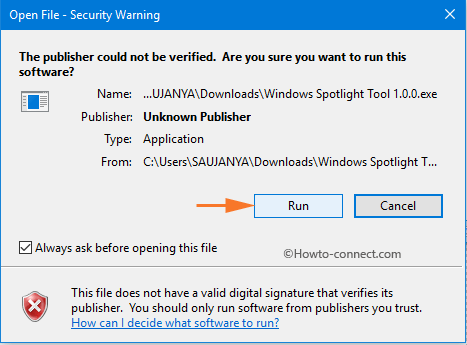
Step 3 – This will evoke Open File – Security Warning box on the screen. Select Run button to see what’s next.
Step 4 – A small wizard of Windows Spotlight Tool will come up on the screen. It will bring forward three options –
1. Show folder after export has finished.
2. Add .jpg extensions to files.
3. Overwrite existing files.
Note – By default, the second option Add .jpg extensions to files is selected. However, in order to take a glance at the images after the export is over, select the first option also.
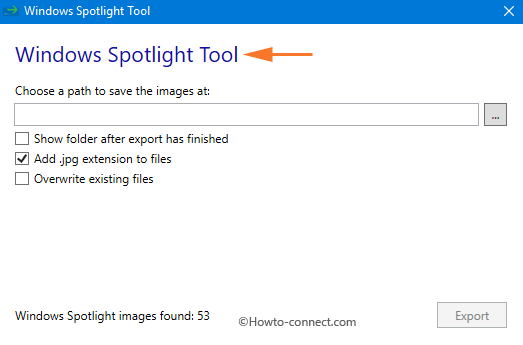
Step 5 – Moving ahead, click the three dots button to select the location where you wish to accumulate the downloaded images.
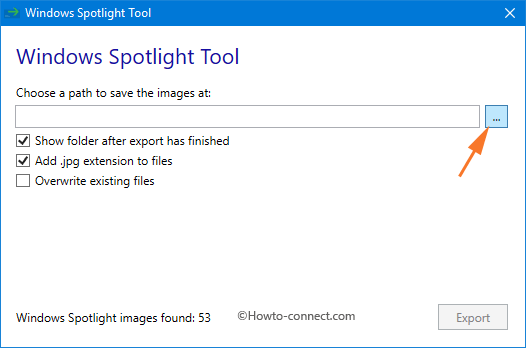
Note – The Windows Spotlight Tool wizard shows up the number of images found at the bottom of the wizard.
Step 6 – The last task you have to perform after deciding the folder is to click the Export button.
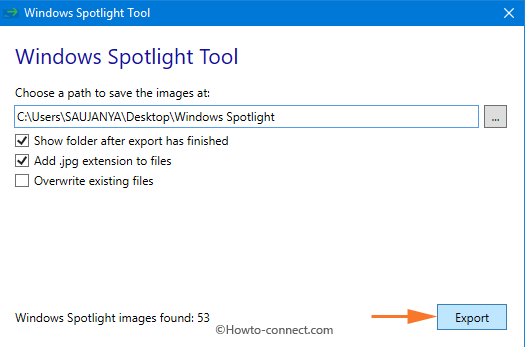
Step 7 – Now, go to the folder and you will view all the images. Locate the image of your choice and then perform a right-click on it. From the list of options that pop-up, click “Set as desktop background“.

Winding Up
These two tools are very easy to handle and in addition, are of very small sizes which means it doesn’t occupy much of your hard disk space. So, use any of the tools and let us write your views on this guide and also let us know which tool is more helpful in this regard.
