Windows 8 has been launched with a great deal in the area of Homegroup networking. In an established Homegroup network in windows 8, you can perform sharing of files or folders without any troubles. The method of file sharing in the windows 8 Homegroup is slightly different from previous windows 7.
In this post, I am going to share easy tips with several steps to configure windows 8 file sharing settings in similar Homegroup and how to connect with another computer like Windows 7?
Step – 1
How to Share Files in Windows 8 with Homegroup
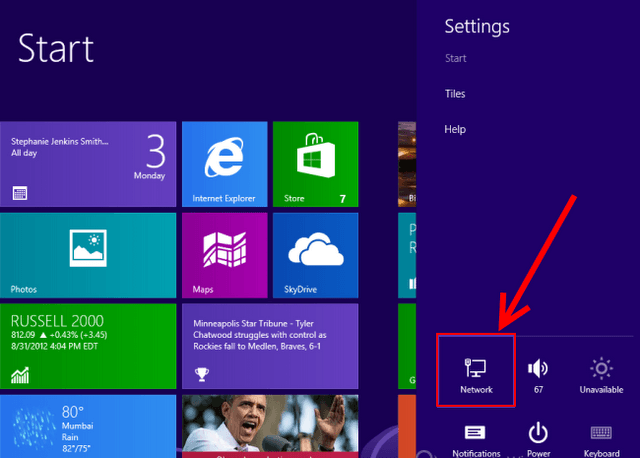
- Press shortcut Windows key + C to launch Charms bar in the right corner.
- Then click on the Settings menu. From Settings window, hit on the Network menu.
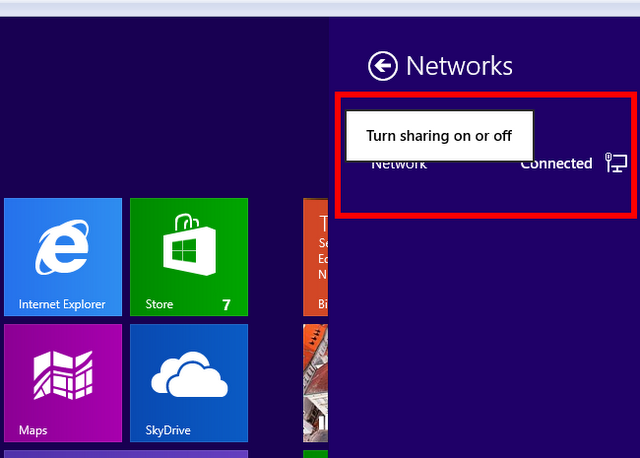
- As a result, you will get active all network connections on your Window 8 computer.
- Choose your preferred network and right-click on it.
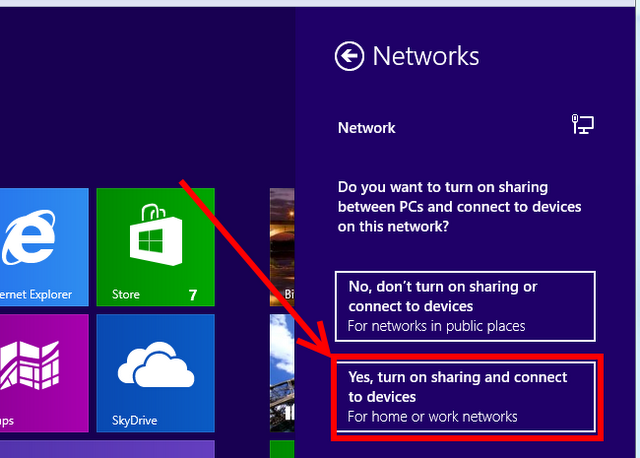
- A right context panel will be shown. Then click on Turn sharing on or off option.
- A new dialog box appears. If you wish to switch on windows 8 sharing permission then click on this option – Yes turn on sharing and connect to devices.
Step – 2
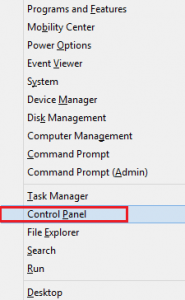
- In second Step, From Desktop Screen Press this Shortcut Window key + X to launch windows 8 Power Tasks Menu.
- Then click on Control Panel option from drop down panel.
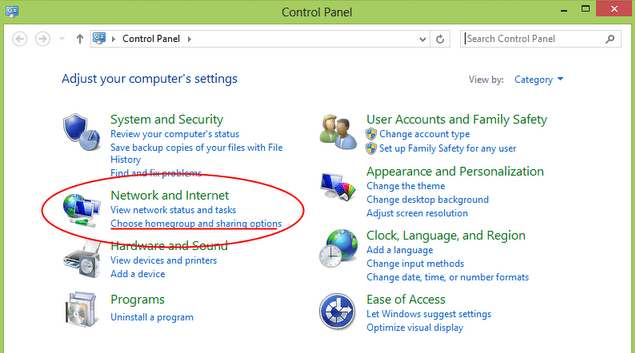
- As a result, Control panel window will come up. Here go to section – Network and Internet.
- Click on the link – Choose Homegroup and sharing.
Step-3
Create Homegroup settings in windows 8
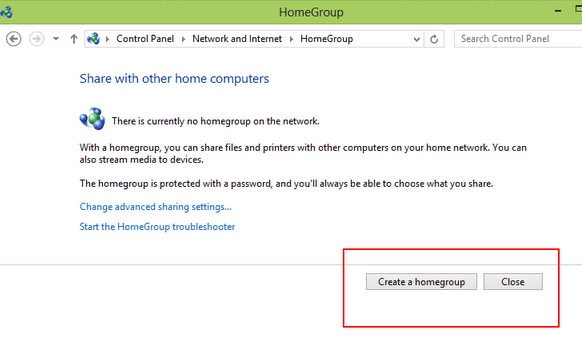
- Now Homegroup window will come.
- Then click on the Create a Homegroup button.
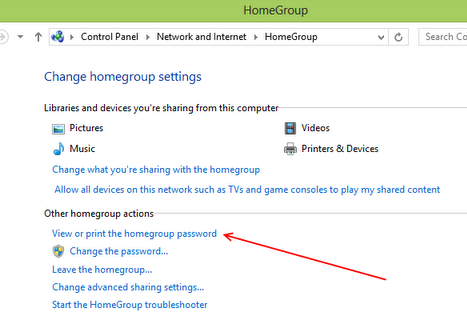
- From next window, click on View or print the Homegroup password option.
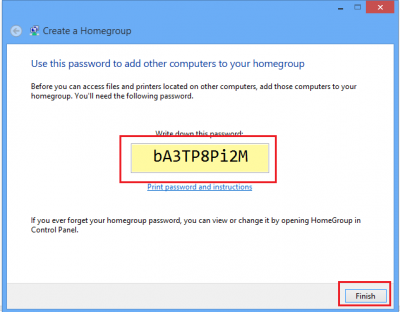
As soon as you complete setup of Windows 8 Homegroup settings, you will get 10 digits passwords that come out automatically.
Step – 4
How to configure Windows 7 to connect from Windows 8 in similar Homegroup?
Above generated Homegroup Password is used to connect with other similar homegroup computers. So you have to note or take printout this password forever.
To connect Windows 7 computer via Windows 8 in similar Homegroup then follow below steps
- In windows 7 computer Press this shortcut – Windows key + E to bring up computer window.
- Here click on the Homegroup option in left panel.
- In Homegroup windows of windows 7 computer, click on Join now button.
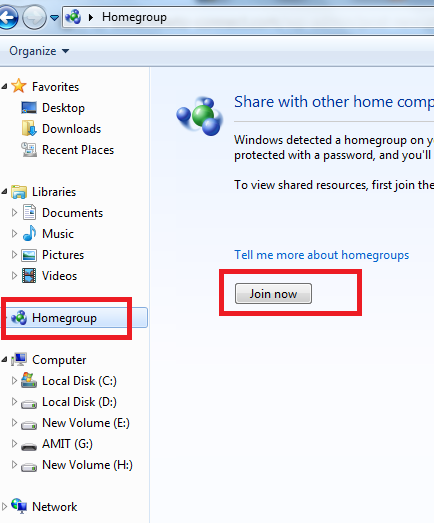
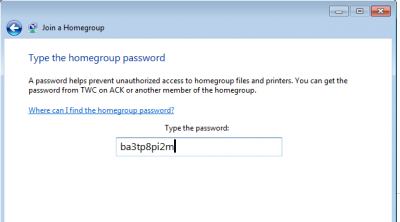
- A new dialog box (Join a Homegroup) is appearing. Click Next button.
- Next dialog box asks you to type above generated windows 8 Homegroup password.
Thus you have established connections among both computers (windows 7 and windows 8) in a similar Homegroup network.
Step-5
How to Share folders or files in Windows 8?
- Now choose the folders which you would like to access the Windows 7 computer.
- For this, right-click on any folder from windows 8 desktop screen and select this option – Share With > Homegroup View.
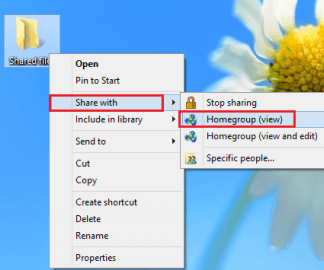
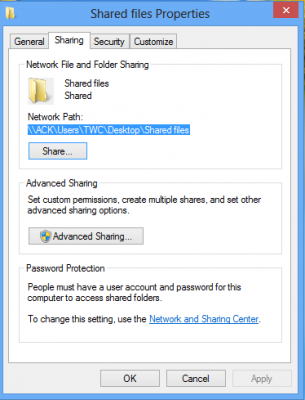
- Next, right-click on the opted folder and select Properties option.
- Then click on the Sharing tab to find the network path.
sneakers isabelle ma
says:I do not usually answer posts but I am going to in this case, great information?- I will certainly bookmark your site. Keep up the good operate!'s a Very good, very useful to me, Thank you very much post.