SMB_REDIRECTOR_LIVEDUMP in Windows 10 is a stop code that may appear on your screen all of a sudden. Having bug check value of 0x000001A7, this issue indicates that SMB redirector has detected a problem and has captured a kernel dump to collect debug information. Also, the Windows freezes and stops responding along with a bunch of error text. Mostly, you conflict with such issue while starting a program or ending it.
SMB_REDIRECTOR_LIVEDUMP usually occurs due to outdated, incompatible and dreadful device drivers. Moreover, virus infection, troublesome memory, missing DLL file due to conflict between similar applications and faulty windows images can cause the same too. Other reasons that may lead you to such BSOD error is the presence of problematic areas in the hard disk, low space in it or often using an additional drive. As there is no specific reason behind this stop code, you might need to try several resources to fix it up. Solutions list of SMB_REDIRECTOR_LIVEDUMP is as follow –
SMB_REDIRECTOR_LIVEDUMP Solutions
Here is How to Fix SMB_REDIRECTOR_LIVEDUMP in Windows 10 –
1] Disable Automatic Restart of Windows 10
Once you get affected by any BSOD error, the system starts behaving abnormally and it restarts automatically time and again. The most annoying part is you don’t get enough time to identify the issue and fix it up. Hence, it becomes mandatory to restrict windows from being restart automatically. Here is the process –
Step-1: At first, save all the programs that are running background and then Press Win+D hotkeys simultaneously to navigate to the Desktop area.
Step-2: Right-click on This PC and Choose Properties from the context menu.
Step-3: When System window is visible on the screen, select Advanced system settings from the left pane.
Step-4: As the System Properties wizard appears, click on Advanced tab.
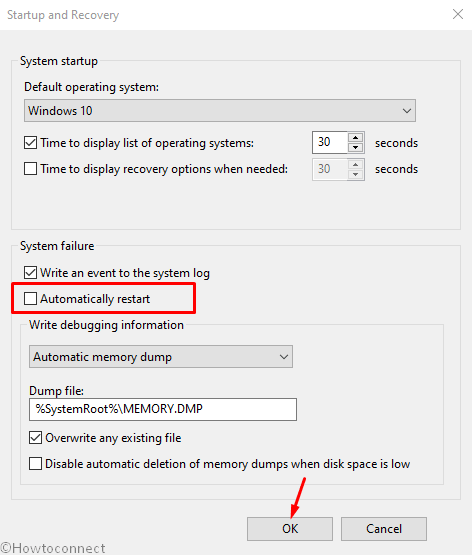
Step-5: Hover the cursor to Startup and Recovery section and click Settings option straightway.
Step-6: Upon opening a new wizard, go to its System failure part and uncheck the box located beside Automatically restart.
Step-7: Lastly, Hit the OK button to save the changes.
After disabling the option, windows will stop rebooting automatically. Therefore, it will be easier for you to try out the probable resolutions to fix SMB_REDIRECTOR_LIVEDUMP.
2] Run Blue Screen Troubleshooter
Blue Screen Troubleshooter is one of the most useful utilities of Windows 10 that helps you to detect the BSOD error and fix it up easily. As it’s a default app, you don’t need to take additional pressure of downloading program file. Here is how to run the utility –
- Do a click on Start button and then select the Gear icon to open Windows Settings app.
- Upon opening the window, move to Update & Security tile and eventually make a click on it.
- Once the next page loads, choose the Troubleshoot placed in the left overlay.
- Move next to the adjacent right and reach out to Blue Screen.
- Expand the same by making a click and hit Run the Troubleshooter option from the elongated pane.
On the accomplishment of the process, there would not be SMB_REDIRECTOR_LIVEDUMP in Windows 10. By any case, if this doesn’t work for you jump into the upcoming solutions.
3] Scan full system through Windows Security
In this era of Internet, Virus component can get inside of your system very easily. So, it’s very important to stay alert during clicking on suspicious links in a spam mail or malicious website. But if you are already affected, system files are at high risk along with several issues such as SMB_REDIRECTOR_LIVEDUMP. However, you can deploy Windows Security app to dismiss all vulnerable threats in a simple way. Here’s how –
- Bring up Taskbar Search by pressing Win+S at once.
- When it comes into the view, type Security in the void text field.
- Once the result shows up, click on Windows Security from the top.
- On the newly opened window, select Virus and threat protection option embedded on the left-hand side.
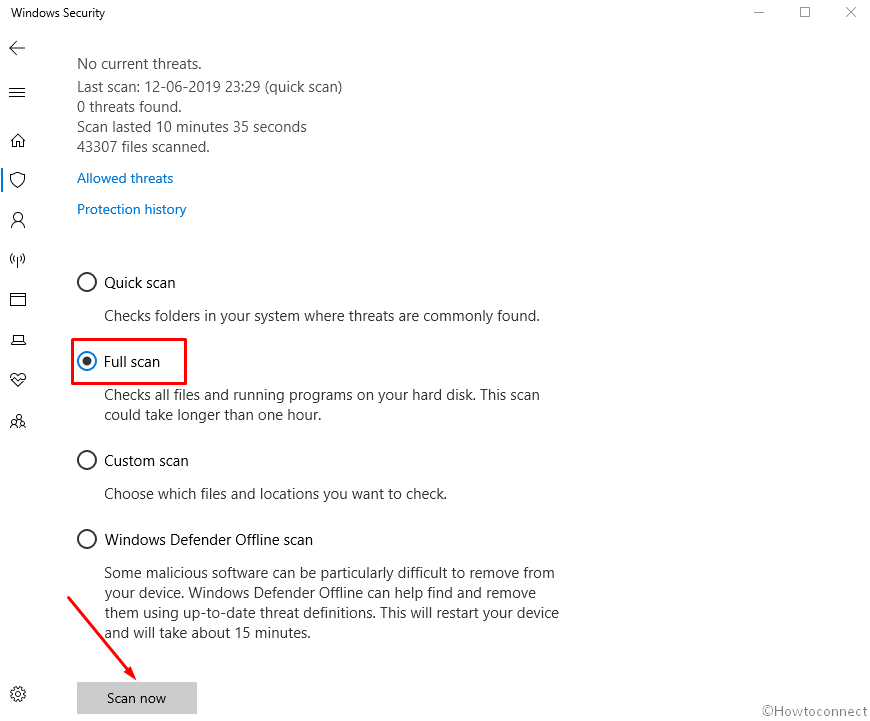
- Jump to the corresponding right pane and make a click on the link saying Scan options.
- Select the radio button ahead of Full scan and then choose Scan now.
- When the scanning process ends, the system will show up the result. If there is any virus present, select Clean threats option to dismiss them.
- In the consequent page, you will view three options. Hit Remove initially and then Start actions to clean the threats.
4] Remove third-party antimalware programs
Third-party anti-malware programs are not necessary for Windows 10 as the built-in one does the best. Therefore, it will be wise to remove them if you have any.
- Open Run dialog on screen by pressing Win+R keys altogether.
- Once it appears, type appwiz.cpl in the text box provided next to Open and Press Enter to bring up Program and Features page.
- Locate the Third party Antivirus program listed here and click on it.
- Click the Uninstall button when the option is available in the top ribbon.
- Follow the on-screen guidelines until the system removes the program finally.
5] Make your drivers up-to-date using device manager
Microsoft has revealed that most of the BSOD Including SMB_REDIRECTOR_LIVEDUMP is caused by outdated and problematic device drivers. Thus, it’s your utmost duty to keep the drivers up-to-date. To accomplish the task, Device Manager is the best choice. Let’s see the complete procedure –
- Right click on the Start button and select Run from the Power menu.
- When it is visible, type devmgmt.msc in the text field and press Enter.
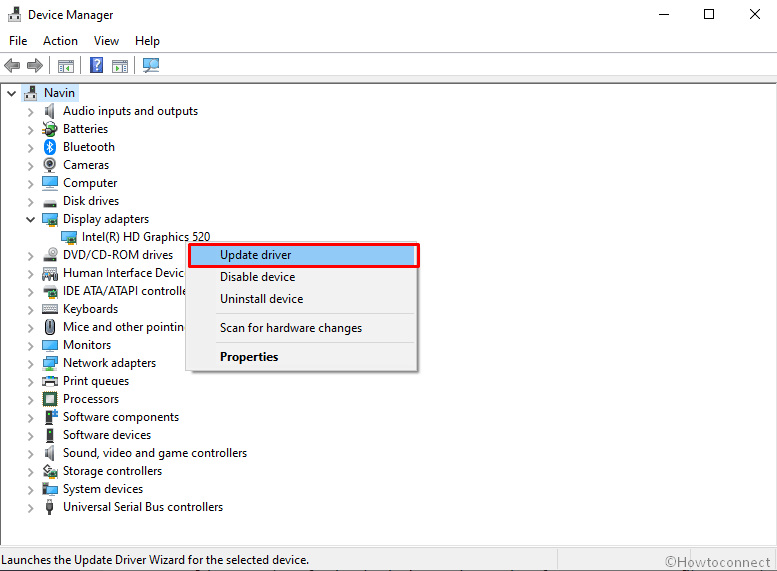
- Once the Device Manager comes into the sight, look for the devices that have any mark of exclamation beside them.
- After getting one, expand the same specific device by double-clicking on them one after another.
- Later on, perform a right click on the driver and select Update driver option.
- To make your drivers are up to date, Keep cooperating with Windows by following shown instruction.
6] Disconnect external Hard Disk from your PC
A substantial number of people noticed that SMB_REDIRECTOR_LIVEDUMP in Windows 10 appears after connecting external Hardware Devices with PC. If this is the case, you just need to disconnect all of them for a while and give a pause. The procedure is as follows –
- Initially, Unplug all the External Hard Disk from the ports and place them safely aside.
- Press Windows key and click on the Power icon once the Start menu spreads up.
- Select the Restart option and let it reboot completely.
- When the PC heads back to normal operation, perform a check for SMB_REDIRECTOR_LIVEDUMP in Windows 10.
- If the error is resolved, re-connect the external hard disk as they were back again.
- Thereafter, you need to visit the manufacturer’s website using the default browser.
- Once you go there, Download and install the up to date driver for that hard disk to avoid problems in the future.
7] Run DISM tool to resolve Windows image files
Windows Image Files quite often fall in corruption and leads you to SMB_REDIRECTOR_LIVEDUMP in Windows 10. Deployment Image Servicing and Management utility is the ultimate solution for solving such issue and here is how to accomplish this –
- Make a combined Press of Win+Q to invoke Taskbar search.
- Type cmd.exe on the search box and once you see Command Prompt in the result, click on Run as Administrator from the right side.
- If a UAC asks for permission, hit Yes to proceed.
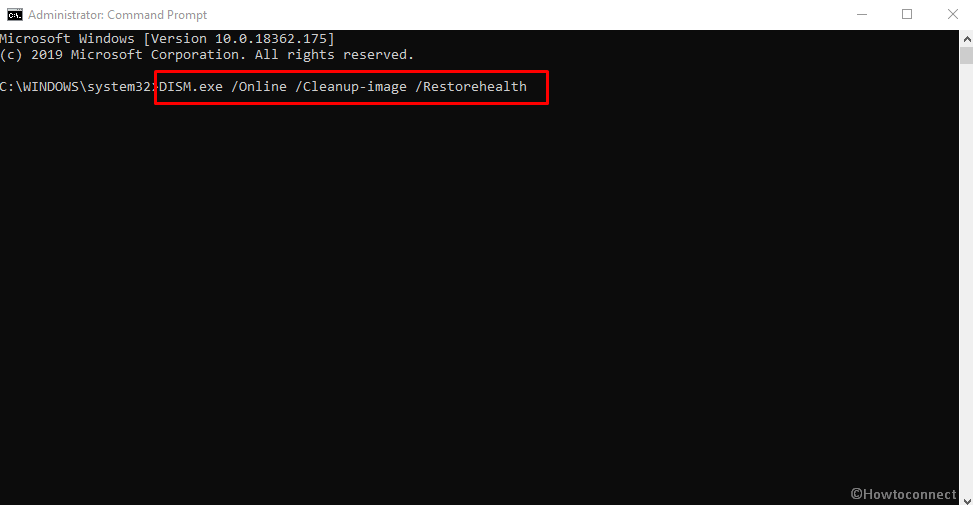
- In the Black Command Prompt window, type the following at the base of the blinking cursor –
Dism.exe /Online /Cleanup-image /Restorehealth
- Hit Enter to power up the DISM tool.
- This process will also take several minutes to accomplish, wait patiently and when it gets over, restart the PC.
- Upon returning to the desktop, check if SMB_REDIRECTOR_LIVEDUMP still present.
8] Fix up poor areas in hard disk with the help of disk checking utility
Disk Checking utility potentially detects as well as fix the poor areas present in the Hard drive. Since it may resolve the SMB_REDIRECTOR_LIVEDUMP also, we can definitely give it a try.
- Make a right click in an empty area of Taskbar and then select Task Manager from the visible list.
- Click File option from the top left corner of the running page.
- Choose Run new task from the menu to let the system launch Run Dialog.
- Type cmd in the void text box and also check the box entitled Create this task with administrative privileges.
- Press Enter key open Elevated Command Prompt directly.
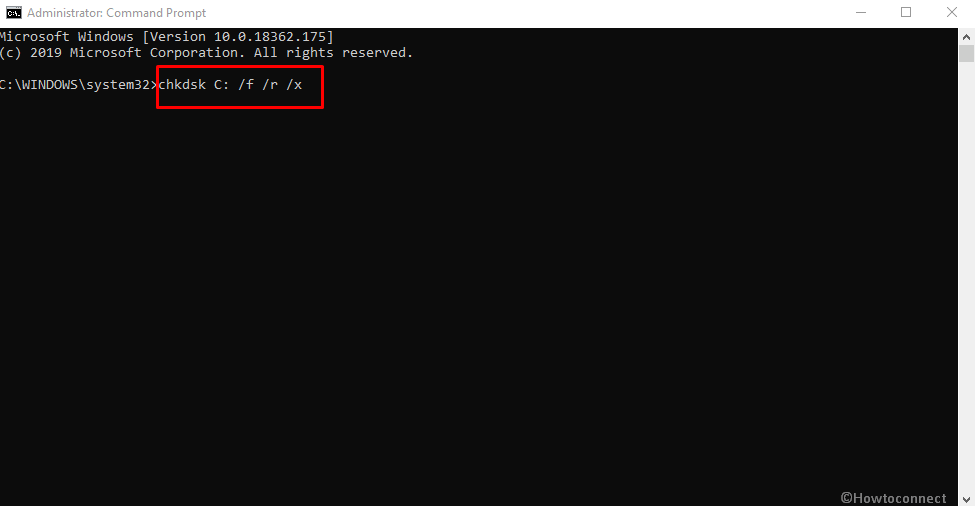
- Once the dark window rolls out in the screen, type the below command after the blinking cursor –
chkdsk C: /f /r /x - Hit Enter and let the disk checking utility to do its job.
- After the task is finished, restart the windows once.
When getting back to operation, perform a check for the existence of SMB_REDIRECTOR_LIVEDUMP in the system.
9] Settle down the Memory issues
SMB_REDIRECTOR_LIVEDUMP in Windows 10 may come in appearance when the system is struggling with memory issues such as incorrect allocation and defective areas in RAM. To eradicate these problems, Microsoft has brought up the Windows Memory Diagnostic tool. Let’s see how to use this utility to detect and fix the issue –
- Launch the Windows Settings app using any convenient method.
- When it turns up, Type memory in the search box provided here and wait for the result to appear.
- Select the option that says Diagnose your computer’s memory problems.
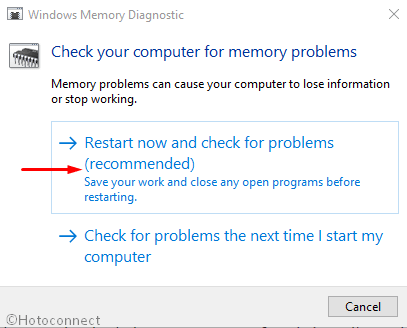
- On the new wizard, Hit the Restart now and check for problems (recommended) option and let Windows reboot initially for the first time.
- When it turns back to operation, a blue screen will be visible and it will start detecting the memory issues.
- Once the progress hits 100%, Windows will prompt to reboot once again.
- After performing the second cycle, the result of the diagnostic will appear in the Notification area.
10] Reduce the risk of conflict between similar apps
When similar apps come in contact with each other, conflict occurs between them. As a result of this action, necessary system resources go missing and end up with issues like SMB_REDIRECTOR_LIVEDUMP. Hence, you need to remove those programs to reduce the risk. Here is the process –
- Press “Win+R” hotkeys to unlatch the Run dialog box.
- Once appears, type appwiz.cpl in the blank text box and hit the Enter key.
- Programs and Features once being visible, reach out to applications causing SMB_REDIRECTOR_LIVEDUMP in Windows 10.
- Perform a right click on the app and select Uninstall option from there.
- To completely remove them, follow the instructions that are coming on the screen.
- Do the same for each suspicious program.
- Once all these programs get dismissed, restart the device using normal procedure.
11] Clean the junk files of your Disk drive
While using the PC, Windows keeps producing lots of temporary files in the name of junks. They are stored in the disk drive and once they grow bigger in volume, occupy huge space in. Therefore, the system gets slower day by day and often causes BSOD issue like SMB_REDIRECTOR_LIVEDUMP. Let’s jump into the process of cleaning the junk –
- Open Taskbar Search by pressing Win+Q at one go and type cleanmgr in the provided empty bar.
- When Disk Cleanup Desktop app appears in the result, click on it.
- When a tiny popup asks to choose a drive to clean junk, select C: using the dropdown menu and then hit Enter button.
- Disk Cleanup utility will figure out the recoverable space in the volume first and then in a minute, a wizard will be visible.
- Click on Clean up system files.
- The small popup will again ask to choose drive. In the same way, select C:.
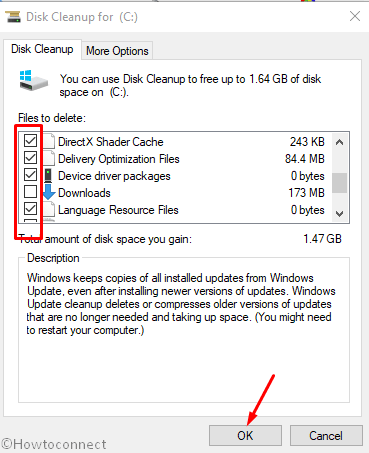
- When the Disk Cleanup for (C:) will appear, move ahead to Files to delete area.
- Check all the boxes against items and keep the Downloads unmarked.
- Finally, select the OK button from the bottom of the window and let the cleanup begin.
- Upon finishing, Restart the computer.
12] Uninstall the faulty Windows Update Files
When you approach for updating windows using Settings app, usually there is seldom risk of an abnormal termination. Yet that happens sometimes and installation stops at halfway. In such cases, these defective files are more likely to cause SMB_REDIRECTOR_LIVEDUMP. To limit the risk, you need to uninstall the files. Here is the way to do so –
- Get access to Windows Settings app by tapping Win+I hotkeys together.
- When the additional settings page appears, click on Update & Security.
- Once there, choose Windows Update from the left column and jump on to sideward pane.
- Click on the View update history link to uncover past updates.
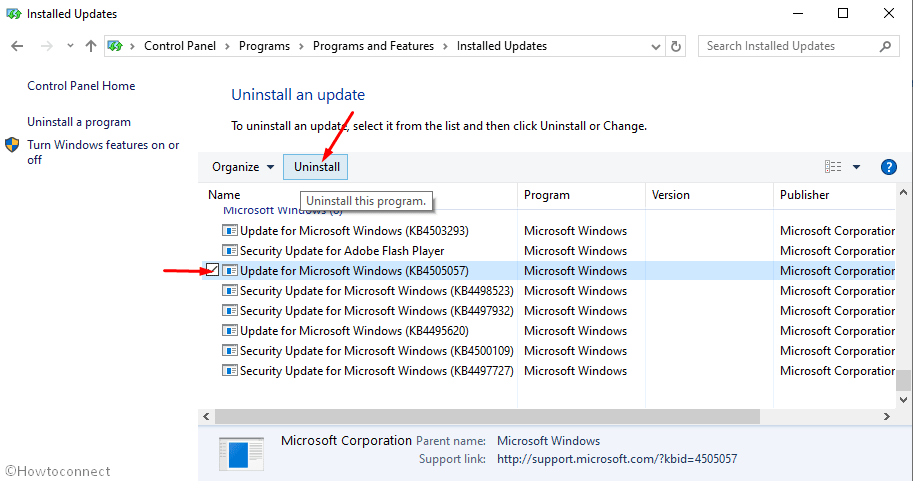
- By default, you will be guided to the Installed Updates page from Control Panel.
- Move ahead to the last received patch and do a right click on it.
- Select the Uninstall option and go through the on-screen guidelines to get rid of them.
13] Execute system file checker
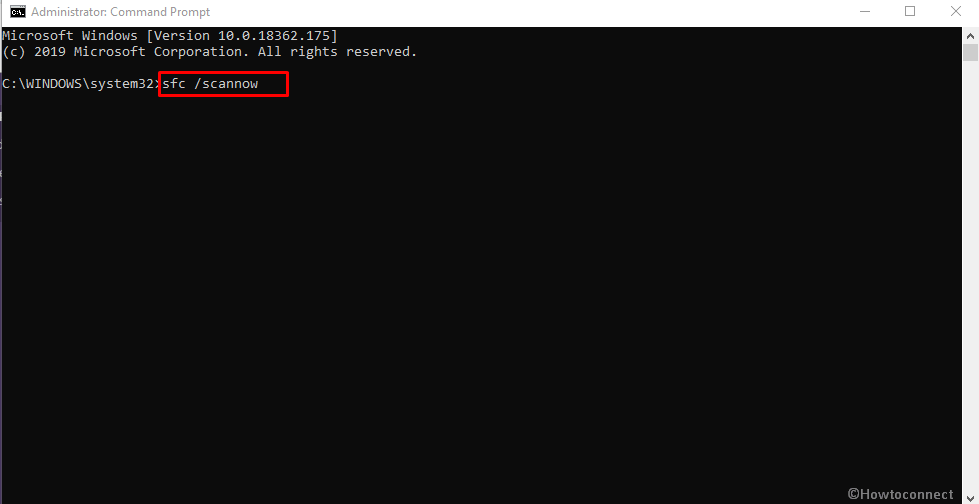
When System resources are corrupted and DLL files go missing, issues like SMB_REDIRECTOR_LIVEDUMP appears. Microsoft offers handy tools to deal with these kinds of problems. System File Checker is one of them. Running SFC /Scannow command in Elevated Command Prompt powers up the utility. Details of the procedure are as follows –
- Run Command Prompt as admin.
- When the black window makes an appearance, type in
SFC /Scannowcommand and Hit Enter. - System File Checker once activated will start detecting the issues and also fix them automatically once found. In the process, the said BSOD error will leave away.
14] Download and install all update patches
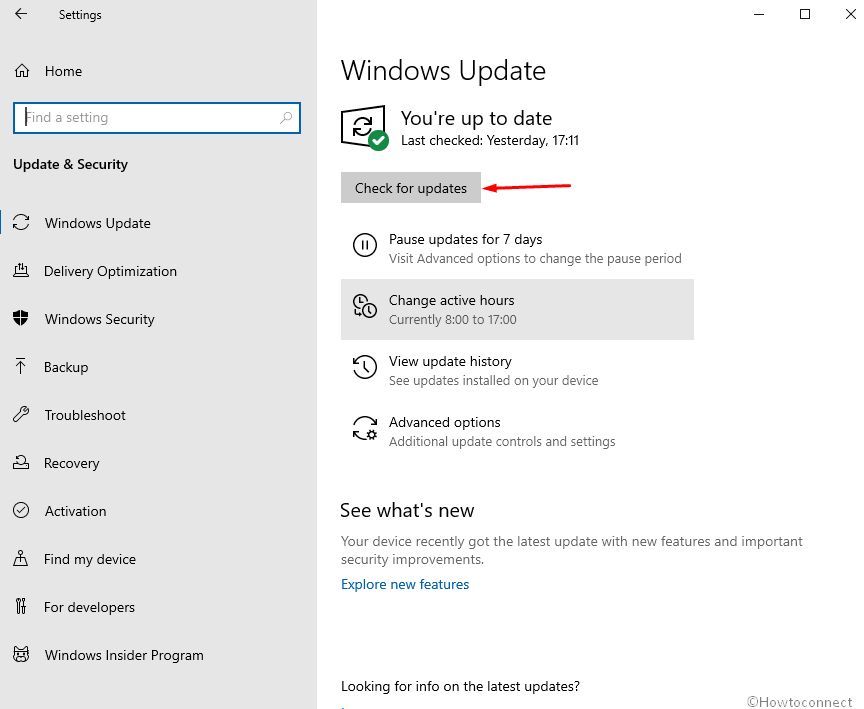
Every single update includes bug fixes and the latest modifications. Microsoft releases these update files regularly so that we can get better performance out of a device. An outdated Operating System usually prone to get affected with SMB_REDIRECTOR_LIVEDUMP. Therefore, we need to install them right now through setting app. The guidelines are as follows –
- Launch the Windows Settings by pressing Win+I hotkey together.
- From the Home page, make a move for Update & Security and eventually make a click on it.
- Once the consequent page loads, select Windows Update located at the left overlay.
- Jumping ahead to the corresponding pane, do a click on Check for updates link.
- After the update patches being visible here, hit Download option located beneath each and initiate.
- Installation will start automatically upon finishing the downloading process. Make sure you restart the windows once asked.
15] Enter into Safe mode to run only basic programs
From the very ancient period of Windows development, one resolution always helped to get out of critical issues. This is to Boot the device in Safe Mode. In this startup process, Windows load only basic programs. In the same way, the issue resolves easily. To accomplish the process, follow the below guidelines –
- Press Winkey and let the Start menu appear.
- Type “msconfig” and at that point hit Enter.
- When the succeeding wizard comes in, move to its Boot tab.
- Straightway reach out the second half of the window named Boot options.
- Next, check the box before Safe Boot and make grayed out options active.
- Proceeding ahead, select the radio button before Minimal.
- From the bottom of this page, hit Apply and then Ok afterward to save these changes.
- Now, leave the Wizard and Reboot the windows initially following the usual method.
- When the Windows is booting next, keep on pressing F8 key continuously.
- Once the Startup page appears, choose Safe Boot options lying in the Advanced boot options area.
- Enter Safe Mode automatically in the next step.
16] Revert back to the previous state using System Restore
Installing a program or uninstalling something leaves marks in Windows Registry. When something turns out wrong here, SMB_REDIRECTOR_LIVEDUMP will show up in the system. To escape from this, we can perform System Restore and load the previous state. To perform this task, you need a previously created Restore Point. In lack of that, you cannot accomplish. If you have one, try moving with blow steps-
- Invoke Run dialog pressing Win+ R keys together.
- Type rstrui in the given text space.
- Press Enter key to open up the System Restore wizard.
- From the appearing wizard, hit Next button to proceed.
- When the succeeding page arrives, select “Show more restore points” to manifest all previous ones.
- Hit the latest one in the list and then choose the Next button located at the bottom.
- After the following window rolls in, select Finish to start the restoring.
Till this point, we have elaborated and shown guidelines to resolve SMB_REDIRECTOR_LIVEDUMP error in Windows 10. We can expect that you have already fixed up the issue and doing fine. In case you are failed to come out victorious, we are suggesting the last resort for you. This will be a complete installation of Windows 10. There won’t be any chance of having issues if you do with perfection.
Methods:
1] Disable Automatic Restart of Windows 10
2] Run Blue Screen Troubleshooter
3] Scan full system through Windows Security
4] Remove third-party antimalware programs
5] Make your drivers up-to-date using device manager
6] Disconnect external Hard disk from your PC
7] Run DISM tool to resolve Windows image files
8] Fix up poor areas in hard disk with the help of disk checking utility
9] Settle down the Memory issues
10] Reduce the risk of collision of similar apps
11] Clean the junk files of your Disk drive
12] Uninstall the faulty Windows Update Files
13] Execute system file checker
14] Download and install all update patches
15] Enter into Safe mode to run only basic programs
16] Revert back to the previous state using System Restore
That’s all!!