To increase the text readability, Ease of Access provides various features such as Bitmap Smoothing, Tracking Options and many more. It also lets you enlarge the screen contents by introducing Invert Colors in Magnifier. In addition to these features, the operating system includes an option to Show Smooth Edges of Images and Text. Enabling this setting will enhance the quality of pictures as well as fonts to a great extent.
In earlier editions, users need to move through complex options in Control Panel for doing so. However, the latest edition added the option in the Settings application so that you can easily get the job done with less effort. So, let us head towards the steps and see how to enable this feature in Windows 10.
How Show Smooth Edges of Images and Text in Windows 10
Step-1: Do a combined press of Win+I hotkeys and let the system launch Settings app.
See: 18 Ways to Open Windows Settings in Windows 10 [5 Seconds].
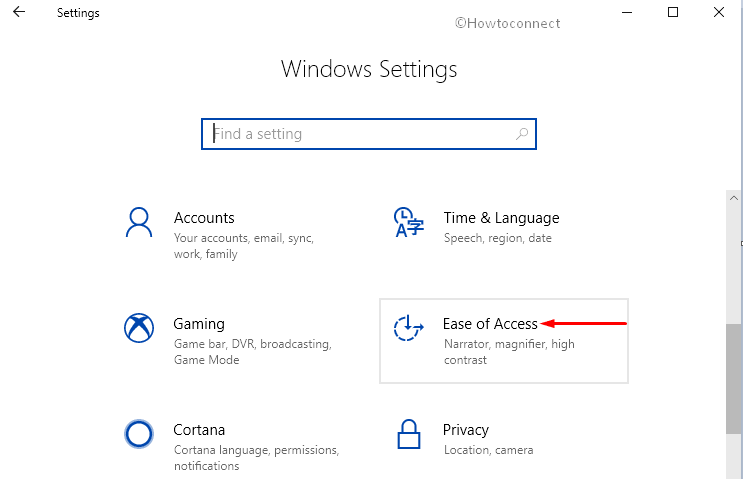
Step-2: Reach out to Ease of access and select it to proceed forward.

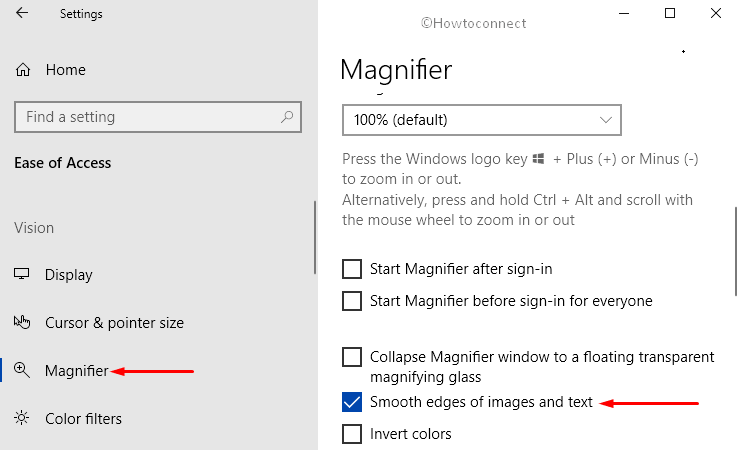
Step-3: When the new settings page comes in appearance, click on the Magnifier section. Jump to the adjacent right side and locate the option Smooth edges of images and text.
For reference, you may like to know Magnifier Keyboard Shortcuts Windows 10 (Updated).
Step-4: Once you see it, checkmark the box Smooth edges of images and text.

Offering Ease of access to the users is the goal of Microsoft and they are successful doing so. Apart from offering options in Magnifier section, the system lets you Enable Show Transparency in Windows, Show or Hide Desktop Background Image, and more.
Hopefully, by now you are all set to enjoy this feature to Show Smooth Edges of Images and Text in Windows 10. This is how Microsoft brings everything easier for the users by shifting features from Control Panel to the Settings application.
