Turn on and off Remove Mouse Pointer Trail in Windows 10. – Generally, people over 60 tend to have vision problems. They often lose the mouse pointer on computer. Windows provides Pointer Trail feature to give them relief. When this feature is enabled, the mouse pointer carries a series of multiple arrows behind itself. The arrows follow mouse pointer wherever it moves and when the pointer stops the arrows vanish. So if a user loses his mouse pointer he needs to only move it and trails fulfill the remaining needs.
When you Turn On Mouse Pointer Trail in Windows 10 you will experience the pointer like the below screenshot –

How to Turn On and Off Mouse Pointer Trail in Windows 10
1. Using Mouse Properties
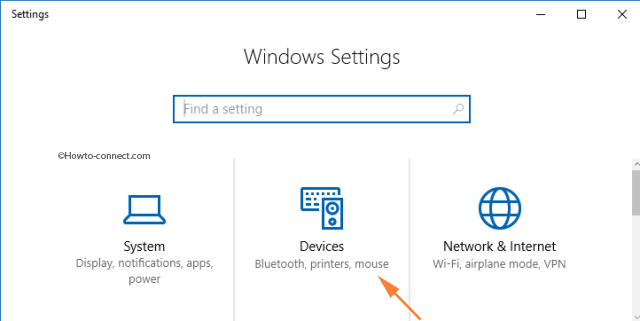
Step 1 – First and foremost, expand the Settings program. Hence hit on Win+I keys on the keyboard.
Step 2 – Click either on Devices icon or block.
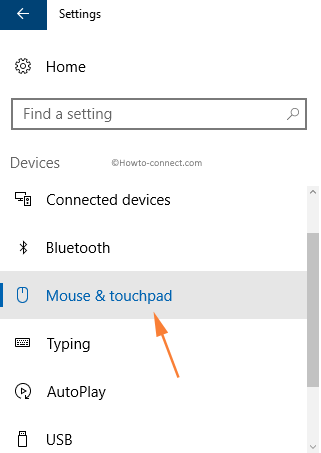
Step 3 – Now, Click on Mouse & touchpad in the left-hand side menus.
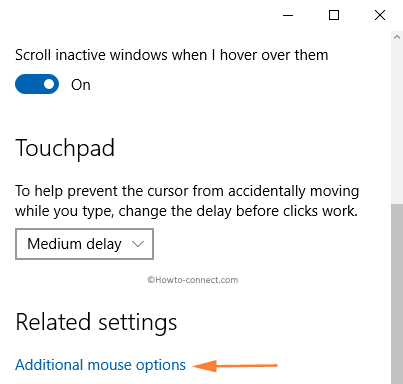
Step 4 – Scroll down to the Related Settings section on the right pane. Hit or click the link termed Additional Mouse Options.
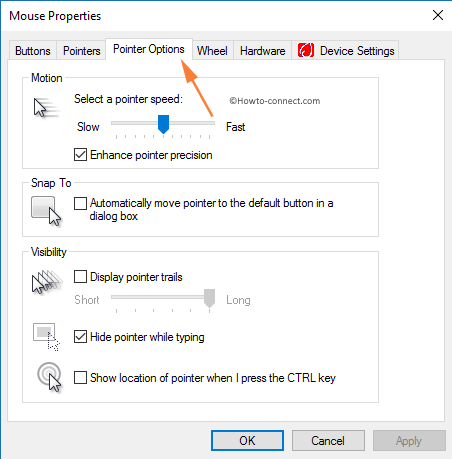
Step 5 – The next dialog box that pops up is titled Mouse Properties. Switch to the third tab, Pointer Options.
Step 6 – Based on your requirements, follow the below-written steps.
To Show The Pointer Trails
Step 6a: Underneath the Visibility block, three boxes are present. Checkmark the cell with Display pointer trails named alongside.
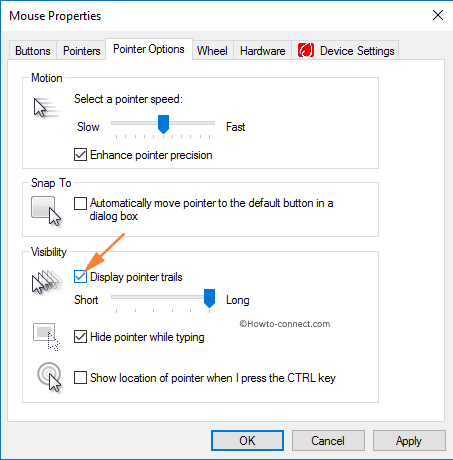
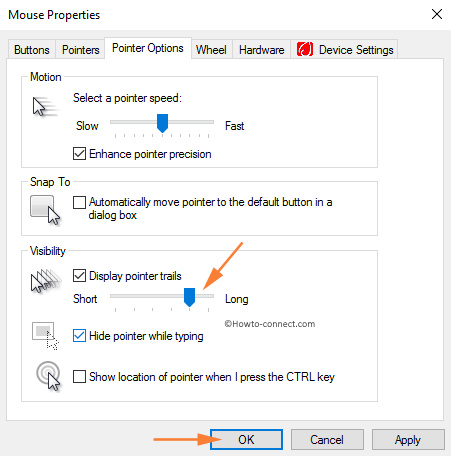
Step 7a: The slider gets activated consequently. Now click and drag the slider along the line towards the ends Long/Short to increase/decrease the number of pointer trails respectively. Go to step 8.
To Remove Mouse Pointer Trails on Windows 10
Step 6b: Inside the Visibility block, uncheck the box with Display Pointer Trails named alongside. Go to step 8.
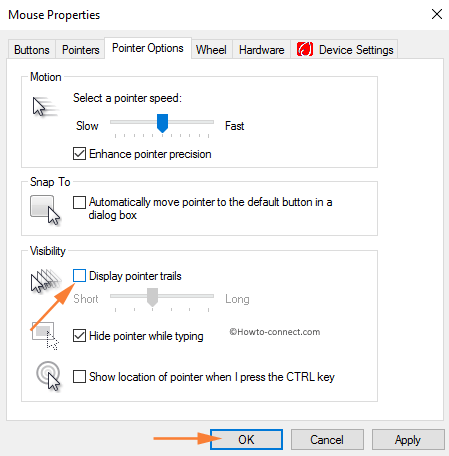
Step 8: Click or hit on OK and implement the changes.
2. Using Registry Editor
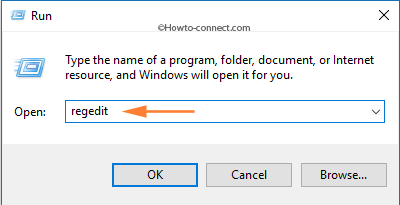
Step 1 – Hit Win+R keys on the keyboard initially.
Step 2 – A dialog box pops up consequently. Write down regedit in the given text area and hit Enter.
Step 3 – A UAC pop-up opens on the screen. Click or hit on Yes and let Registry Editor appear on the screen.
Step 4 – Traverse the path specified in the given Registry Editor that comes up
HEY_CURRENT_USER\Control Panel\ Mouse
Step 5: When you reach the key named Mouse, check the right panel for MouseTrails String Value.
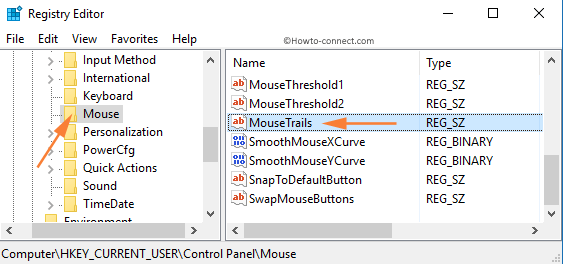
Note: If the String Value is not present,
- Right-click on the Mouse Then, go to New- > String Value
- Write down the name as MouseTrails.
Step 6: Once done, follow the steps 6a or 6b as per the requirements:
To Show the Pointer Trails
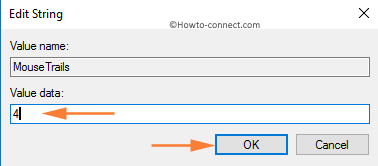
Step 6a – Double-click on MouseTrails and assign any number from 1 to 7 in the Value data space.
- 1 – Minimum length trails.
- 4 – Medium length trails.
- 7 – Maximum length trails.
To Remove Mouse Pointer Trails on Windows 10
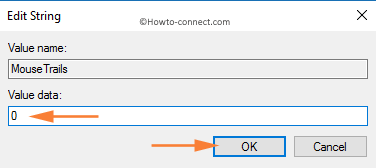
Step 6b – Double-click MouseTrails and just assign 0 to Value data. Click or hit OK.
Step 7 – Finally, After the modifications are finished, exit from the Registry Editor.
Windows provide a variety of customization options in every component of the OS and the same goes with the mouse also. With so many functions, the users are free to customize their mouse settings which incorporate mouse pointer trails also. Hence, hopefully after the pursuance of the two methods, you would be successful in How to Turn On and Off Mouse Pointer Trail in Windows 10.