If you disable lock screen in Windows 10 it makes your PC Fast. When you left your Windows 10 computer or laptop isolated for some time after working on it, lock screen comes into sight. Here, we will share you the tips to exert which you can enable or disable the lock screen in Windows 10. One thing is worth buzzing here that Local Group Policy Editor is usable for the change the display settings of Lock Screen.
You also get to see the lock screen when your Windows startups, or when you lock your screen to avoid unknown sneaks on your work. There are multiple reasons for the lock screen to happen but to be back on the screen you need to put away the lock screen and make the sign in screen available. After then you need to enter your Microsoft accounts credential to log into Windows 10. There are a number of users who are not well pleased with the lock screen. So they prefer to disable lock screen in Windows 10. If you are also among them, try out the below steps to enable or disable lock screen in Windows 10.

How to Enable or Disable Lock Screen in Windows 10
With the help of Local Group Policy Editor, you can carry out the process.
Enable Lock Screen
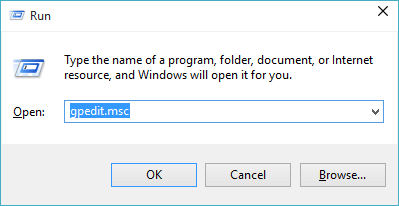
- With the two keys, Windows and R bring the Run command on your screen.
- Type the command gpedit.msc in the text box and hit Enter key.

- A new Local Group Policy Editor window displays on your screen.
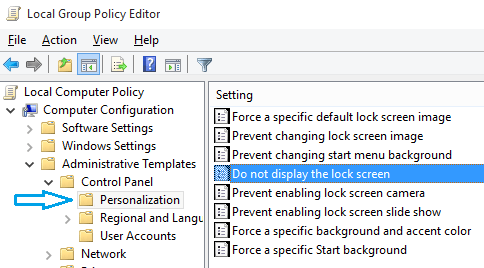
- Navigate to the following path on the left pane: Computer Configuration/Administrative Templates/Control Panel/Personalization
- The right area of Personalization exhibits some policy entries. Look for Do not display the lock screen.

- Twice hit on the Do not display the lock screen policy.
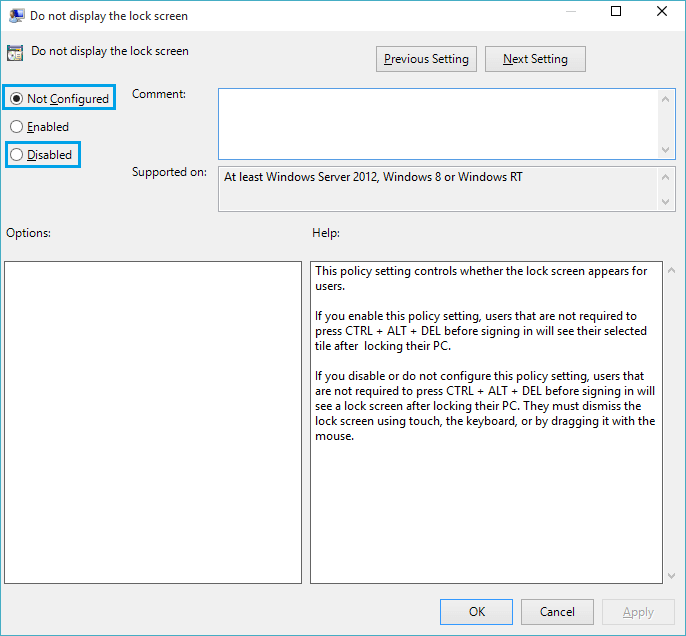
- A separate window of Do not display the lock screen arrives. On the top left click Not Configured or Disable options.

- Save the changes by clicking Ok button.
Note: The lock screen is enabled by default.
Disable Lock Screen in Windows 10
- Be into the Local Policy Group Editor window using the same way as mentioned above.
- Also, navigate the same path and look at the right area of the Personalization.
- Again twice hit the option Do not display the lock screen policy.
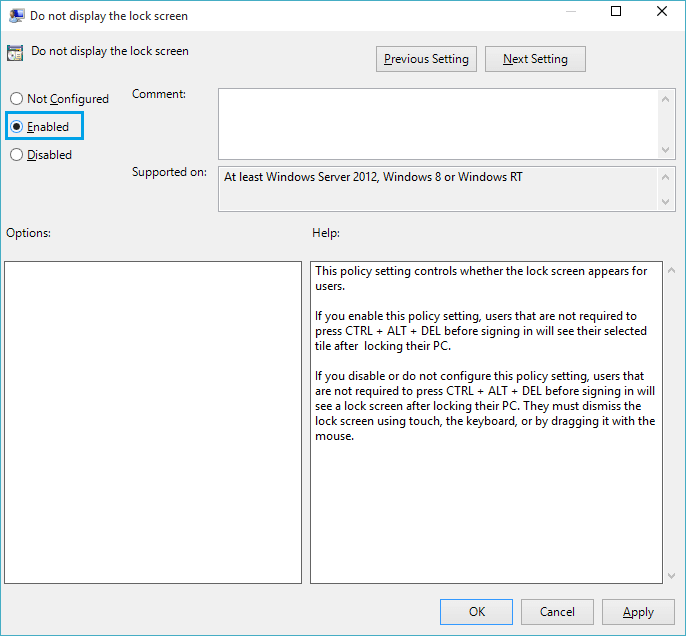
- In order to disable the lock screen, choose the radio button Enabled.

- Click Ok button and save your changes done.
- Exit yourself from the Local Group Policy Editor window.
- You can also confirm the disable lock screen on Windows 10 by using the Windows and L keys together.
This the process that leads to enable or disable lock screen in your Windows 10 PC.

Hello Jim, welcome to Howtoconnect comment area. At first Download Group Policy Editor.
gpedit.msc says windows cannot find. I tried the other method through regedit an when I get to the windows directory and it is supposed to say personalization that is not a choice on my machine.