If you have unintentionally deleted a file, folder or some important data from your hard drive then restoring the same has always been a tedious task. But with Windows 10, things have changed as the giant software introduces Windows File recovery Microsoft Store App, a command-line tool which is specifically designed to retrieve photos, videos, documents, and more. The MS store app also gives you the ability to even bring back data from an attached SD card or camera. However, it does not support network drives.
File recovery Microsoft Store App offers comprehensive recovery options for a variety of file types and different file systems as well. Additionally, the tool provides you three modes to recover the lost data – Default, Segment, and Signature. Advanced users and system administrators can gear up with this app for its command-line feature. So go through the below section and see how to grab and use this app.
Windows File Recovery Microsoft Store App
Here is How to Download Windows File Recovery Microsoft Store App for Windows 10 and use –
- Launch any web browser and navigate to the official page of the MS App.
- Once into the page, click on Get. When a pop up appears, hit Open Microsoft Store button.
- This will immediately fire up Microsoft Store displaying an overview of this new app.
- To download the app, click on the Get button (see screenshot).
- After installation gets over, go to Start Menu and launch the app.
- Upon a UAC prompt, click Yes to agree running as administrator.
- You will get the command prompt named Windows File Recovery as follows –
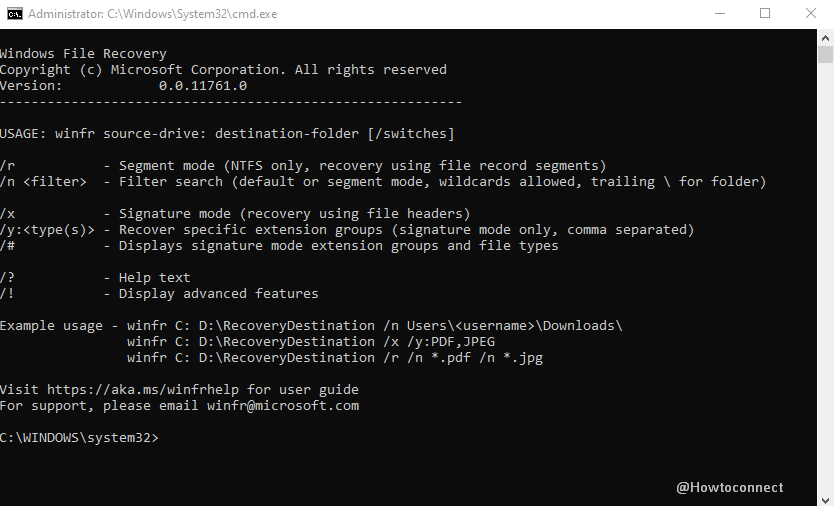
- Insert the command in the given format –
winfr source-drive: destination-drive: [/switches]
Note – Here the source and the destination drives must be different. When you want to recover files from the operating system drive (usually C:), use /n <filter> and /y:<type<(s)> switches to indicate the user files or folder.
- The app will create a recovery folder Recovery_<date and time> all by itself on the destination drive.
- However, there are three modes available for you to fetch the lost files. They are namely Default, Segment, and Signature.
1] Default mode
Recover png and jpeg photos from your Pictures folder to the recovery folder on D: drive using following command
winfr C: D: /n \Users\<yourusername>\Pictures\*.JPEG /n \Users\<yourusername>\Pictures\*.PNG
Once more note: C is the source and Dis the destination drive.
Recover a particular file from your C: drive to the recovery folder on a D: drive through the below command –
winfr C: D: /n \Users\<yourusername>\Documents\QuarterlyStatement.docx
Recover your Documents folder from your C: drive to the recovery folder on D: drive by running underneath command –
winfr C: D: /n \Users\<username>\Documents\
2] Segment mode (/r)
Recover Word and PDF files from your C: drive to the recovery folder on D: drive –
winfr C: D: /r /n *.pdf /n *.docx
Recover a file with the string ‘invoice’ in the filename through wildcard characters.
winfr C: D: /r /n *invoice*
Recover PDF and Word files from your C: drive to the recovery folder on an E: drive.
Signature mode (/x)
Check the supported extension groups and corresponding file types when applying the signature mode.
winfr /#
Recover PNG and JPEG (jpe, jpe, jpeg, jfi, jfif, jif) photos from your C: drive to the recovery folder on D –
drive - winfr C: D: /x /y:JPEG,PNG
Recover ZIP files like pptx, docx, zip, xlsx, from your C: drive to the recovery folder on D: drive –
winfr C: D:\RecoveryTest /x /y:ZIP
System Requirements
To retrieve the lost files through this command-line app, your device needs to meet certain specifications. They are –
- The operating system should be running Windows 10 19041 or higher.
- Supports architecture ARM, ARM64, x64, x86.
That’s all!!!