Procedures and Steps to Uninstall 3D Builder App From Windows 10. – We have provided many guides and tips with respect to uninstall applications and remove options from Context menu, but this is distinct from all those. Yes, this is about the removal 3D Builder App, and for this, you will need to put extra effort.
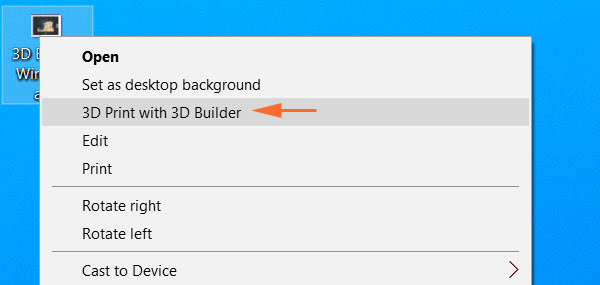
When you will uninstall 3D Builder app on Windows 10 you experience that 3D Print with 3D Builder still exists on the context menu of .png, .jpg and .bmp file extensions. And In case, you click this option anyhow, the application will get installed automatically.
So, if you proceed to completely uninstall 3D Builder app from Windows 10, registry hack will be necessary. The 3D Print with 3D Builder option made its presence in the right-click context menu just after the Anniversary Update. Let us see this guide and the steps in detail.
How to Uninstall 3D Builder App From Windows 10
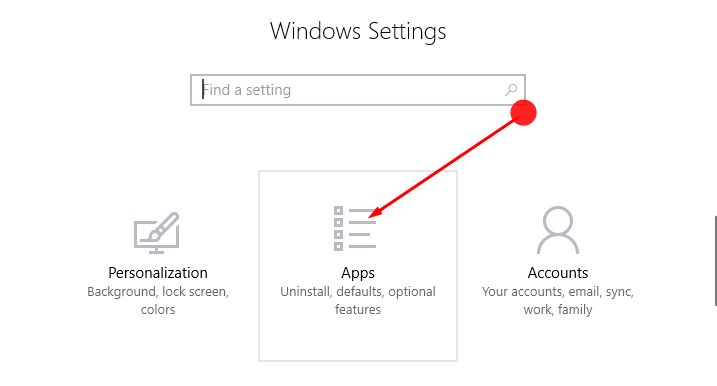
Step 1 – Open Settings by pressing the combination of Win & I keys on the keyboard.
Step 2 – Next, Settings program will show up with all the categories. Select Apps from the settings application.
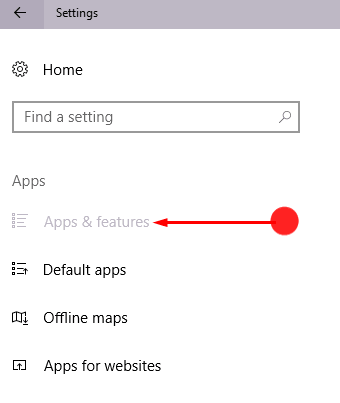
Step 3 – Now, you will see several sections on the left pane of Apps. Click Apps & features.
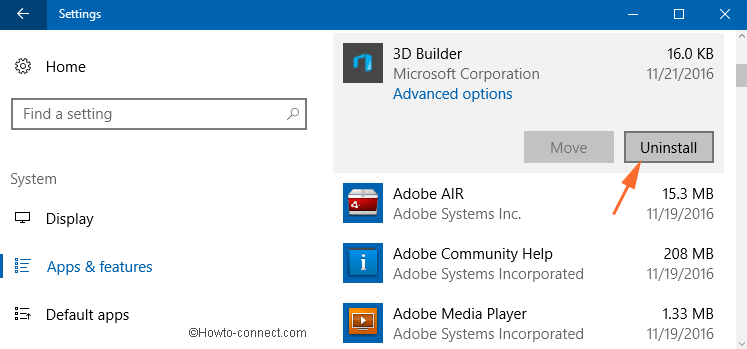
Step 4 – Moving ahead, locate and select the app 3D Builder on the right pane. After selecting it, two options will appear, click Uninstall.
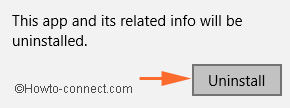
Step 5 – A small pop up will prompt for your confirmation. So, again click Uninstall on that pop-up to remove the app.
Now you can successfully uninstall 3D Builder app from Windows 10. Still, you need to tweak the Registry keys for the elimination from the context menu. Therefore, this is important to perform because it will eventually prevent the app from reinstalling. Look at the below screenshot which displays the 3D Print with 3D Builder option in the context menu.
How to Remove 3D Builder Option from Context Menu
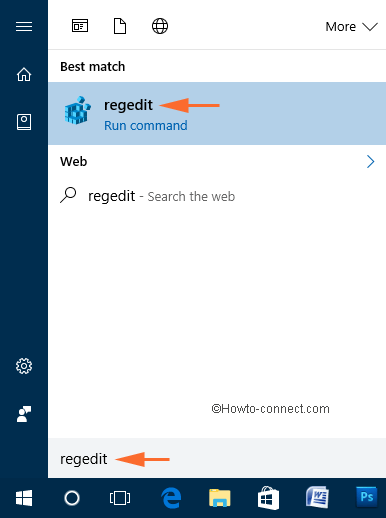
Step 1 – First of all, click Start icon and write regedit. Cortana will appear with the regedit command, click on it.
Step 2 – Approve the UAC prompt by clicking Yes button.
Step 3 – Next, follow the below path on the Registry Editor –
HKEY_CLASSES_ROOT\SystemFileAssociations\.bmp\Shell
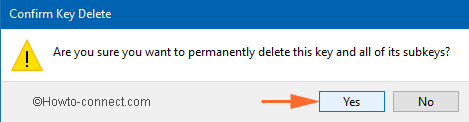
Step 4 – Under Shell folder, there is a subkey with a name T3D Print. Right-click that subkey and click Delete.

Step 5 – Finish the delete process by clicking Yes on the pop-up window.
Step 6 – two more works still remain, so browse to this path –
HKEY_CLASSES_ROOT\SystemFileAssociations\.jpg\Shell
Step 7 – Here also, below the Shell, a T3D Print subkey is present. Do a right-click on the subkey and from the list of few options, click Delete.
Step 8 – Select Yes to finish the removal process.
Step 9 – Finally, navigate to this path –
HKEY_CLASSES_ROOT\SystemFileAssociations\.png\Shell
Step 10 – Just as the above two cases, right-click T3D Print subkey. From the list of few options that appear click Delete.
Step 11 – You will come across an approval box, click Yes.
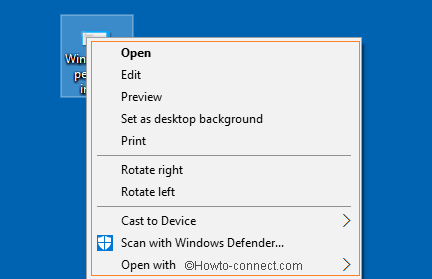
Step 12 – In the end, close Registry Editor and finish the task. Now, do a right-click on any file with a .bmp, .jpg, or .png extensions, and you will not see 3D Print with 3D Builder anymore.
Conclusion
Above are the procedures and steps guiding you to perfectly Uninstall 3D Builder App From Windows 10. Right-click a file with .jpg, .png, and .bmp extensions to assure, and you will not find the appearance of 3D Print with 3D Builder option. In addition, this will also prevent the chances of reinstalling the app after following this guide.