A few days back, there was a sensation for the release of Windows 10 Consumer Preview. Now the time has come when you can upgrade your PC to Windows 10 build 9926 whether you have Windows 8 or 8.1 or Windows 7. Microsoft has pushed the update for the Windows users who signed up in Windows Insider Program. I myself have got Windows 10 build 9926 updates, downloaded it, and installed on my PC. In between, I have captured the screenshots of the important steps that I have followed. I am sharing here all the steps in the crude way which will guide you Step by step to install Windows build 9926 on your computer for sure.
You may like to Read: Windows 10 – Know About All New Features – Xbox Live, Cortana, Spartan
Check your Windows Update
Step 1
Open Control Panel using Start menu if you are Windows 7 and Windows 10 Technical Preview build 9879 users. Write Control Panel in the search box beneath the Start menu and hit Enter.
Windows 8 users will right click on Start button on the taskbar and choose Control Panel.
Step 2
In Control Panel, press Windows Update link.
Step 3
Click Check for updates link on the left sidebar of Windows update window.
Step 4
If you have already got the update of Windows 10 Technical Preview build 9926 which is having 2260 MB then it is OK. But if you have not got the update for the build then sign up Windows Insider Program and you will get the required update few days later.
Here, we will write for the users who have got Windows 10 Technical Preview build 9926 update on their PC.
Download and Install Windows 10 Technical Preview build 9926
Step 5
Click Install button in the update box. The downloading process will start. It will take a few hours (depending upon the speed of data transfer on your PC). So we still and wait for the completion of the download.

Step 6
As soon as the download finishes you get a notice in Windows update box. You need to Check your PC before the installation. Click the Check your PC button.

Step 7
Windows 10 Technical Preview setup will begin Checking your PC like the screenshot below.

After the check is finished you get a confirmation window containing two buttons:
1. I changed my mind 2. Let’s get started
Click Let’s get started button.

Step 8
You view a window having to ask for your agreement towards the terms and conditions (Important Legal Stuff). Click I accept button.

Step 9
Again, the setup will check the computer for a while. The installation process will start automatically.

Step 10
The most important time for you to start now. Since you need to wait, wait and only wait. The Process will take time in hours ( more than 1). Don’t touch your PC. Meanwhile, your setup will be installed, configured, your PC will get ready, extra configuration will be processed. All the processes will be held automatically. You must nothing to do.
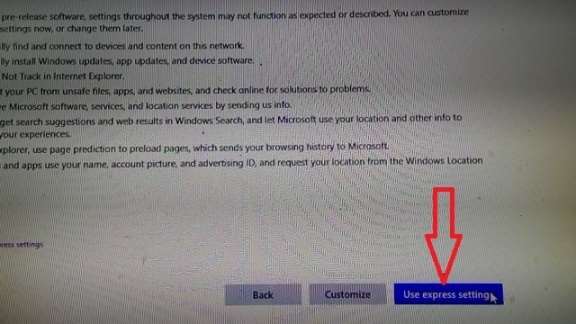
Configure Settings
Step 11
Finally, you get a window to select settings. Click on Next.
Step 12
Now you will choose between custom and express settings. Hit Express settings.
After a while, you get your Windows 10 Technical Preview build 9926 ready to use. Colorful changing screen of your PC will finally welcome you to use the new build of Windows 10.