Desktop.ini Editor v1.0 is a free software that allows you to make changes in the hidden desktop.ini files. You might have known that this file includes Windows folder arrangement details and is located in every folder. We have written an article in this concern here – Why Are Grayed Out Desktop.ini Files Everywhere In Windows 10? When you edit a folder setting or layout, this file is automatically created to accumulate those modifications. You can use Desktop.ini Editor Tool to Change Folder Attributes on Windows very easily.
Desktop.ini editör helps you to edit desktop.ini files and customize folder icons, Folder Infotip, include CLSID, reset folder settings to default. This freeware is very important when Windows resist ignoring any changes to desktop.ini. You can modify Folder name, Folder infotip, Folder icon, Add CLSID for Default, My Computer, My Network Places, Control panel, Printers, and Recycle Bin. You can use another tool RegistryChangesView to Take a Snapshot of Registry Editor in Windows.
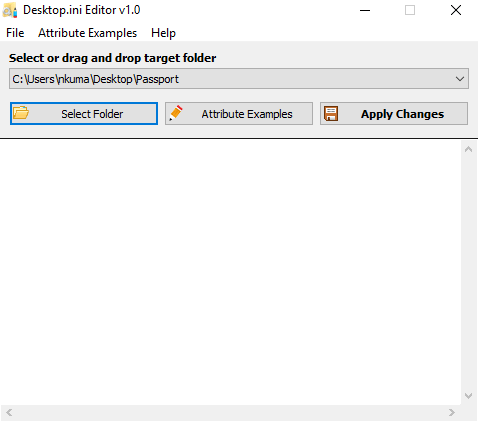
In addition, the desktop.ini file contains multiple attributes but the following custom attributes are the most common: –
ConfiConfirmFileOp – This attribute ensures to prompt a warning “You Are Deleting a System Folder” while eliminating or moving the folder.
IconFile – When you change the icon for a folder, Desktop.ini add its entry to file name.
IconIndex – The attribute includes this entry to determine the index for a custom icon. In case, if the file assigned to IconFile comprises only default icon, leave the IconIndex to 0.
InfoTip – This entry specifies the information you view while hovering your cursor on a folder. You can see a tutorial about this – How to Disable Infotip in Windows 10.
Table of Contents
How to Use Desktop.ini Editor Tool to Change Folder Attributes on Windows
Here suppose to use Desktop.ini Editor tool to change a folder named ABC on Desktop. Start with downloading the tool from this location, extract it and launch.
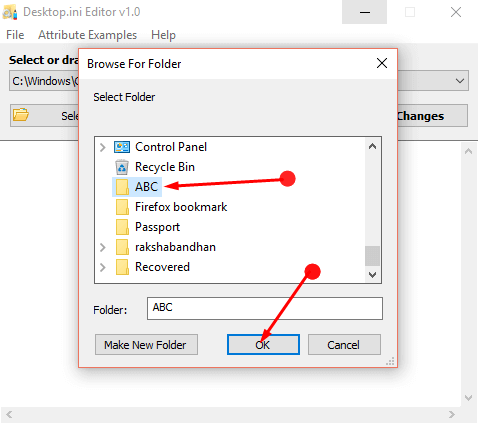
Step 1 – Open Desktop.ini editor tool and click Select Folder. You get a Browse for folder small window, locate one for which you want to change attributes (Note – I have selected ABC from the desktop).
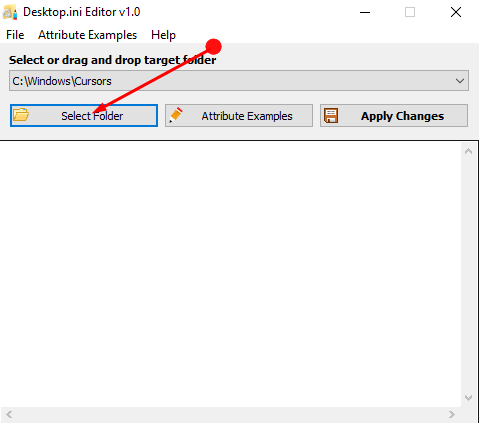
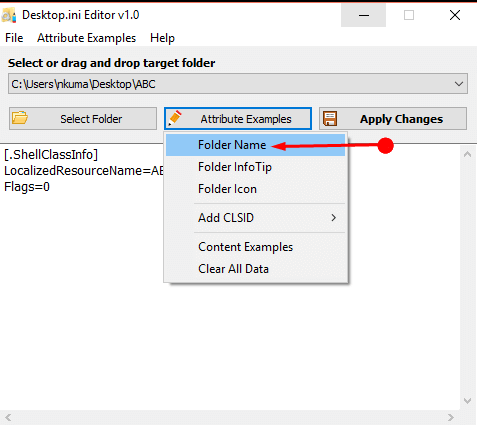
Step 2 – If you want to change its name then click Attribute Examples and choose Folder Name from dropdown. This will prompt a tiny pop up.
Step 3 – Browse For Folder small window comes to view. Sort out the one which you are making the change and click OK.
Step 4 – Type a name of your preference on the pop up and press OK (Note – here it is DEF).

Step 5 – Click on Apply Changes to store the attribute. Lastly, you can go to the folder and check the new name for confirmation.
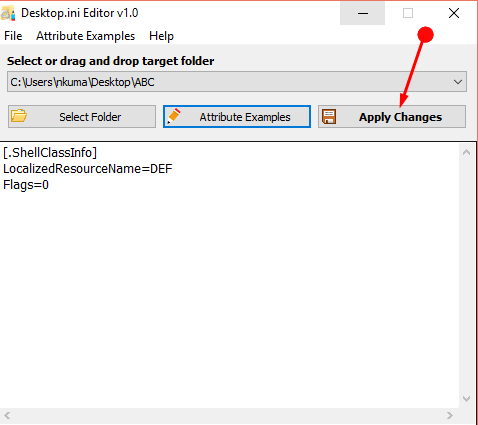
Step 6 – In the same way, to change InfoTip, click on Attributes Example and select Folder InfoTips from the drop-down. Type the name that you want to display after hovering on the folder and hit on OK. Finally, opt Apply Changes button to save the new InfoTip.
Step 7 – When you are setting its icon to custom, select Attributes Examples followed by Folder Icon. Change icon small pop up appears, browse, select a cool one and click OK. As earlier use the Apply Changes option to store the icon.
Step 8 – In order to register a CLSID, choose Attributes Examples and then ADD CLSID followed by a location from My Computer, My Network Places, Control panel, Printers, Recycle Bin. and Default.
Step 9 – If you are not satisfied with the changes then click Clear All Data from the drop down.
Important – You can drag a one and drop instead of Select Folder option on the interface.
Conclusion
So you will use Desktop.ini Editor Tool to Change Folder Attributes on Windows in the given ways. The freeware Editor also offers CMD support and follow its parameters. This is compatible with all versions of Windows and runs very fast without any bugs and crashes.