Procedures and Steps to View Network Status in Windows 10. – Whenever your PC come across an internet access issue, you straightaway rush to find its status and other details. Two locations in Windows 10 allows seeing the Network Status and other relevant details for your connections.
In the Network & Internet category of Settings, the Status tab usually displays the situation of your connection. It explains whether your PC is connected to the Internet and if so, then it mentions through which network it is connected. So, the moment you enter the Network & Internet category, the graphical representation on the right side of Network Status will clear you the scenario. Similarly, the Network Connections in the control panel also displays a Network Status dialog box with all the relevant information. See the guide below.
How to View Network Status in Windows 10
Method 1 – Through Settings App
Step 1 – Press Windows and I all along. This combination of keys will quickly open the Settings app on the screen.
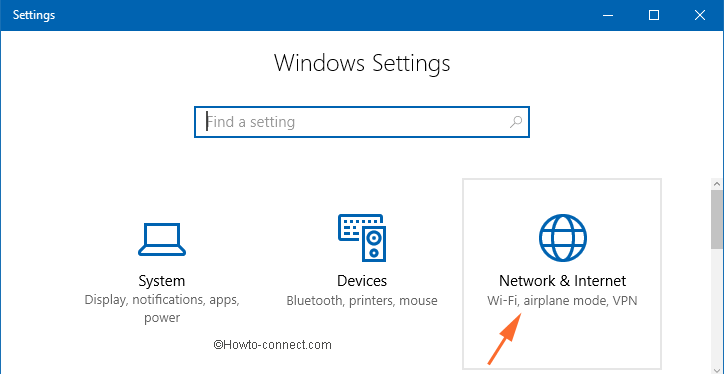
Step 2 – Now, select Network & Internet, the third category.
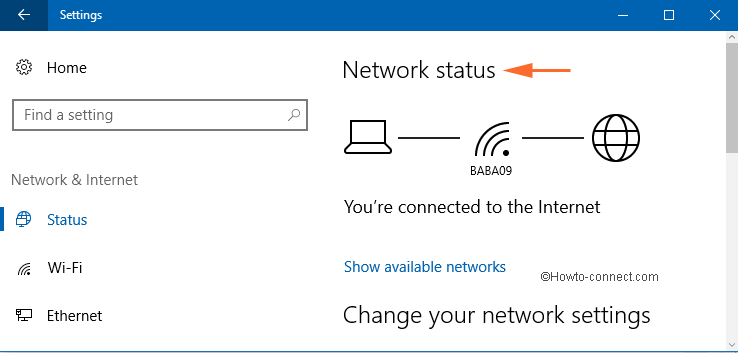
Step 3– By default, Status appears in the right pane. In the left pane, you will see network status in the form of graphical representation with a statement your “You’re connected to Internet”.
Method 2 – Via Power User Menu
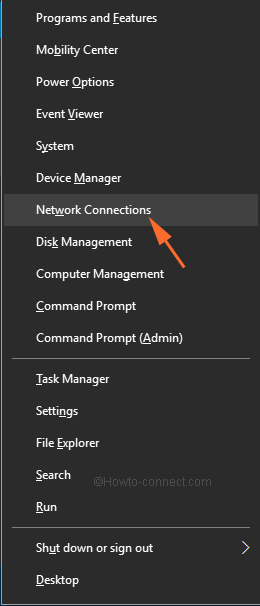
Step 1 – Press Win & X combination of keys and then a list of options will pop-up. Locate and select Network Connections.
Step 2 – This will straightaway bring the Network & Internet category. The Status section will be opened and so you can clearly see Network Status on the right side.
Method 3 – Using Network Connections
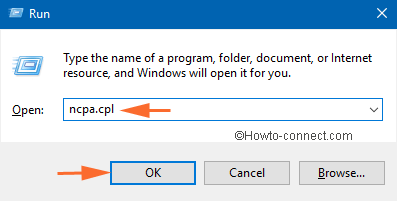
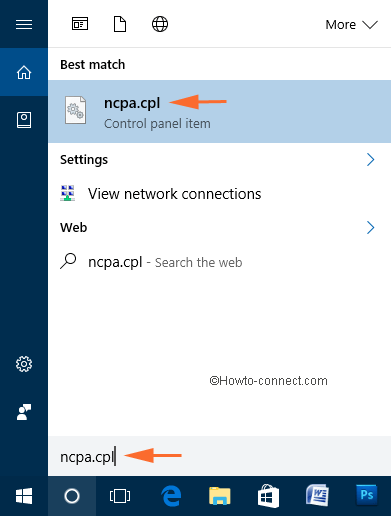
Step 1 – To begin with, click Win & R keys and launch Run window.
Step 2 – In the Open bar, write ncpa.cpl and select OK.
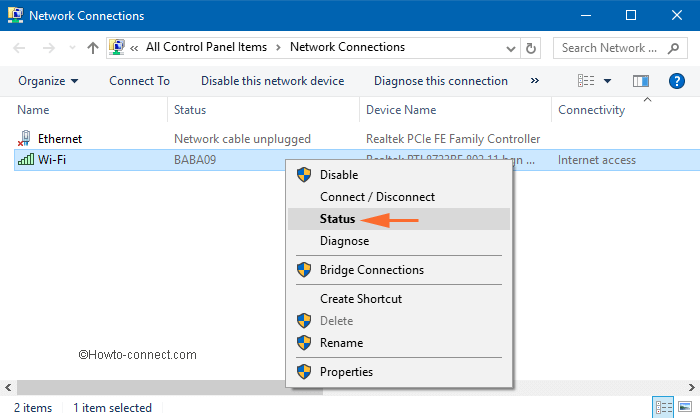
Step 3 – Now, in the Network Connections window, make a right-click on the connection you are presently using. From the list of few options, choose Status to View Network Status in Windows 10.

Step 4 – Finally, the necessary information of the network status will appear in the Status dialog box.
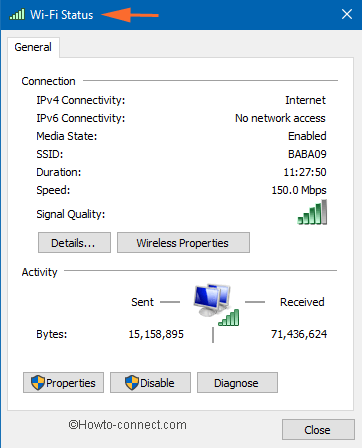
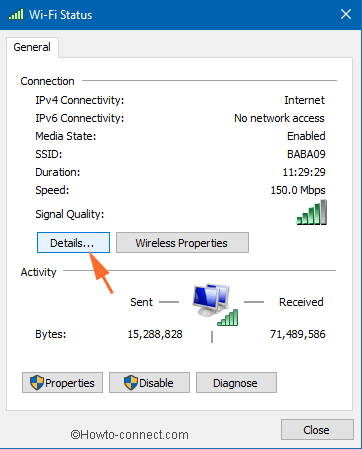
The Network Status not only reveals the connection status of the network but also provides every little detail of the connection such as Physical Address, Duration of the connection, Speed, Signal Quality and a lot more similar things. So once you View Network Status in Windows 10 you will get all the above information.
Now, in the below part, we will guide you two ways to view network status properties in Windows 10.
How to View Network Status Properties in Windows 10
Method 1 – Through Network & Internet Category
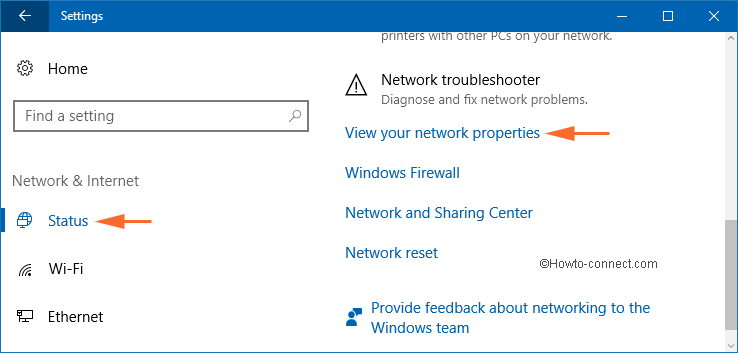
Step 1 – Right-click on Start button and from the list of options, select Network Connections.
Step 2 – Next, the Status page will appear. Click View your network properties option.
Step 3 – Now, View your network properties will appear with a list of all the networks. If you see carefully, the details of all the networks such as Ethernet, Wifi, Local Area Connection, etc are there.
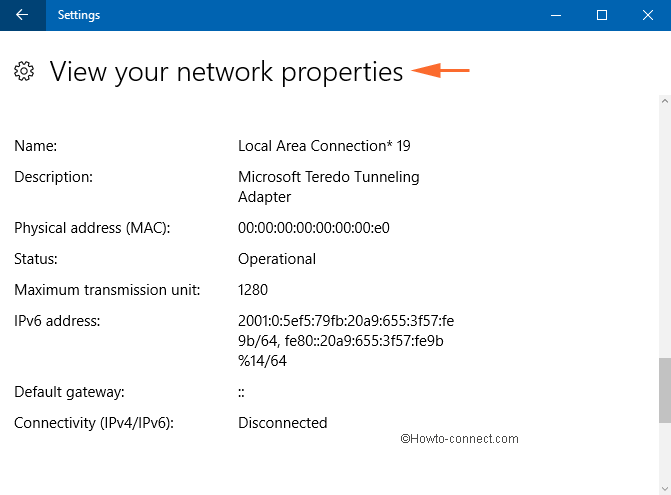
The list displays link speed, IPv4 and IPv6 address, Network name, category, MAC address, and several other details. There is a Copy button at the end of the page for you to copy all the information and save it for further use.
Method 2 – Network Connections
Step 1 – Click Start icon and type ncpa.cpl. This will launch Cortana displaying the same command as the Best match, select it.
Step 2 – Now, in the subsequent window of “Network Connections” right-click your connection. A pop-up menu with few options will show up. Select Status.
Step 4 – The network status dialog box will show up with all the fundamental information such as SSID name, Duration, Speed, Signal Quality. For seeing additional information, click Details button.
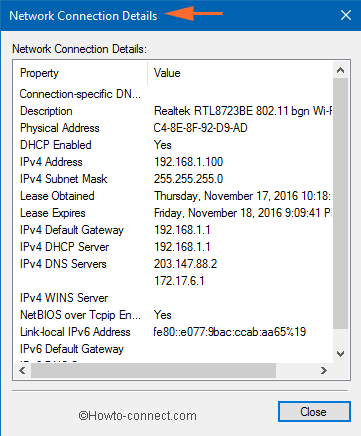
Step 5 – Finally, Network Connection Details dialog box will show up with a list of other relevant information of the network. Moreover, the dialog box displays Physical address, dates when the lease is obtained and when it lapses and other similar information.
Conclusion
To summarize, View Network Status in Windows 10 is quite simple and if you know some other methods for the same, please take the help of the comments section and suggest to us.