Storage Sense is an advanced option on Windows 10 to automatically cleanup space and ensure best system performance. The tool identifies when disk has low space, starts deleting the unnecessary files. Furthermore, you can set a frequency of time to clean items such as temporary files, recycle bin, and downloads folder.
Windows 8.1 had a feature called Disk Space but Windows 10 brings this tool. This also lets you know the amount of space freed in the last month.
How to Access and Use Storage Sense in Windows 10
1] Enable
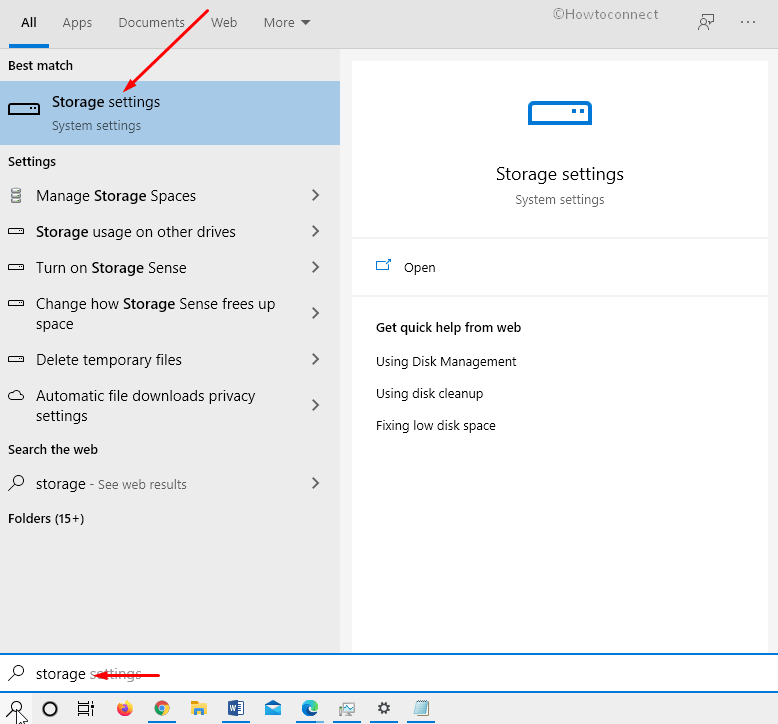
- Click the – Start.
- Type – storage.
- Hit – Enter.
- Click the toggle switch under Storage to enable Storage sense.
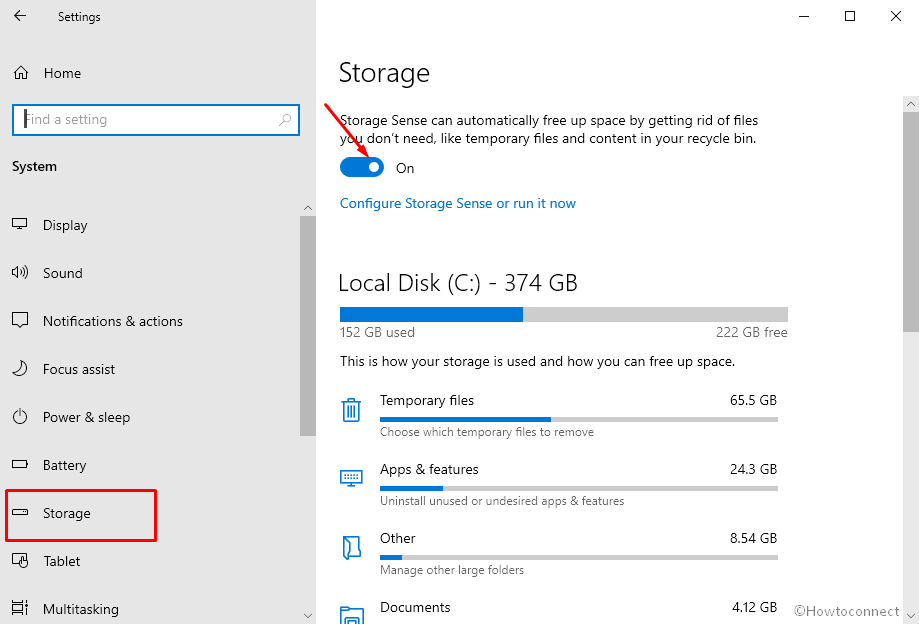
2] Use Storage sense
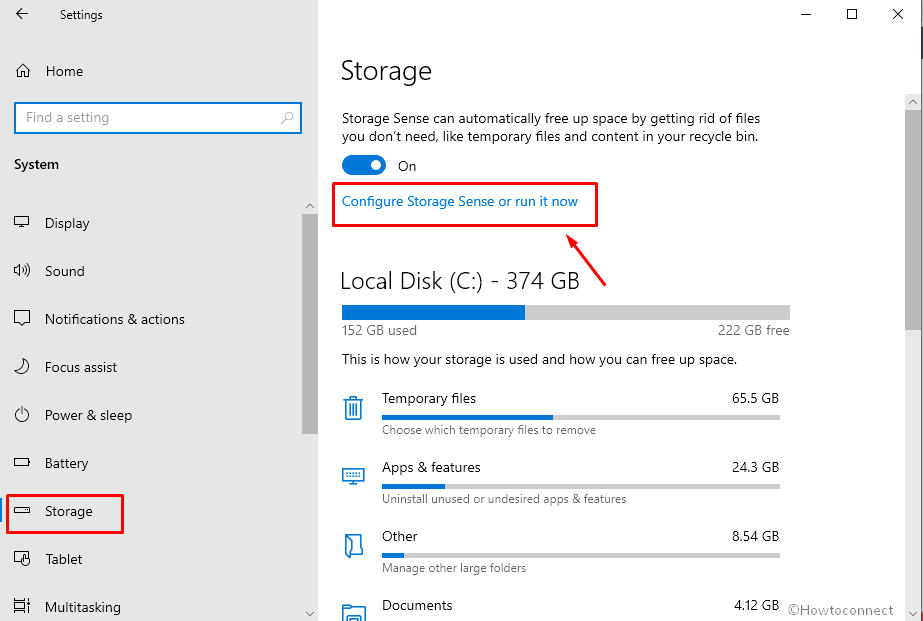
- Select the link – Configure Storage sense or run it now.
- Next, click the drop-down for – Run Storage Sense.
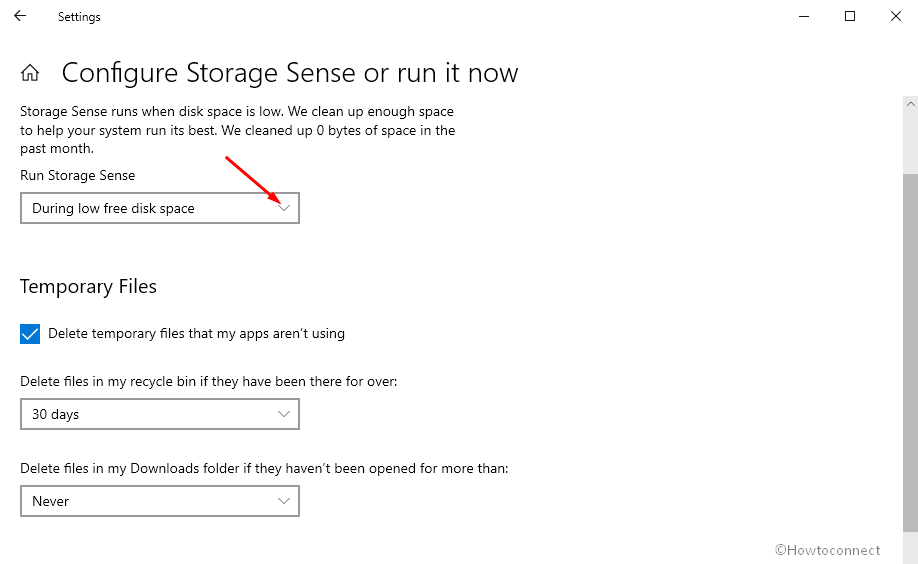
- Choose an option from – Every day, Every week, Every month, and During low free disk space.
- Check the box for – Delete temporary files that my apps aren’t using.
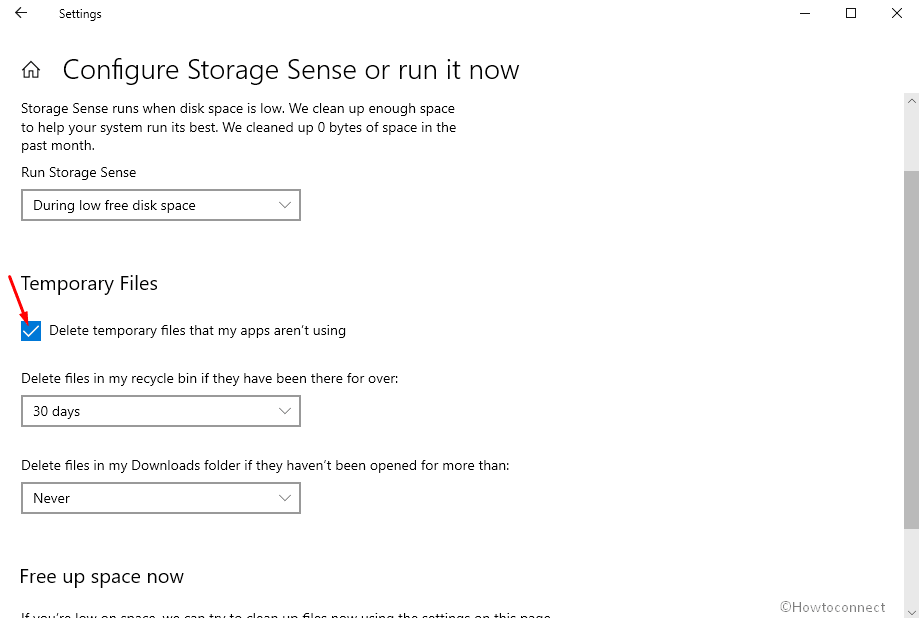
- Click dropdown for – Delete file in my recycle bin if they have been there for over.
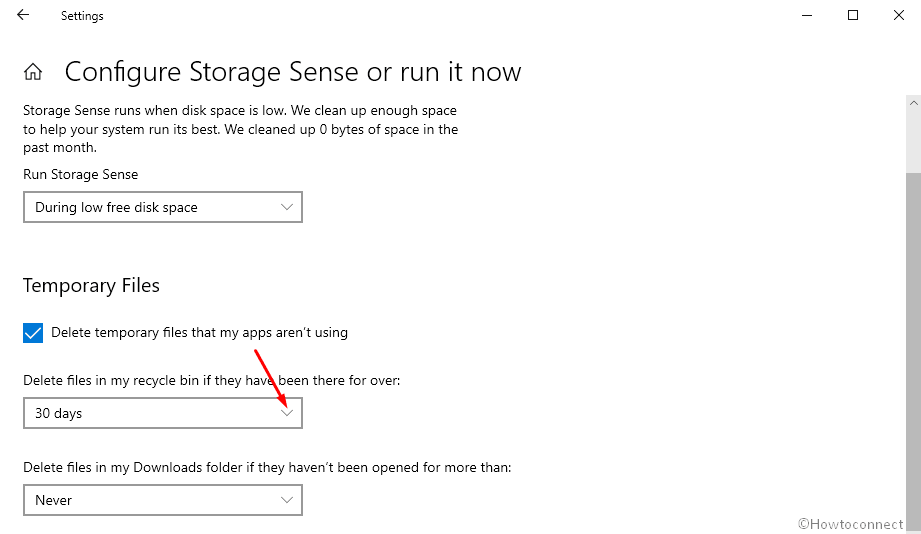
- Choose the frequency of days that suits you.
- Next, click the – Delete files in my Downloads folder if they haven’t been opened for more than:.
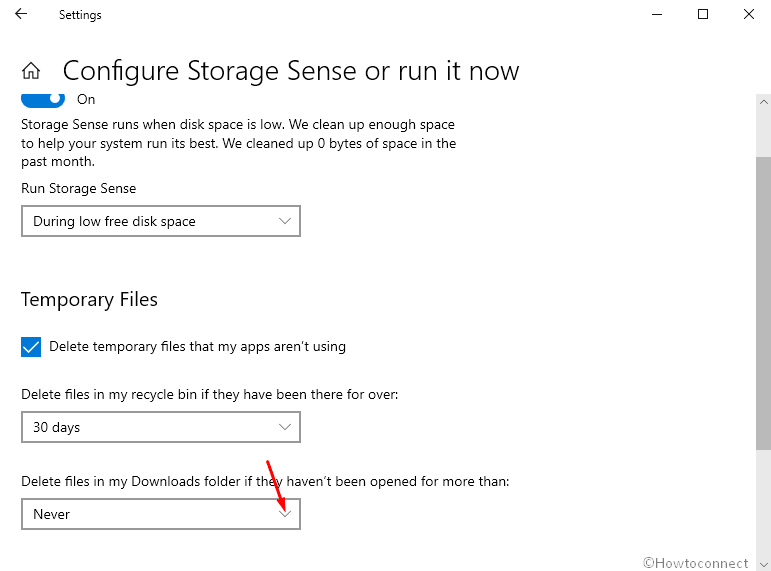
- Select according to your preference.
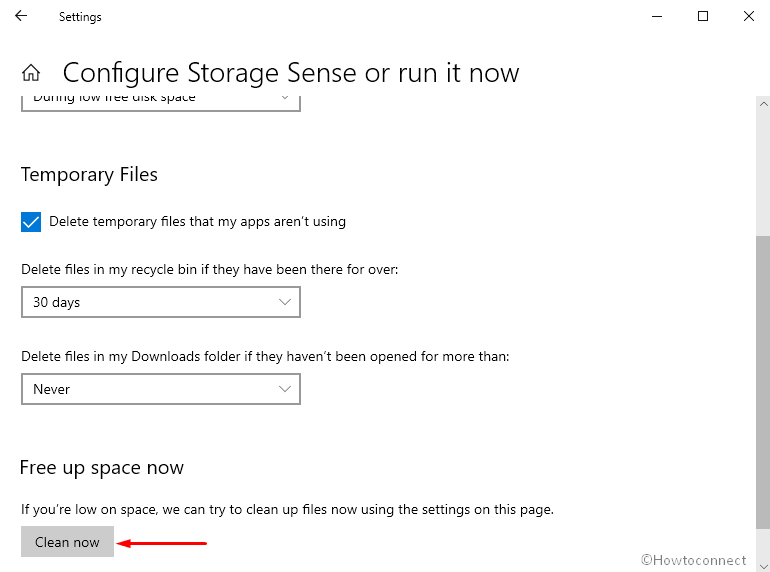
- If you want to delete the unwanted items at present click the – Clean now.
You can remove the apps having a large amount of space on your Windows 10 PC from here –
1] Include System Compression in Disk Cleanup on Windows 10
2] How to Uninstall Large Space Taking App from Windows 10
