In this article, you will see How to Change Time to Stay Notification Popup so that you can see and read and understand it easier to take necessary action in Windows 10.
Windows 10 prompts notifications pop up above the taskbar in the right side time to time to update you on your system related info. These notifications are very significant and keep you aware of your system condition. But sometimes you might need to change the time period to stay the notification popup. For example, the popup emerges suddenly and return backs. This time period of the notification popup is too short to read. You might want to increase the time period of the popup to show on your PC so that you could read and understand it comfortably to take necessary action. You can change the time period after a short change in settings.
You may like to Read:
How to Disable / Enable App Notifications on Windows 10
How to Change Time to Stay Notification Popup in Windows 10
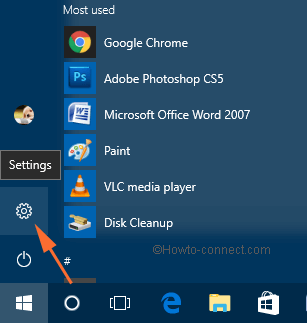
- Launch Start menu.
- Hit Settings.

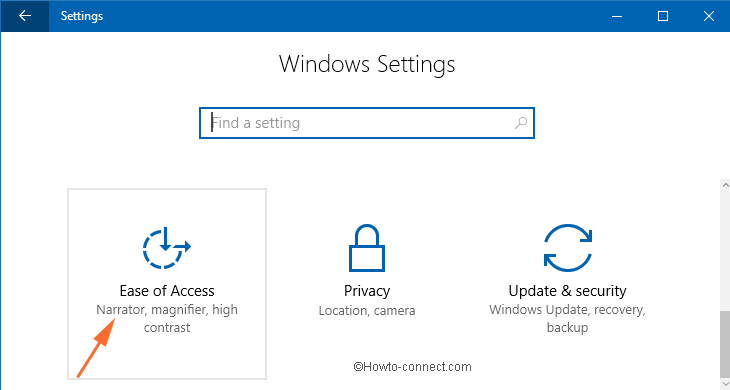
- Click Ease of Access option on Settings window.

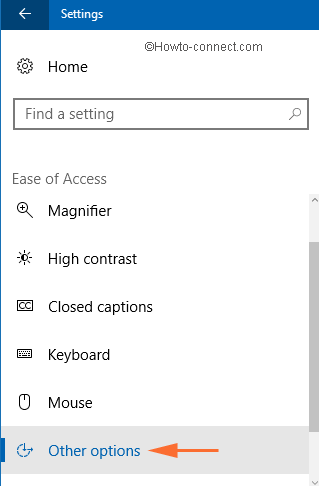
- In Ease of Access window, choose the Other options.

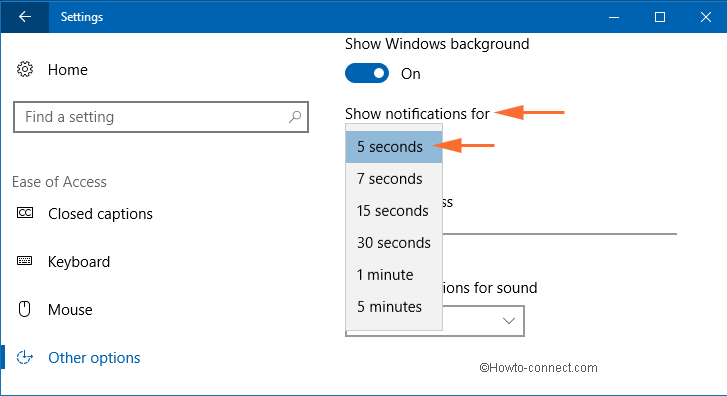
- On the right side of the window, you can see a drop down under the heading Show Notification for. Click on the drop down and select the time period you like to show the Notification popup on your computer. In this drop down there are 6 options – 5, 7, 15, 30 Seconds, 1 minute and 5 minutes. You can set any period of time which suits you.

That’s all.
Final Words
Notification popup distracts us when we work on the computer but they are important as well. So it would be better for you that set the popup to stay for a convenient time.
To change the time period of the notification popup to stay on the screen of the computer, there is no straight way through notification area settings in Windows 10. So we decided to present the tips for you. I hope this will be helpful to you.
