The hard disk for your computer is the magnetic disk where your data of the computer system is stored. It has a huge storage capacity and it retains the data in it even after the system is turned off. When you run your computer its hard disk functions relentlessly and even it works when your PC is in Standby and hibernating situation. But have you ever thought to give hard disk rest so that the computer can perform better and live a long life? If yes, then we are writing Windows 10 tips to turn off your hard disk after a certain period of time. Follow the steps below.
Give Hard Disk Rest after Certain Time in Windows 10
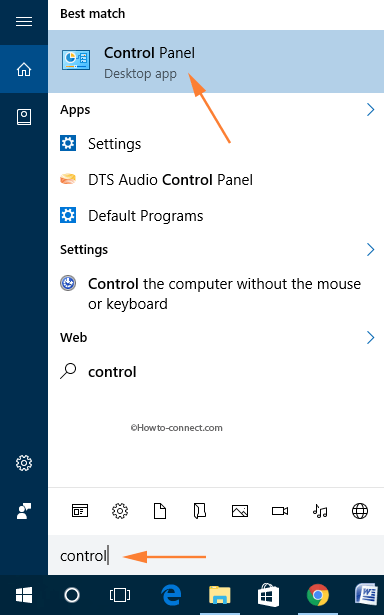
- The prime step is of opening the Control Panel on your display screen.
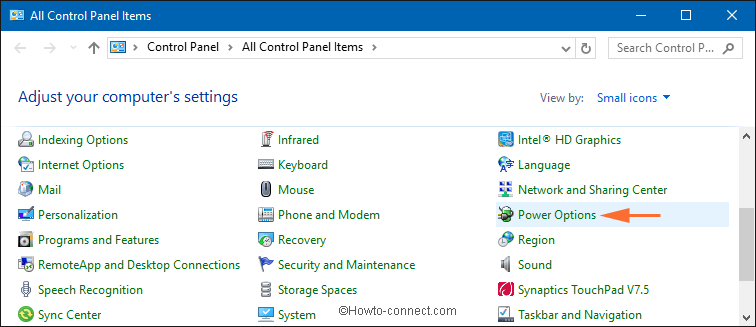
- Then click on the Power option where you will carry out the change.
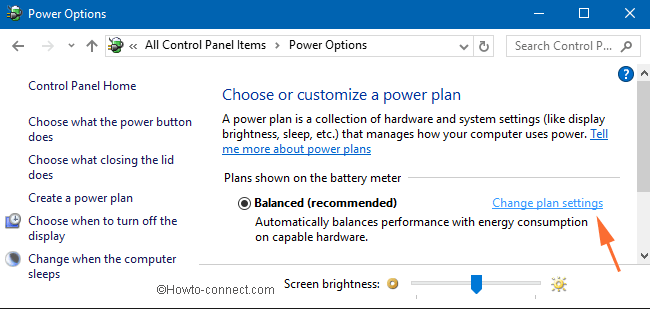
- Now, click on Change plan settings option of your selected plan.
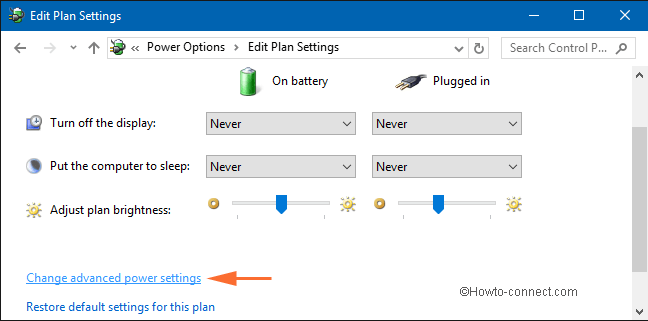
- An Edit Plan Settings window will now arrive on your screen. Click on the Change advanced power settings link.
- This will bring the Power Options window where you will find the Hard disk option in the list.
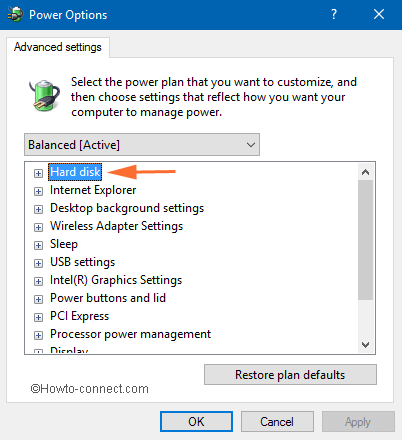
- When you click on the Hard disk option, another sub-option Turn off hard disk after will appear.
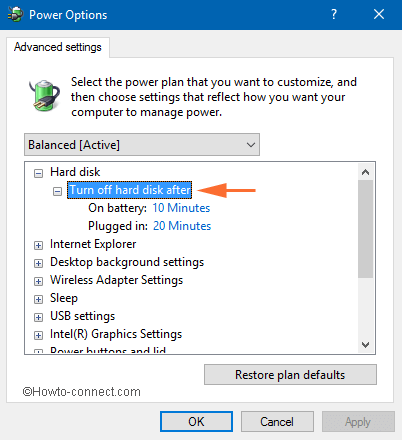
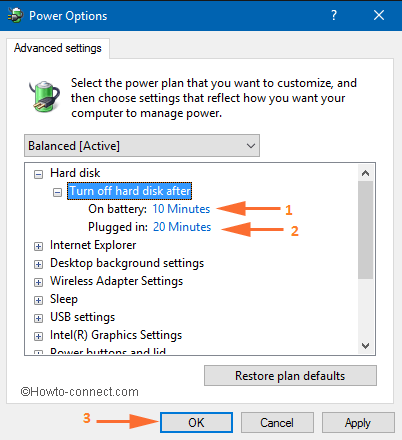
- Now you will have options: On battery and Plugged in. To Give Hard Disk Rest after Certain Time in Windows 10, set the desired time for the options. Finally, click on Apply and Ok buttons to implement the changes.
Conclusion
Thus, apply the above few simple steps and let your computer take some rest after a certain period of time when it is running on battery or plugged in. If you have any queries related to this article you are welcome to ask from us using the comments form below.
