There is a tool in Windows 10 operating system which expands the various portions of your display screen. When this program is made run you will notice a bar on the upper portion of your screen which enlarges the parts of your screen where you put your mouse. This tool makes reading and viewing minute things on your display easy. The Magnifier tool can be used at different levels and types. Today, I will portray all the details of Magnifier in Windows 10. You get gather knowledge about its accessibility, its usage, types, and a lot more.
How to Access Magnifier in Windows 10
There are three different ways to open the Magnifier in Windows 10. Let us see them one by one.
Control Panel
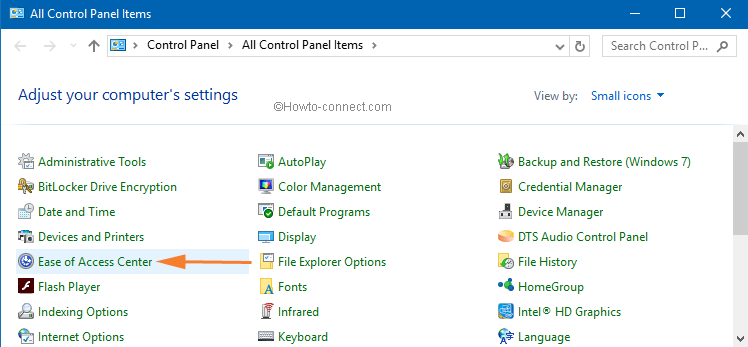
- The most common place to get all the tools is Control Panel. When you are into Control Panel, let the icons be displayed in small mode. Click on the icon Ease of Access Center.
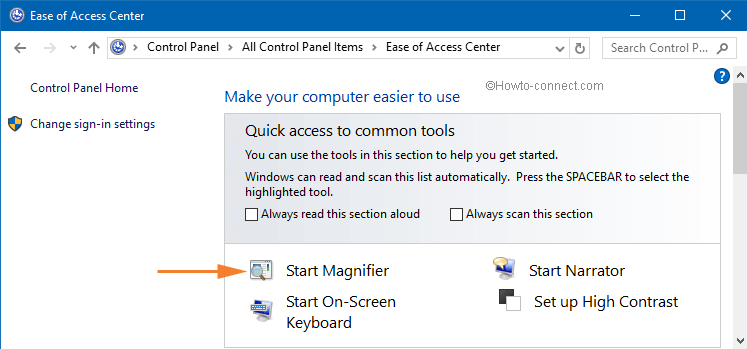
- On the Ease of Access Center window, you will notice an option called Start Magnifier.
Start Menu
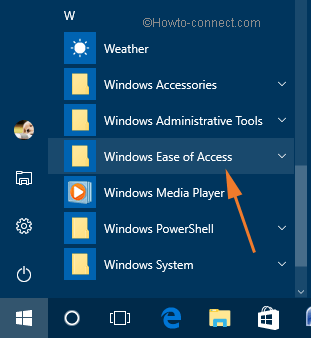
- Launch your Start Menu and select All Apps. Scroll down and go to Windows Ease of Access.
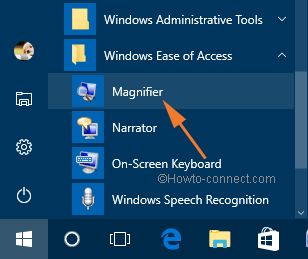
- When you open it, Magnifier tool is available.
Cortana Search
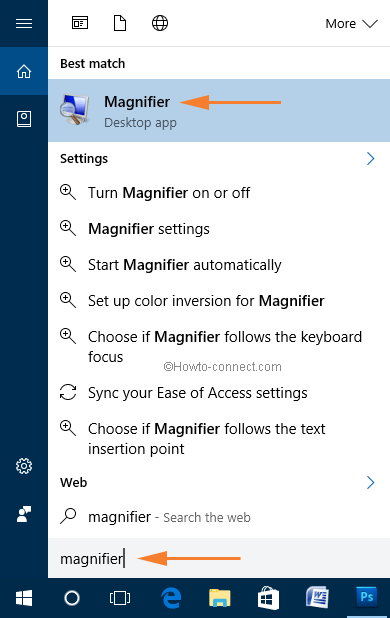
Here also first open your Cortona and then go to the Search field. Type Magnifier in the search box and hit the Enter key. The search result will display the Magnifier option along with its icon.
Settings
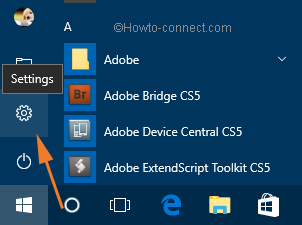
Lastly, you can get into Magnifier tool from the new Settings. Launch Start Menu on your screen. Choose Settings from Places category.
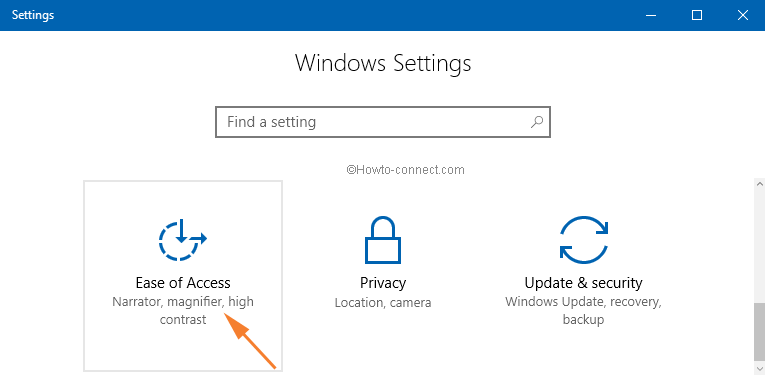
In the opened Settings window, pick up the Ease of Access category.
Then the Ease of Access will have some more options. If looked carefully, Magnifier is one of them. Click on Magnifier and see its options on the right pane of the window.
How to Use Magnifier in Windows 10
When you open Magnifier by any of the above-mentioned ways, you will see that your screen has been enlarged by 200%.
And this is how the Magnifier window looks in Windows 10.
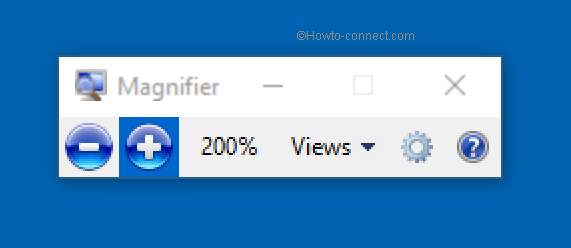
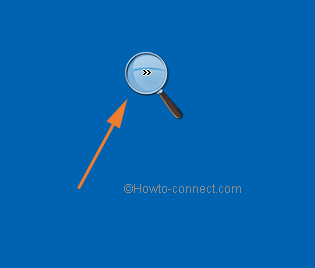
Now, you have opened the Magnifier, but if you don’t bring it to use within 5 seconds, you will notice a magnifier instead of Magnifier window. Don’t get confused, it is just that the interface got changed. To get back to the original window of Magnifier click on the middle of the magnifier that got replaced with the original one.
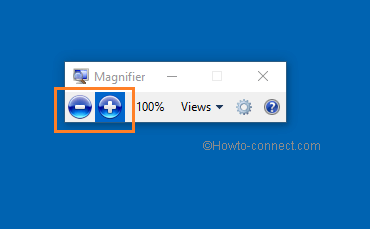
Getting back to the original interface of Magnifier window, there are two buttons to modify the enlargement: “+” and “–“. The plus button (+) is for enlargement and the minus button (-) is for the reduction. Click on any of the buttons and modify the view of the screen or part as per your need.
It’s time to take a look at the types of magnifications provided by this tool. To see the options of the available types, click on the drop down menu to the Views option. Three options are listed: Full Screen, Lens, and Docked. Let us see them now –
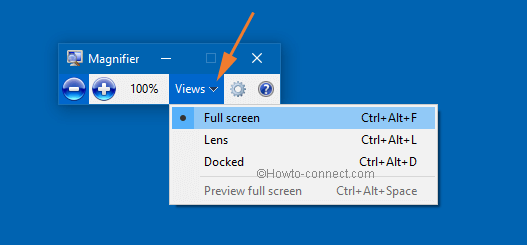
Full Screen – This full-screen view is set by default. The entire display screen will be enlarged in this option. Set your enlargement level and view the full screen as your desired level. Depending on your zoom level you select and the size of your display screen, you may not see the entire screen at the same time.
Lens – This is my favorite type of view. Select this option and see only that area to be enlarged where you place your mouse. Move your mouse where you want and see the areas where the mouse is has been enlarged. So this view is useful when you wish to enlarge a particular part of the screen.
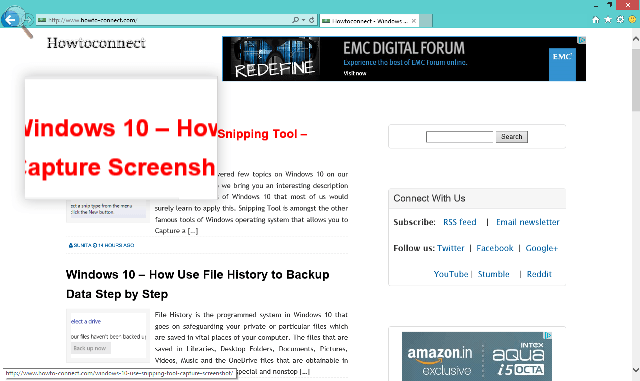
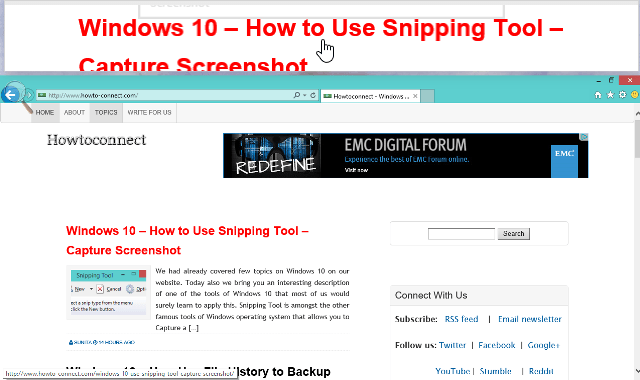
Docked – The third type is the Docked view. When you set the magnifier in the Docked view, the area where your mouse is will be displayed on the upper half of your screen in a zoomed mode, keeping the rest of the area in its original state. For example, I have kept my mouse on the heading of our one of the post and it is been displayed on the upper half of the screen in an enlarged way. You will see that the other areas are in its original form.
How to Customize the Magnifier in Windows 10
If you wish to customize your Magnifier, you are reading the correct thing. To see the options available for customizing,
- Click on Options button of the Magnifier window.
![]()
- A Magnifier Options window will now arrive on your screen.
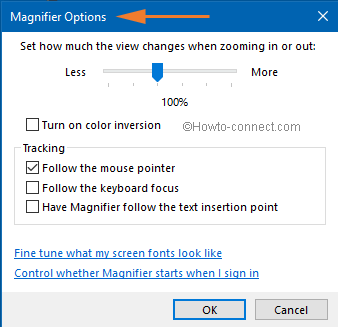
You will see a slider on the upper part of the window. The point on the slider is the amount of view that changes when you enlarge or reduce any part of the screen. Use the slider and adjust it as per your preference.
The below mentioned are the other options available for you. Select them as per your desire and do the modifications.
Turn on color inversion – If you select this option, the contrast on the items of your screen increases which can be of help to you in seeing the screen.
Follow the mouse pointer – The surrounding area covered by your mouse pointer will be enlarged. If you choose this option, you can make the Magnifier window move when your mouse pointer reaches the corners of the Magnifier window.
Follow the keyboard focus – This option when selected exhibits the nearby area of the mouse pointer when you hit the arrow keys or the Tab.
Have Magnifier follow the text insertion point – When you are typing a text, this option will magnify its nearby area.
If you are into the Lens view, the Options window has something different for you to customize. It allows you to adjust the Magnifier Lens Size by using its slider provided.
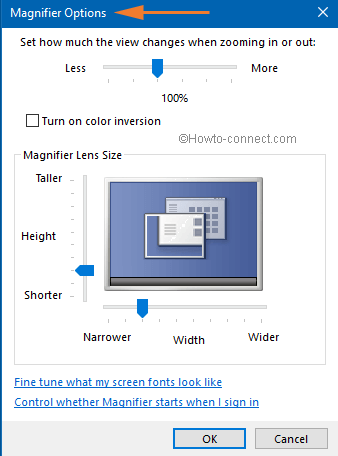
- Don’t forget to click Ok after you are done with your modifications.
How to Prompt Magnifier at Startup in Windows 10
In case you require using the Magnifier every time you log into Windows 10, you can set it to start automatically. Open Ease of Access Center window from the Control Panel.
- Now under the Explore All Settings section, click on Make the computer easier to see the link.
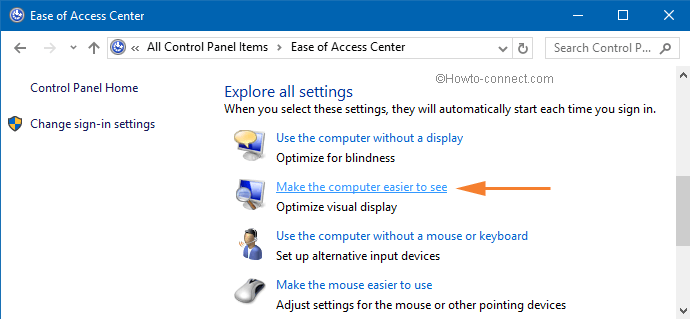
- On the following screen, look for the Make things on the screen larger section. Then select the radio box which says Turn on Magnifier. Further, click on Ok button to save your settings.
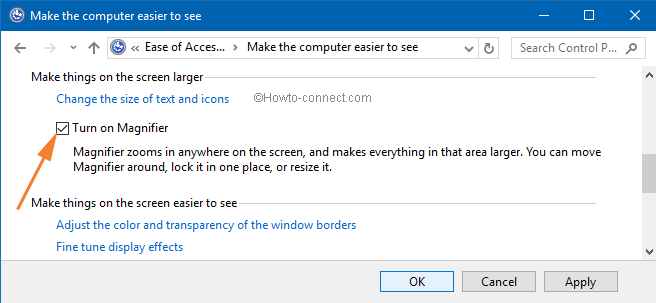
- To experience the change, restart your computer. You will see that the Magnifier has started all by itself. In future, if you wish to deactivate this service from automatic startup, simply deselect the check box of Turn on Magnifier following the same route as mentioned above.
Keyboard Shortcuts
This is for the users who always use their keyboards to carry out most of the activities of their computer. We will present you few keyboard shortcuts related to the Magnifier in Windows 10.
- Windows (logo) key & Plus (+) key: This combination will let you zoom the screen.
- Windows (logo) key & Minus (-) key: Your screen will be zoomed out.
- Ctrl & Alt & Spacebar: Your mouse pointer will be displayed.
- Ctrl & Alt & F: You will be taken to full-screen view.
- Ctrl & Alt & L: When you press these three keys, the lens view will be on.
- Ctrl & Alt & D: You will be switched to the docked view with this blend of keys.
- Ctrl & Alt & I: Try these keys and invert colors option will be turned on.
- Ctrl & Alt & Arrow keys: The screen will sweep in the course of arrow keys.
- Ctrl & Alt & R: Your lens will be resized.
- Windows (logo) key & Esc: Use these keys and get out of the Magnifier. My favorite 😉
Final Note
By the end of this tutorial, you must have noticed that it is the friendlier tool Magnifier in Windows 10. Apart from enlarging the areas of your screen, you can do many modifications as per your choice. This tool has turned very supportive for the users who have some sight problem. If you have some other details of Magnifier tool to share with us, don’t hesitate a bit and let us know about it.

Good evening.
Some comments, YES this is a really good service and I have used windows magnifier on my old computer for years but lost the hard drive and had forgotten how I set it up.
It works really well and is easy to use.
I had to try to copy all the instructions so I may be able to read them on my CCTV reader however the CCTV reader will not do pictures at all.
Again thanks but I have a suggestion and it is because I am 90 and per the VA opt ophthalmology clinic I am now at 20/400 and as you probably know 20/200 is legally blind I can NOT read regular type so I feel it would also be a great service if you could do a bit larger print when you know that LOW VISION people would be the ones interested in this information.
THANKS, Everett Gamble
I am experiencing problems with the magnification tool in Windows 10 which I had to upgrade to with the arrival of a new computer. I use it in docked mode, and in Windows 7 Pro I had no problem with the windows in any program that I use resizing a window to fit under the magnified section so that the top bar of the window was accessible. Ever since I started using 10, I have had all windows slide up underneath the magnifier so that I can’t close, resize, or minimize the window without physically moving the magnifier so that I can access the top bar of any window. No matter how many times I go to the magnifier menu and switch modes, I encounter the same issue. This is extremely frustrating because I can’t switch between programs or even windows without constantly fiddling with the magnifier window. I didn’t have this happen when I used 7 Pro, and I would like to know if there is anything I can do to fix this once and for all.
I should add that I DETEST Windows 10, and if the computer didn’t come with it installed, I never would have switched from 7 Pro.
The program is horrible. It keeps starting up and will not close down by clicking ‘close program’ when hovering over the icon in the taskbar and clicking the right mouse button. I would like to completely exterminate it and just use my professional screen magnifier but this is Microsoft and their uber Gruppe fuhrers don’t allow us cripples to control our PCs by turning off Edge or exterminating Magnifier.
Yes, search magnifier in the charm search.
Is this procedure available in windows 8.1 (which I am currently trying to setup. Thank you