How to Personalize Lock Screen in Windows 10 – Your display screen gets locked when your computer is left unused for a certain time or maybe at times when you lock it manually. And when you see your computer’s Lock Screen you will see an image to it. The Windows 10 allows you to assign your favorite picture to set as your Lock Screen image. Apart from setting your favorite image, it also gives you the opportunity to make a slide show with your own list of images. Not only that it allows you to do the modifications with the Lock Screen image, you can also bring necessary information of different installed apps on your Lock Screen.
Here, in this article, we will be explaining to you every little detail of the Lock Screen settings. The Lock Screen settings in Windows 10 are obtained from the PC Settings. So, let us see How to Personalize Lock Screen in Windows 10.
You may like to Read:
How to Disable or Turn Off Windows 10 Lock Screen
How to Personalize Lock Screen Windows 10
Access Lock Screen Settings:
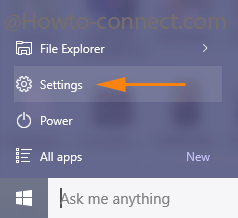
Obtaining the PC Settings is very quick in Windows 10. You will notice it as soon you enter into the Start Menu of Windows 10.
- So, open Settings.
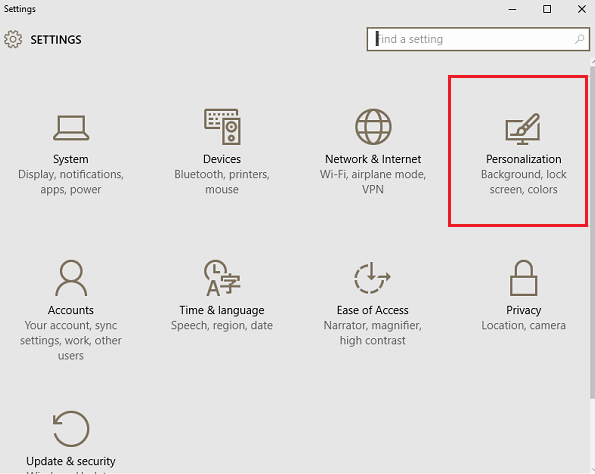
- Now, theSettings window exhibits you the different categories of settings on the left part of it. The Lock Screen settings are obtainable from Personalization. So click it.
- Again lists of settings are present under Personalization. Select Lock Screen.
- When you will select Lock Screen, its related settings are displayed on the right part of the PC Settings window: Lock Screen Preview, Lock Screen Apps, and Camera.
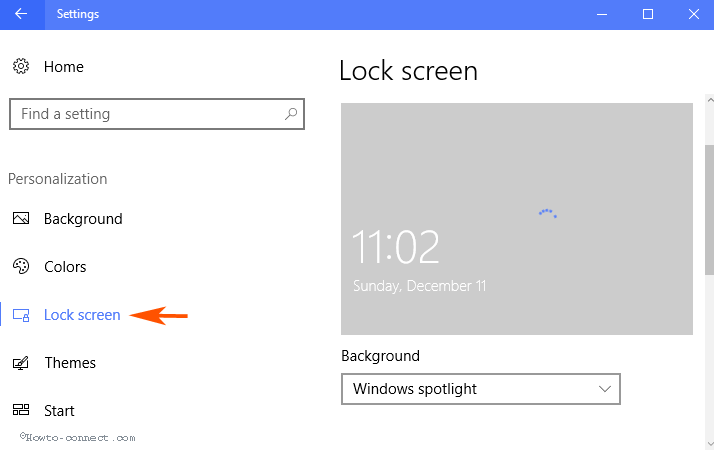
Personalize Lock Screen in Windows 10
1. Transship (Change) Lock Screen Wallpaper in Windows 10
Let us begin the settings of the Lock Screen by learning how to change the image of the Lock Screen. And for that the first section of the Lock Screen Settings, Lock Screen Preview will be used. You will see different images are provided by Windows 10 to set any of them as a background of your Lock Screen. Choose the one that impresses you. But if you are not happy with the list of provided images and wish to set any of your desired picture as Lock Screen background,
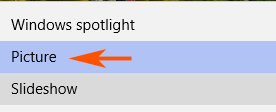
- Choose Picture in the dropdown and click the Browse button.
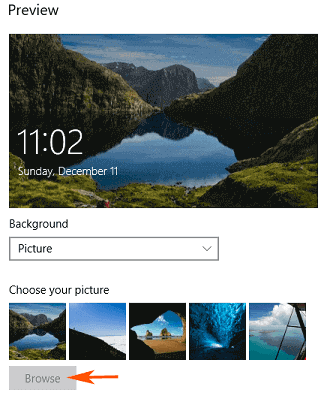
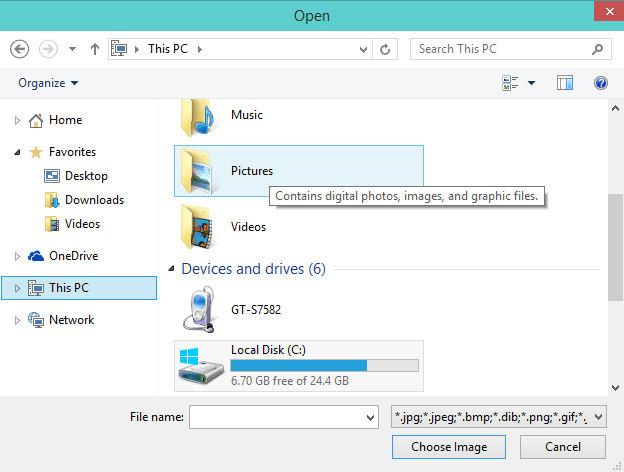
- Scan your computer and pick your desired image and click Choose Image.
2. Play Slide Show with Images on Windows 10 Lock Screen
Setting only one image as the Lock Screen wallpaper might not fulfill the need of many users and thus their face might glow up seeing a slide show of their desired images as the background of Lock Screen. So, use the slider of the Play a slideshow on the lock screen and turn it on.
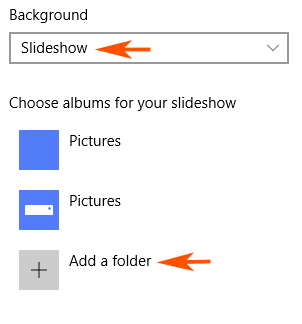
The moment you do this, you will see a new list just under the slider which asks you to Use pictures from Pictures library of your computer. (In the below screenshot you will not see Pictures folder of OneDrive because it is not synced here. Otherwise, you will also see the Pictures folder of OneDrive.)
- If your desired pictures are not present in these folders, click Add a folder button.
- Browse your computer to look for the folder that contains your desired images and select Choose this folder button.

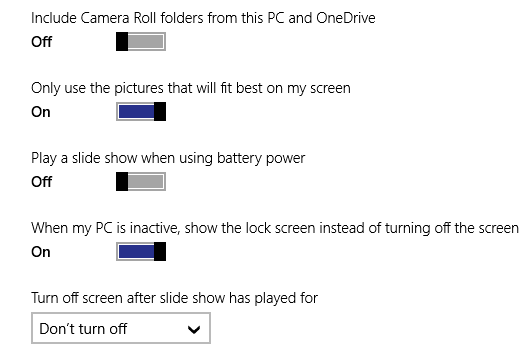
- Now, the next thing for you is to customize related settings of the slideshow. They are:
3. Include Camera Roll folders in Lock Screen from this PC and OneDrive
If you have ever taken images using the Camera of your Windows 10 you will know that the captured images are stored in a folder called Camera Roll of the Pictures library. So, the images stored in the Camera Roll will be used in the Lock Screen slide show. The same thing happens with the OneDrive also. The images present in the Camera Roll folder of OneDrive will also be used here. If you back up the pictures using OneDrive that are stored in your smartphone then they are also present in the Camera Roll folder. And the pictures that you capture from your Windows phone are backed up on a folder called Camera Roll of your OneDrive.
4. Only use Pictures that will Fit best on my Screen
It is not necessary to have all the images of the same size. Some might be of good resolution and some might be bad. So, if your make this option switches on, the Lock Screen will show those images that hold a good resolution and fits exactly on your screen. It will omit the images that have a poor resolution and doesn’t fit perfectly on your Lock Screen.
5. Play Slide show when using Battery Power
To Personalize Lock Screen in Windows 10 you will find this option on the laptops and tablets and not in the desktop computers. Windows will play a slide show of images when you are working on battery. Of course, this will consume a good amount of your battery power and thus switching on his option depends on your battery’s capacity.
6. When PC is inactive, Show Lock screen instead of Turning Off Screen
When you don’t use your computer for some time, the screen gets locked and switches off the screen. When you allow this option, it will keep your screen on even when it is inactive. Unlike others, the screen will not turn off and instead will display a slide show of your images. If you own a tablet, you can keep this option on and it will look like a picture frame displaying a slide show of images.
7. Turn off Screen after Slideshow has Played for
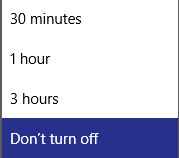
This option lets you set a closing time for the slide show. Use the drop down menu and you can choose after how much time the slide show should be stopped. You have three-time slots to choose from 30 minutes, 1 hour, and 3 hours. Select Don’t turn off if you wish to keep it running. Well, by default it never stops as the Don’t turn off is selected.
8. Add Live Data from Windows 10 Apps to Lock Screen
The second section of the Lock Screen settings is the apps whose important information you can get on your Lock Screen. When you are into the Lock Screen apps section, you will see three settings are available.
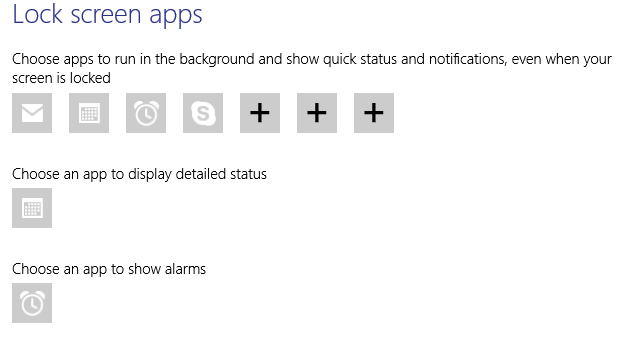
The first one asks you to choose apps that run in the background and whose information will be exhibited when the screen gets locked. Click on the plus sign (+) button to add your required application. You can see the apps that have been installed on your computer.
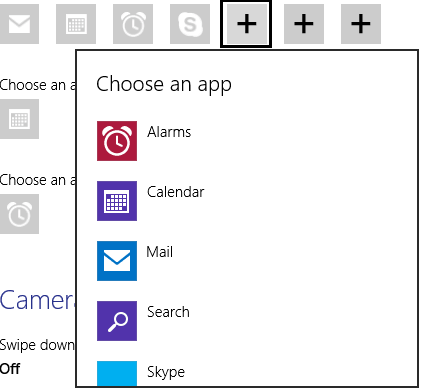
- The second settings part allows you to pick up an app whose detailed status you wish to see on your Lock Screen.

- Thirdly, you can pick up an app to display the alarms. But when you do so, you will only get the Alarms app which has been set by default. Thus, by selecting it, you will be displayed the alarm on your Lock Screen. We have written a detailed article on Alarms App of Windows 10 which can be accessed from here:

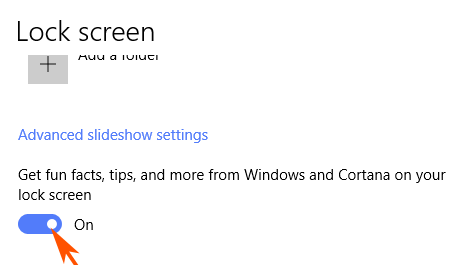
Show lock Screen Background Picture on Sign in
Screen If you want to see an identical picture on both of the Sign in screen and lock screen this toggle is useful.
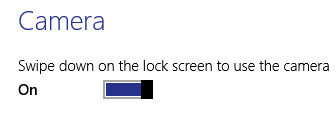
9. Use Camera App on Windows 10 Lock Screen
The last section of personalize Lock Screen in Windows 10 is quite interesting. If you are on a Windows 10 computer that has a webcam to it, you can use the camera without being signed in if your screen is locked. To make this happen, you have to turn the option on that says Swipe down on the lock screen to use the camera. You can use the apps that need the camera even your screen is locked.
Conclusion
It makes feel so good when you share some good information with others to Personalize Lock Screen in Windows 10. Explore your favorite pictures and enjoy displaying them on your Lock Screen. Go with the slide show also if you have lots of them to show. The only thing that the Lock Screen settings don’t provide is how quick or slow the slide show will run. If it launches any settings related to this, it would be very good. Then the best part is that it gives you the chance to see the important details of your apps in the Lock Screen. Use the settings and see yourself how you feel and also how it is performing. Share with us the stories of your favorite pictures that you wish to use on Lock Screen ;-)! Keeping jokes apart, tell us whether it stood up to your limitations or not and make us learn something if you have it in your store.
