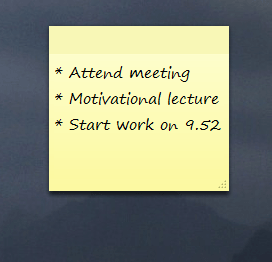
To delete a Sticky Notes on the desktop is easier than creating. It requires only a click on the close button just located at the upper right corner of a Note. When we talk about confirmation It does require confirmation when default features are enabled and when you disable the inbuilt features you don’t get any confirmation pop up. And unfortunately, Windows 10 does not have any tool using you would recover deleted sticky note.

Sometimes you might delete sticky notes unintentionally. In this situation, it is an arduous task to get it back. For the solution, we are presenting here a few tips using which you could redeem the sticky notes on Windows 10 without a third party tool.
On Windows 10, you find Sticky note with more features. It is a good solution to quickly note down the contact numbers, email address and many more.
How to Redeem Deleted Sticky Notes on Windows 10
Tips 1:
Using Command
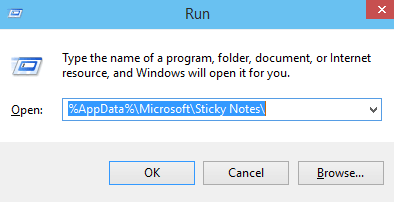
1. Launch the Run dialog box by pressing Windows and R keys together on your PC.
2. Write the given text
%AppData%\Microsoft\Sticky Notes\
in that box and tap on OK button.

3. See StickyNotes (.SNT) file in the Sticky Notes folder. When you make double-click on the file, but you would not get any response because Windows 10 does not support .SNT extension to Sticky Notes or another program due to default settings.
4. Next, make right-click on that StickyNotes (.SNT) file and open it with a supported text editing application like Microsoft Office Word.
5. When the file is opened in Word then the actual contents of the Note will show at the lower part of the document which is given in the screenshots.

Note: If you want to open the file using Notepad then you will not able to locate the actual notes. You need try to open the file with using equivalent to Office Word.
If the required content will not appear on your desktop then you can restore the file to a previous version by right-clicking on StickyNotes.SNT file and hit the restore previous versions option.
Tips 2
How to Enable Delete Confirmation for Sticky Notes Using Registry Hack
If you have turned off the delete confirmation prompt for Sticky Notes on your PC then you can turn it on using Registry Editor again. You may follow us to enable it.
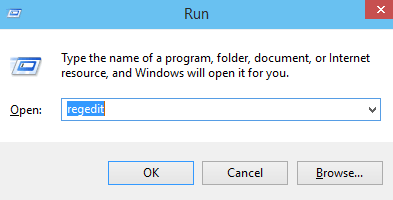
1. Launch the Registry Editor by clicking Windows and R keys and type regedit in the run dialog box concurrently followed by OK button.

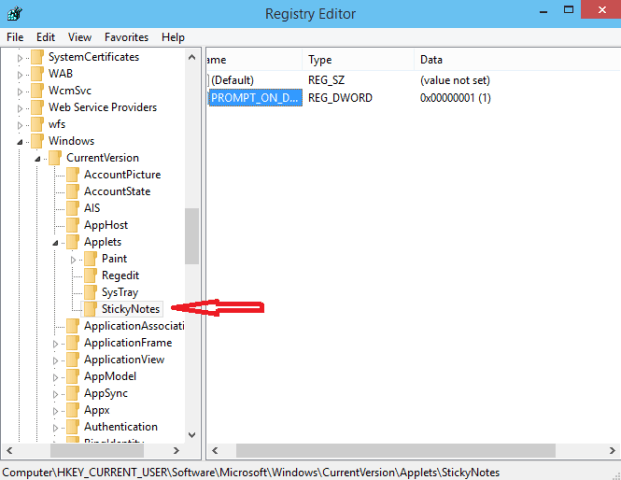
2. Follow the given registry key to open StickyNotes finally:
HKEY_CURRENT_USER\Software\Microsoft\Windows\CurrentVersion\Applets\StickyNotes
3. In the right pane, you will see the PROMPT_ON_Delete value. Double click the same and put the value “1” to activate the Delete confirmation box.

After this registry hack, whenever you will click the X button of a Sticky Note then you will get the warning notification “Delete Note: Are you sure you want to delete this Note” on your screen including with Yes and No tabs. That’s it.

in latest windows 10 update , sticky notes became an app and its folder became in packages (the numeric part varies) and the file is plum.sqlite:
\AppData\Local\Packages\Microsoft.MicrosoftStickyNotes_8wekyb3d8bbwe\LocalState\
thanks sohail.
There is another way
if you have your old snt file
open a new sticky note
write something
close it (Delete it)
now go to the drive in which you have windows installed
users\your account\AppData\Microsoft\Sticky Notes\
and replace the snt file there with the snt backup file that you have
open sticky note again from start and you will have your old notes back.
Thanks a lot that was quite helpful.