File History is the programmed system in Windows 10 that goes on safeguarding your private or particular files which are saved in vital places of your computer. The files that are saved in Libraries, Desktop Folders, Documents, Pictures, Videos, Music and the OneDrive files that are obtainable in offline are provided with special and nonstop security by the File History.
Time to time, it inspects the file system and the look for the changes and if found any they are copied to another place. To backup your files when you start utilizing the File History, you have to set up a drive in which you will be saving your files. It is always recommended to use an external drives or network places to take the backup of files. As mentioned earlier that the files located in Libraries, Desktop Folders, Documents, Pictures, Videos, Music and the OneDrive files are only be backed up by File History on Windows 10, so if you wish to backup those files and folders which are located in other places than you have to put them into these locations so that they can be backed up.
We will show you the workings of File History from Settings of Windows 10. If you are ready with your external drives (like the external hard disk or huge spaced USB drive) then we should plunge into the steps now.
How to Backup Data using File History on Windows 10
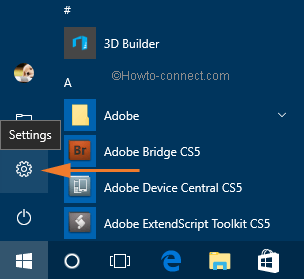
- To learn its workings, you have to first get into the File History. So open Settings from the Start Menu of Windows 10.
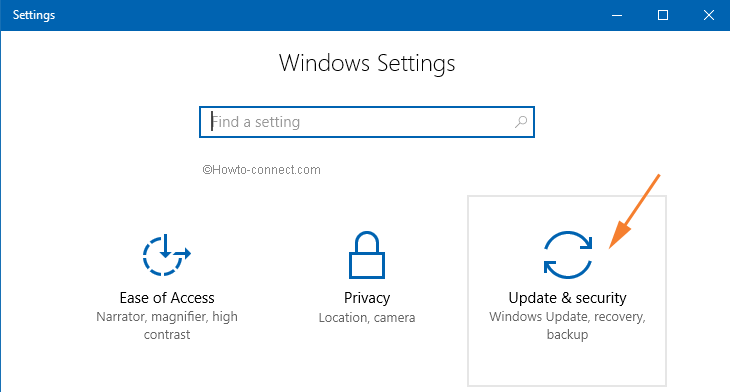
- Scroll down and go to Update & security.
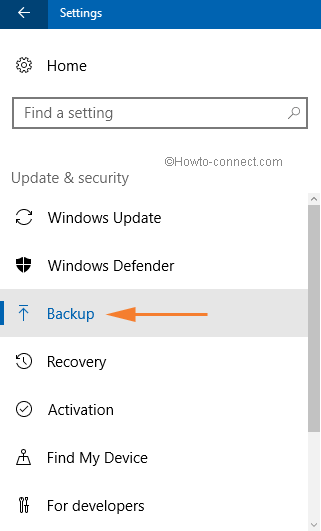
- Among the four available options of Update & Security, you will select the Backup.
- The right pane of the File History is the place where you will carry out the work. You will see a couple of options being mentioned there. Click + icon just before Add drive. This action leads to scan for the USB or hard drive you inserted in your PC. After it shows the same click More options link
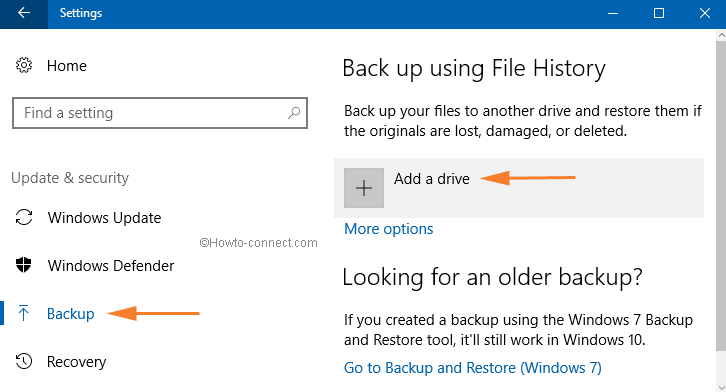
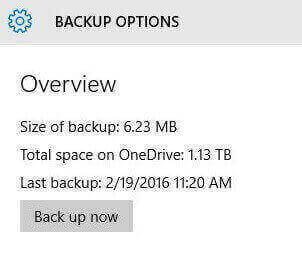
- Click Backup now button.
CONCLUSION
Backing up of the files has become so easy with the File History option of the Settings. All you have to make sure is to insert a drive to carry out the process. The Settings File History on Windows 10 has limited options available. But to view the other advanced options you can go to the Control Panel. Looking forward to your views!

Further to my message above about backing up File History, the Toshiba laptop which does recognize the external drives is running Microsoft Office 2013 but the desktop which does not recognize them has MS Office 2010: does this make the difference?
It all seems logical but does not always work.
Yesterday I backed up File History from a Toshiba Satellite 300 laptop onto a WD 0730 external drive with no problem, but could not – and still cannot today – do a similar backup of my desktop PC.
File History on the desktop will not recognize the WD drive nor a new Toshiba Canvio drive, though both will show up in File Explorer when plugged into either the USB 2.0 or 3.0 ports. File History will, however, recognize USB sticks, either one dedicated to ReadyBoost or other ones plugged into the USB 2.0 port – but that is not what I want to use. I tried downloading WD drivers and followed all the tips in the forum posts but simply cannot get the two external drives recognized, even though the USB stick are recognized. Any idea?