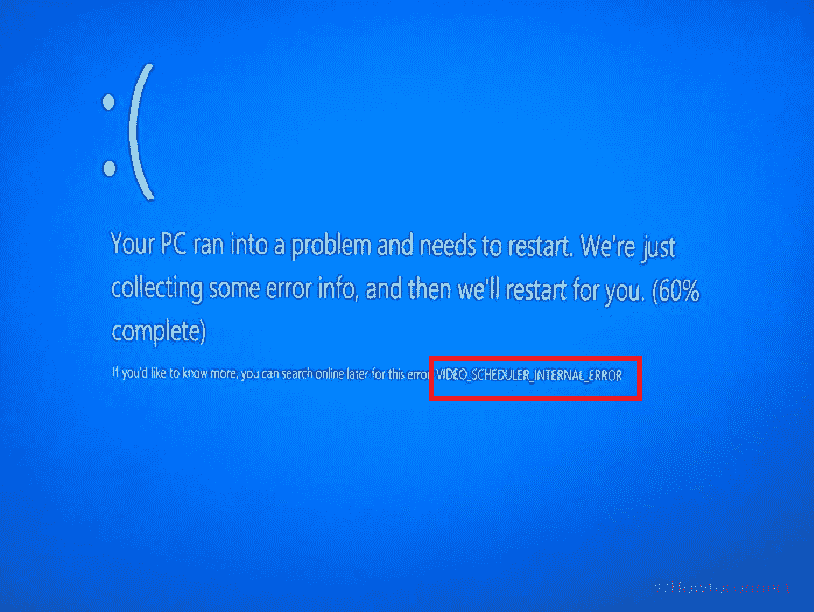
The 0x00000119 is a common issue that can occur in Windows and can lead to a blue screen of death (BSOD) with system crashes. This error is related to graphics drivers and can be caused by a variety of factors such as outdated applications, faulty hardware, or corrupted system files.
If you are experiencing the 0x00000119 on your Windows PC, there are several methods you can use to fix the issue. In this article, we will explore the most effective solutions to this problem. See: Fix: Video Scheduler Internal Error in Windows 10.
Table of Contents
0x00000119 Blue Screen in Windows
Here is how to fix Error Code 0x00000119 Blue Screen in Windows –
Way-1: Update Graphics Drivers
The most common cause of 0x00000119 error is outdated or corrupt graphics drivers, therefore, the first step in fixing this bug check BSOD is to update them. You can do this manually by following the steps:
- Press Windows key + X.
- Select “Device Manager” from the list of options.
- Expand the Display Adapters category by clicking on the arrow mark or by a double click.
- Right-click on your graphics card.
- Select Update Driver from the context menu.
- Then, choose “Search automatically for updated driver software” and head to the on-screen guide to complete the process.
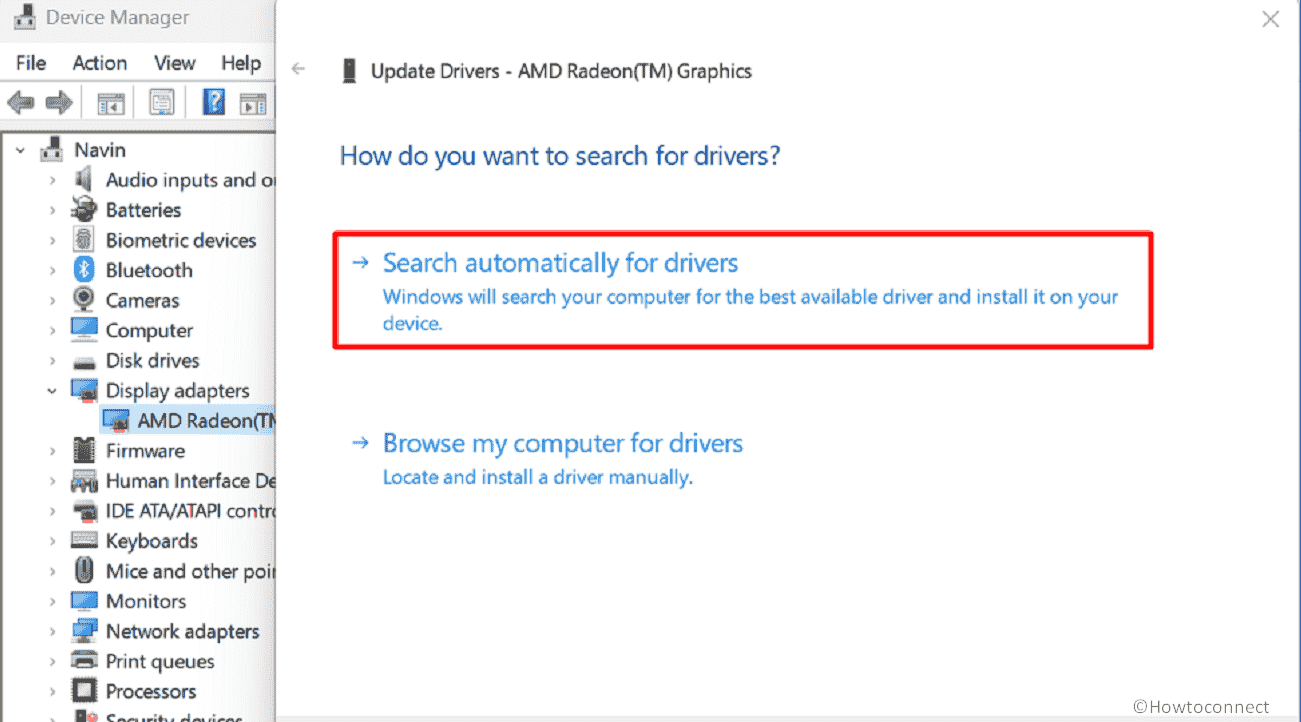
Note: Usually, for error 0x00000119 NVIDIA is found faulty and the Geoforce company releases hotfixes from time to time. So keep track of the company’s hotfix page. Once any patch is rolled out, download and install it.
If there is no updated driver available, you can download the latest one from the manufacturer’s website and install it manually.
See: Dump File Location Windows 11 or 10 and How to Configure System to Collect Memory Dump Files in Windows 11 or 10.
Way-2: Install Pending Windows updates
Windows update might rescue Video_scheduler_internal_error blue screen error if it is started because of buggy software or other updates. So check for and install if any pending is available:
- Hold down the Winkey.
- Type updates and hit Enter.
- When Settings open, click on – Check for updates.
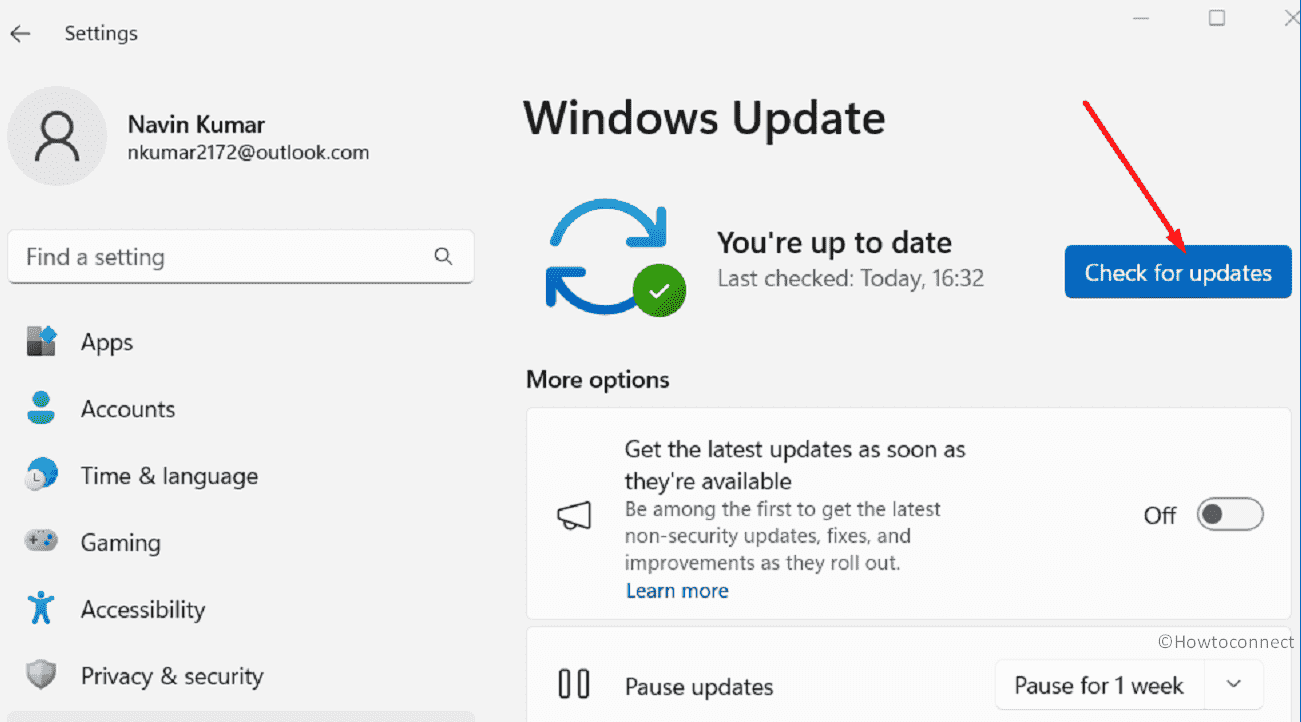
- Once the system completes scanning, select – Download and Install.
- When asked, click on Restart now.
Way-3: Check for Hardware Issues
If the previous method did not resolve the issue, it’s possible that the 0x00000119 BSOD is caused by faulty hardware. In this case, you should check your hardware components, such as your graphics card, RAM, and hard drive, for any issues.
To check, follow these steps:
- Right-click on Start and select Device Manager.
- Double click the categories of the hardware components you want to check, such as Display Adapters, Memory technology devices, and Disk drives.
- Then, right-click on each device and select Properties from the context menu.
- Check the status of each device to see if it’s working properly. If there are any issues, such as yellow exclamation marks or error messages, try updating the drivers for that device or replacing the hardware component if necessary.
You can also use built-in Windows tools such as the Memory Diagnostic tool and the Disk Check tool to check your RAM and hard drive for any issues.
Way-4: Run dism tool and System File Checker
In case, video_scheduler_internal_error (119) is caused by corrupted system files, you can use the SFC tool to scan and repair any corrupted files. Furthermore, The Deployment Image Servicing and Management (DISM) tool is another built-in Windows tool that can help you fix the “Video Scheduler Internal Error” by repairing corrupted system files. To run them, follow these steps:
- Click on – Start.
- Type – cmd.exe.
- Select – Run as administrator.
- On the User account control dialog, click – Yes.
- Type “sfc /scannow” (without quotes) and press Enter.
- Wait for the scan to complete and once you see “Windows Resource Protection did not find any integrity violations.”, restart your PC.
- Check if 0x00000119 error code is fixed.
- In case, the issue still persists, start the Command prompt with administrative privileges again and run the below command:
dism /online /cleanup-image /checkhealth
dism /online /cleanup-image /scanhealth
dism /online /cleanup-image /restorehealth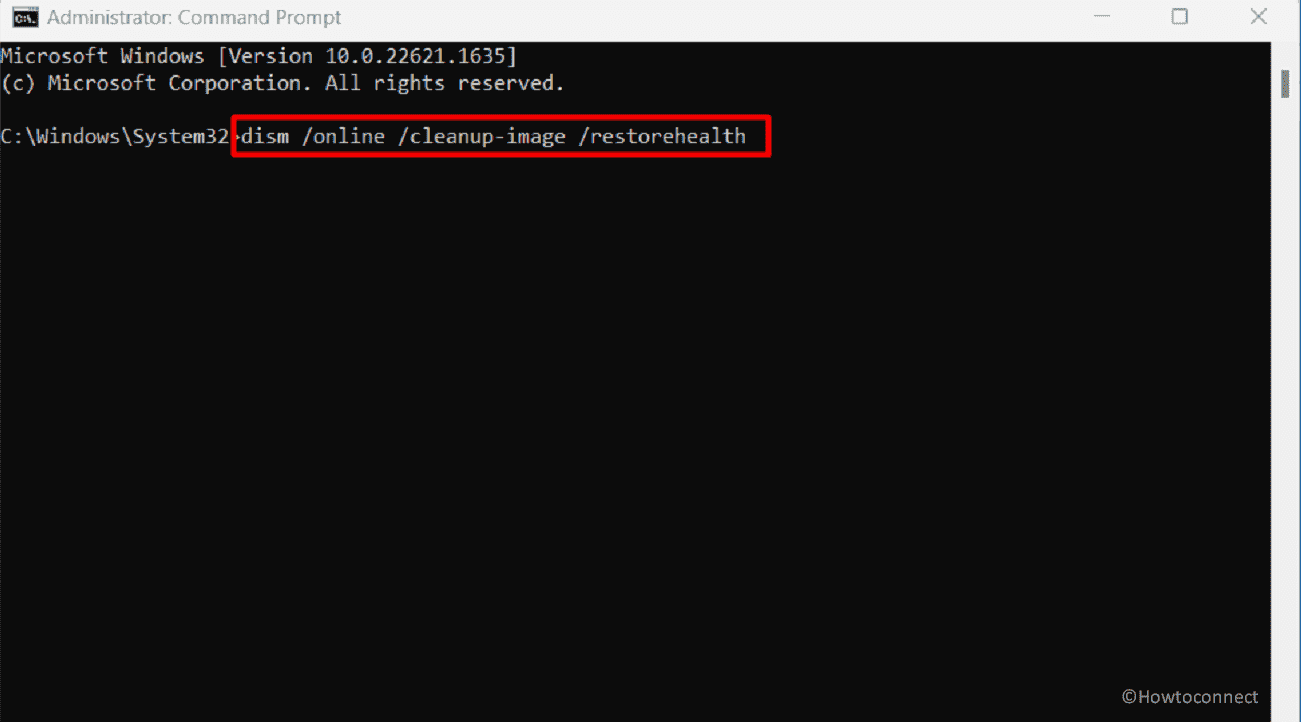
- Once completed, reboot the system.
Way-5: Disable overclocking
Overclocking is the process of increasing the clock rate or frequency of a computer component, such as the CPU, GPU, or RAM, to achieve higher performance than the manufacturer’s recommended specifications. This can cause increased heat production, which can damage or shorten the lifespan of computer components. Therefore, for 0x00000119 Video Scheduler Internal error, overclock might be a culprit.
Disabling Overclocking might help fix this Blue Screen error in Windows so move forward with the steps:
- Restart your computer and access the BIOS settings by pressing the appropriate key during boot-up. The key may vary depending on your computer manufacturer and model, but it is usually one of the following: F2, F10, F12, Esc, or Delete. You can consult your computer’s documentation or manufacturer’s website for the specific key.
- Once you are in the BIOS settings, look for an option to reset the settings to their default values. The option may be labeled as “Load Setup Defaults”, “Reset to Default”, or similar.
- Select the option and confirm the action.
- Save the changes and exit the BIOS settings.
- Once your computer has restarted, the overclocking should be disabled, and your computer should be running at the manufacturer’s recommended clock rate or frequency.
Way-6: Perform a Clean Boot
Performing a clean boot on your Windows PC can help you troubleshoot 0x00000119 Video scheduler internal error (sometimes occurring due to AMD graphics) by disabling all non-essential startup programs and services.
This allows you to identify and isolate the cause of any issues with your system. Here are the steps to perform a clean boot in Windows:
- Click on – Search.
- Type – msconfig.
- Press – Enter.
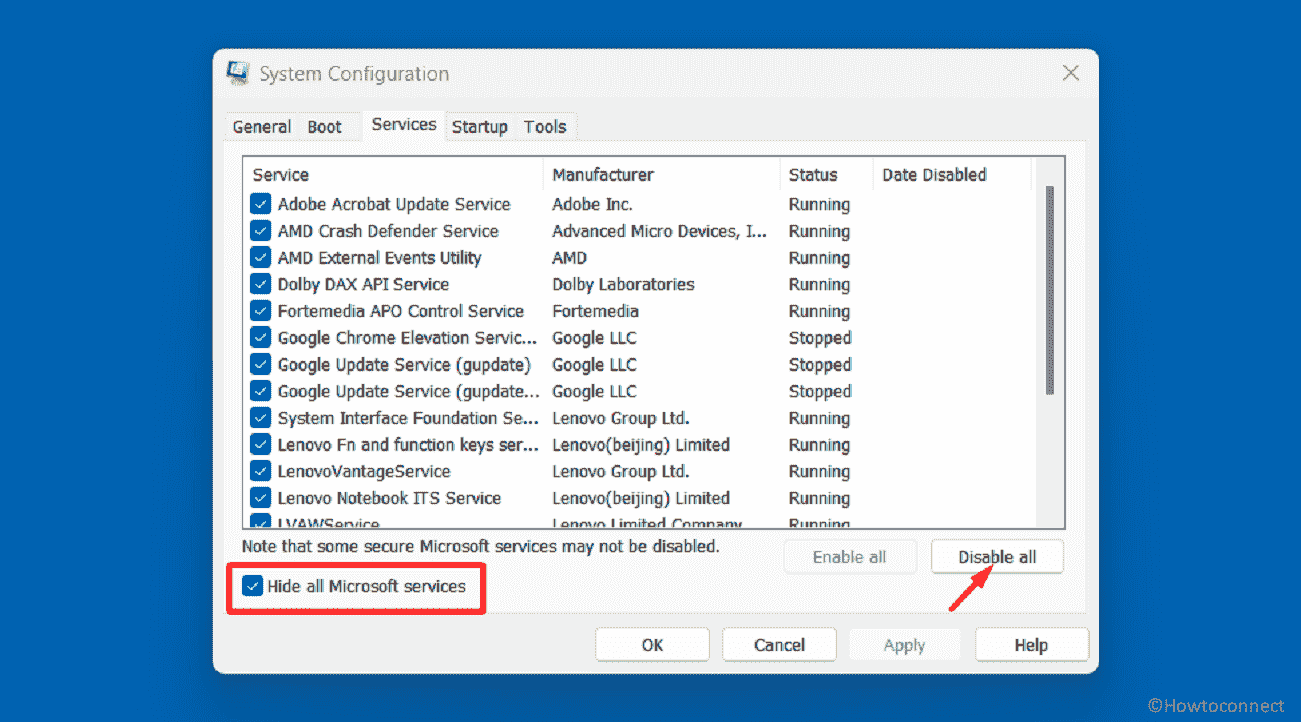
- In the System Configuration window that opens, select the Services tab.
- Check the box next to “Hide all Microsoft services” at the left bottom of the window.
- Then, click on the “Disable all” button.
- Next, select the Startup tab.
- Click on the “Open Task Manager” link.
- In the Task Manager window, select each startup item and click the “Disable” button.
- Close the Task Manager window and return to the System Configuration window.
- Click on the OK button to save the changes.
- Restart your computer for the changes to take effect.
Once your computer restarts, it will boot with a minimal basic set of services and programs. Now, you can then perform any necessary troubleshooting steps to identify the cause of the problem. To return to your normal startup configuration, follow the same steps and click the “Enable all” button in the System Configuration window, then restart your computer again.
Way-7: Use System Restore
System Restore is a built-in feature in Windows that allows you to revert your computer’s system files and settings to an earlier point in time when 0x00000119 was not triggered. This way after restoration, you should no longer find the BSOD. Therefore, follow the method –
- Press Winkey+R.
- Type rstrui.exe in the Run dialog box.
- Hit Enter.
- In the System Restore window, check the option Choose a different restore point.
- Click on Next.
- From the list of available restore points select the one when the blue screen was not generated
- Click on “Next” to continue.
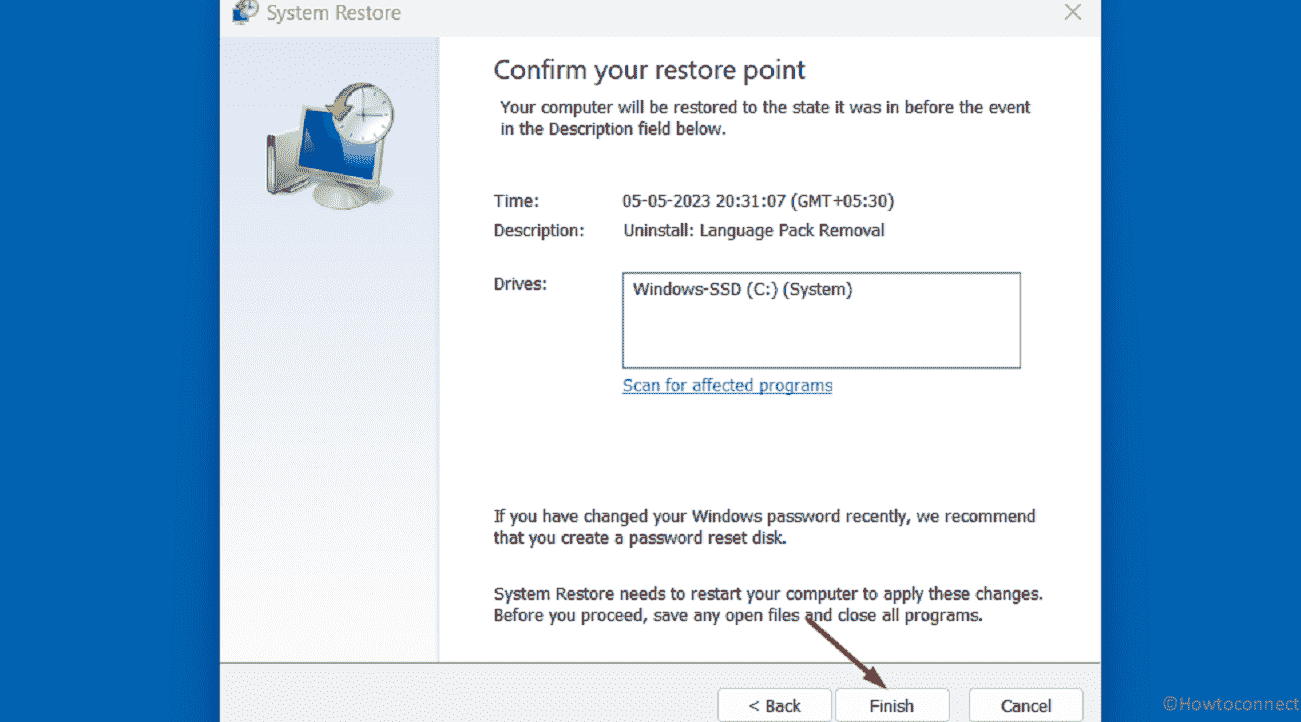
- Review the details of the selected restore point and click on “Finish” to start the process.
- Confirm that you want to proceed with the restore by clicking “Yes.”
- Wait for the restore process to complete. This may take several minutes or more, depending on the size of the point.
- Once the system restore process is complete, the computer will reboot.
Hope these 6 methods will solve the Error Code 0x00000119 blue screen in Windows.
Methods:
Way-1: Update Graphics Drivers
Way-2: Install Pending Windows updates
Way-3: Check for Hardware Issues
Way-4: Run dism tool and System File Checker
Way-5: Disable overclocking
Way-6: Perform a Clean Boot
Way-7: Use System Restore
That’s all!!
