Are you unable to install Windows update due to 0x80240017 error? This issue stops updating process unexpectedly and suggests to Try again. For a major number of users, Office updating files get stuck and display this error.
0x80240017 Error may occur due to Internet interruption, update cache, or Service issue. A few simple methods will help you come out of this trouble.
Table of Contents
0x80240017 Error Windows Update Problem on Windows 11 and 10
Either of the 2 Methods helps to fix this Issue – 1. Resetting Update cache and 2. Running Troubleshooter.
Method 1 – Reset Update Cache to Fix 0x80240017
In this regard, you will Stop the services pertaining to update, wipe out the stuff from the Software distribution directory and, then start the same.
Stop Windows Update and Background Intelligent Transfer service
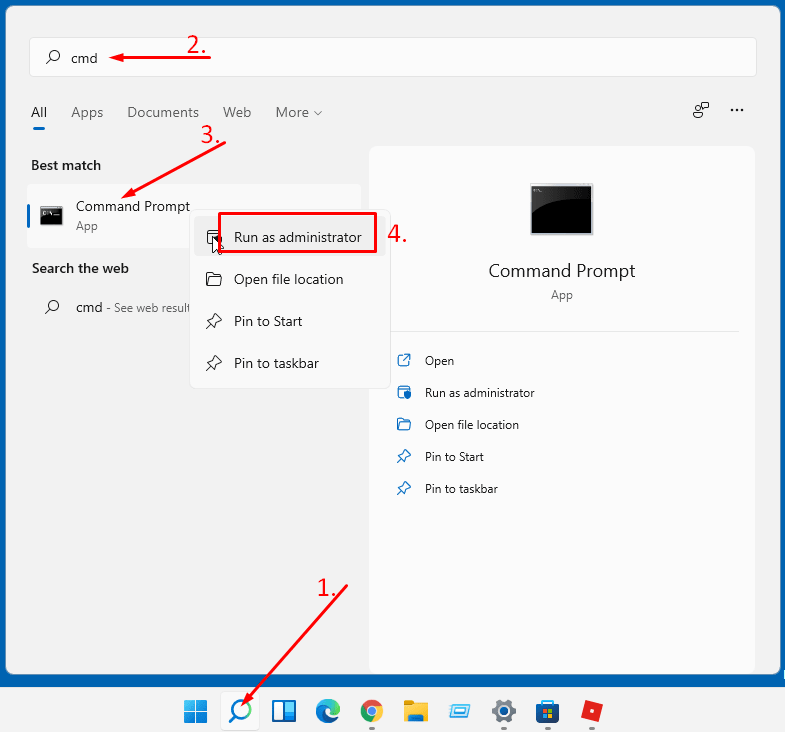
Step 1 – Press Windows logo key on the keyboard and type cmd. Right-click on the result. Select – Run as administrator.
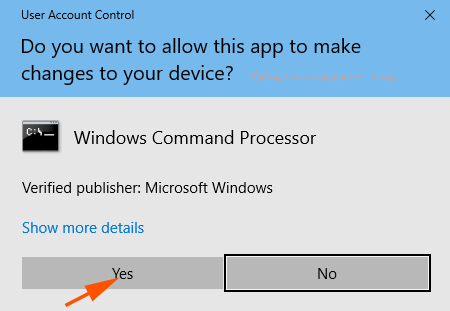
Step 2 – As soon as the UAC pop up appears select Yes.
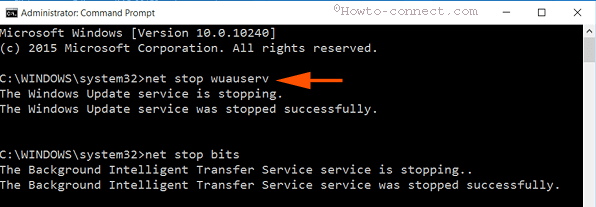
Step 3 – Copy the below piece of Command and paste into the revealed command prompt.
net stop wuauserv
net stop bits
Press Enter button for the successful execution of the windows updates command line.
Delete the Content in Software Distribution Folder
Step 2 – Click Win + R, type C:\Windows\SoftwareDistribution and press Enter.
Step 2 – Access the directory C:\Windows\SoftwareDistribution, select all the folders and files here and click Delete button.
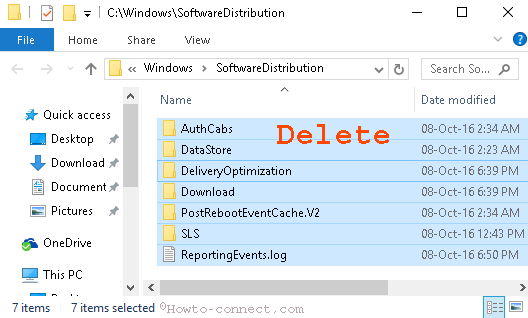
In most cases, a few files deny being deleted. If you face this type of issue too then reboot your PC and delete it.
Start the Services again and see if 0x80240017 Error Windows Update Problem Solved
Step 1 – Once you delete the files, copy the commands from below.
net start wuauserv
net start bits
Step 2 – again paste into the Command prompt and run by pressing the Enter key.

Now click Try again and check if 0x80240017 Error settles.
Method 2 – Run Troubleshooter to Fix 0x80240017
In addition, the Troubleshooter is the utility to sort out entire issues.
Step-1 – So write troubleshoot in Start menu search and press Enter.
Step-2 – Click Fix problems with Windows Update on the left side.
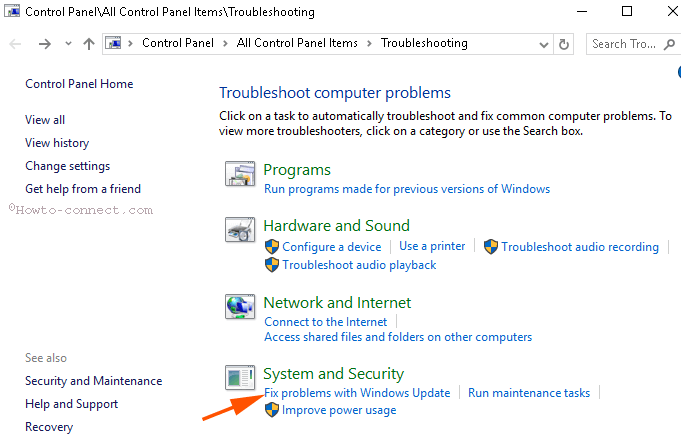
Step-3 – The Troubleshooter wizard comes on the screen, click Next.
Step-4 – Now click Try troubleshooting as administrator option.
Step-5 – The troubleshooter will scan the services, registry entries, and other components to find problems. At last, you see two options Apply this fix and Skip this fix. Select Apply this Fix, the first option.
Consequently, all the problems will be repaired so again restart the PC. Confirm if 0x80240017 Error on your Windows 11 or 10 gets resolved.
Conclusion
Therefore, these are the procedures and steps for How to fix 0x80240017 Error Windows Update Problem on Windows 10 and 11. Hopefully, the first method will solve the issues otherwise, a troubleshooter is ever available for you.