Table of Contents
21. Snap windows to the corner locations
Snap Assist feature in Windows 10 permits you shift your windows to varying corner locations. It also helps in snapping two windows side-by-side. Moreover, you can even make your window “quarter size of the screen” by dragging it to the corner.
22. Scrolling between Inactive windows
If you are working with multiple windows at the same time, Windows 10 provides you a facility to quickly switch between windows/tasks running in the background.
For this, simply go to the Settings app => Devices => Mouse & Trackpad. There, you’ll see an option called “Scroll inactive windows when I hover over them”.
Enable it and enjoy this feature through your mouse.
Iff you find a difficulty then follow How to Enable / Disable Scroll Inactive Windows on Windows 10.
23. Arrange Windows
You can even rearrange windows in Windows 10.
- Simply right-click on the taskbar to launch 3 different positioning viz: “Cascade Windows”, “Show windows stacked” and “Show windows side by side”.
- Choose anyone of them and click OK.
This will induce three different formats to how a window is displayed once you switch/ hover between them.
24. View Apps Across Desktops
The taskbar displays apps and windows from the current desktop only (by default).
To change this, go to Start => Settings => System => Multitasking => Virtual Desktops and select the “All desktops” option from the drop-down menu.
25. Get back Icons
You can easily access some of the key locations on your computer through the get-back icons. To do this, head to:
- Start => Settings => Personalization => Themes.
- Now click the “Desktop icon settings” and select the list of icons which you want on the desktop.
You can See the guide for How to Add Desktop Icons to Windows 10 After Creators Update.
26. Peek at the Desktop
You can at anytime confirm what’s going on your desktop while doing other tasks. Simply, right click the button at the lower right-most end of the taskbar and choose the “Peek at desktop” option from there. Now if you hover the pointer over this icon, it’ll display you a quick preview of the current desktop. This will end once you move the cursor away.
27. Label and group Windows tiles
The Start menu arrange tiles inside two groups which have their own default names. You can rename these tiles simply by clicking their labels. If you have already pinned your tiles, click the two parallel lines and rename the group/Windows tiles.
28. Uninstall Apps – Windows 10 Tips
You can easily uninstall any application/program from the Start menu itself.
Simply right-click the app (in the Start menu) and hit the “Uninstall” option from the list. This will remove the desired app from your PC.
Follow a guide in detail in this regard – How to Uninstall Software From Windows 10 After Creators Update.
29. Find Apps Faster
To quickly find an app among the alphabetically arranged list of programs, press the first letter (the first initial) of the app you are looking for and then scroll down to find your program on the list. This obviously save time and efforts.
Get detail in this article – How to Find Programs in All Apps list Easily on Start Menu Windows 10.
30. Resizing the Start Menu Windows 10 tips
You can simply resize your Start menu to create space for your customizations.
- Simply place your cursor on the top or right border of the Start menu.
- The pointer will change into an arrow using which you can easily increase or decrease the size of the Start menu.
Go to the instructions here – How to Change Color and Size of Start Menu on Windows 10.
31. Remove Tiles
If you don’t want to contain some or any of the tiles in your Start menu, you can simply remove them from the location. How?
- Right-click each tile one after another and select “Unpin from start” option to remove them from the site.
Try this guide if you decide to remove the tile – Create Folder on Start menu and Place Multiple Tiles Windows 10.
32. Changing names and icons of the tiles
You can even change icons and names of tiles in Windows 10. To do this:
- Right click any tile and select “open the file location” option from the list.
- Press F2 to rename the shortcut.
OR,
- To change its icon, straightforwardly right-click on the Shortcut, select properties and then click the “change icon” option.
- Now assign the icon according to your choice and click OK.
33. Switch to the Start screen
If you want more items to pin to the Start menu, you can stretch it to fit the entire screen. Navigate to Start => Settings => Personalization => toggle the “use full-screen start when in the desktop” option to stretch it.
Follow the directions from here – How to Shift From Start Menu to Start Screen on Windows 10.
34. Pin settings programs to the Start Menu
To see programs and settings in the Start menu, right click it (the desired file/folder/shortcut) and select “Pin to Start” option from the list.
This will locate the item to the right side of the start menu which will then become easy to access.
Follow the instructions in details from here – How to Pin Settings App Categories to Start in Windows 10.
35. Turn off Tile updates
You can easily turn off updates taking place in the tiles and other distractions anytime. How? Simply,
- Right-click these tiles (desired)
- Select “Turn live tile off” option to switch off getting updates.
36. Operating Start using Keyboard
You can switch items in the start menu using the keyboard now. Just press the Windows key to open the menu. Now, use arrow keys to navigate or you can simply search by typing the name in the search box.
37. Choose folders to appear on Start
You can even list your personalized folders in the Start menu in Windows 10.
Simply go to Start menu => Settings app => Personalization and then click on the “Choose which folders appear on Start” option to select the folders.
Also, you can remove them anytime from the Start menu as well.
38. Hide the recently opened apps Windows 10 tips
To hide recently opened apps:
- Go to Settings and then Personalization.
- Click “show recently added apps” option to turn it off afterwards.
This will hide all your recently opened applications from the Start menu.
39 Colored Start
You can easily colorize your Start menu if the default looks boring to you. To select your own color go to:
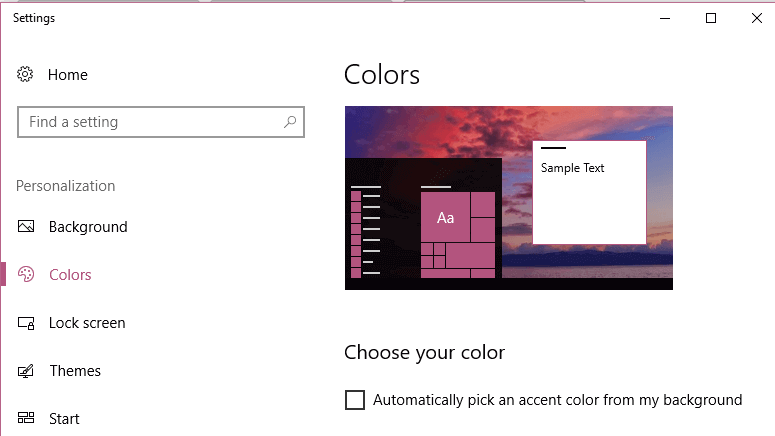
- Start => Settings => Personalization => Colors.
- Now disable the “Automatically pick an accent color from my background” option.
- At last, pick your own accent color from the palette to customize Start menu in your own way.
Follow specific instructions in detail – How to Choose a Custom Accent Color Using Settings App on Windows 10.

40. Streamline the Start Menu
To stop start menu from showing the most used programs in the left-side pane:
- Open Settings app (from Start menu) and head to Personalization. You’ll find an option named “Show most used apps”.
- Click and turn it off to avoid being notified about the programs which you use frequently.
