Windows Defender as equipped by Microsoft is the elementary service that bestows security to your machine but it still holds one loophole. As per its default nature, its scanning feature is not associated with the context menu and thus scrutinizing any files or folders or removable drives becomes difficult.
So, whenever any removable drive is attached to your Windows 10 machine, the urge for scanning them becomes the primary task and if you add up the “Scan with Windows Defender” in the context menu, you can examine any stuff of your machine easily and can obstruct the threats.
How to Add Scan with Windows Defender to Windows 10’s Right-Click menu
- Write Notepad in the search field and underneath Best match portion, click Notepad Desktop app.
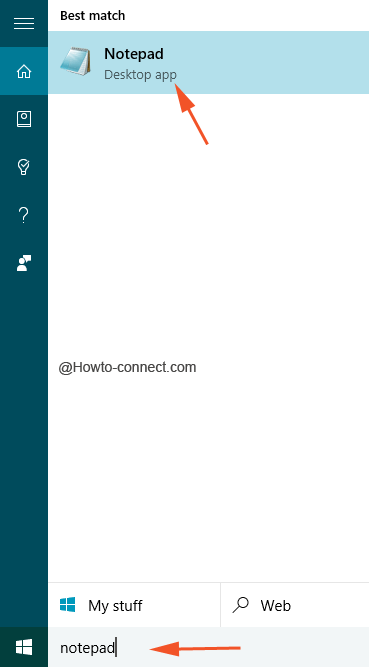
- Now copy the below jotted entire text and paste it in the Notepad that is opened in the first step; also do not attempt any modification and ensure to paste it in the same way.
Windows Registry Editor Version 5.00
; Folder Scan

[HKEY_CLASSES_ROOT\Folder\shell\WindowsDefender]
"Icon"="%ProgramFiles%\\\\Windows Defender\\\\EppManifest.dll"
"MUIVerb"="Scan with Windows Defender"

[HKEY_CLASSES_ROOT\Folder\shell\WindowsDefender\Command]
@="cmd.exe /s /c \"\"C:\\Program Files\\Windows Defender\\MpCmdRun.exe\" -scan -scantype 3 -SignatureUpdate -file \"%1 \"\" & pause"

; File Scan

[HKEY_CLASSES_ROOT\*\shell\WindowsDefender]
"Icon"="%ProgramFiles%\\\\Windows Defender\\\\EppManifest.dll"
"MUIVerb"="Scan with Windows Defender"

[HKEY_CLASSES_ROOT\*\shell\WindowsDefender\Command]
@="cmd.exe /s /c \"\"C:\\Program Files\\Windows Defender\\MpCmdRun.exe\" -scan -scantype 3 -SignatureUpdate -file \"%1 \"\" & pause"
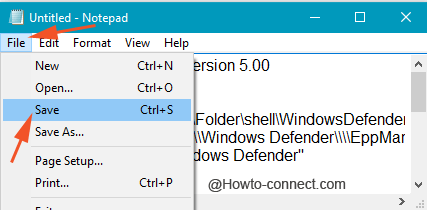
- After you paste the code of letters in the Notepad, click File, thereupon Save.
- In the saving window, pick up your desired location and entitle “Add_Scan_with_Windows_Defender_Context_Menu.reg” in the File name field; you can type or even copy the entire name along with quotes.
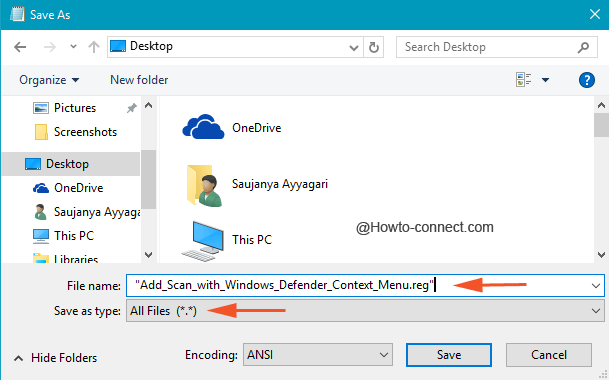
- Also, see if All Files is opted in the Save as type so that the saving is done in a proper format.
- Click Save button.
- Now head to the location where the .REG file has been stored, and twice hit on the file.
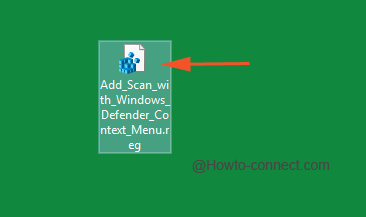
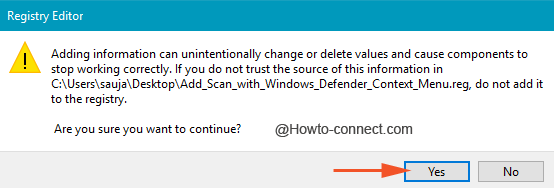
- Click Yes when a wizard prompts for the merger to happen.
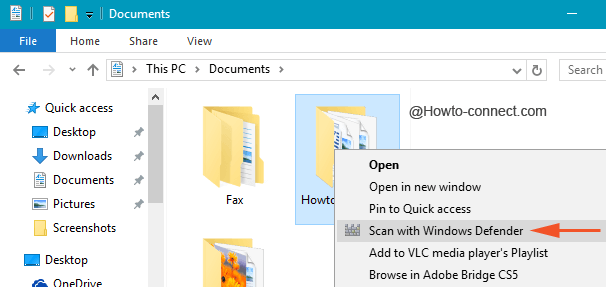
- Administer a right tap on the removable drives or any other item of your machine and “Scan with Windows Defender” will be apparent in the context menu.
- To make your work simpler, we are presenting a readymade reg file that will associate the Scan with Windows Defender to the context menu once it is downloaded and installed.
- Execute a hit on the underneath placed Download button.

- Extract the received .rar file.
- Twice hit on the reg file. click Ok on the UAC Pop-up covering the screen and install it to make the modifications on Registry Editor.
Adding this small piece of service to the context menu definitely raises the level of security to your machine as examining the threats on any item is just a click away. So, if you are amongst those who desires to make the protection easier, quickly grab the above steps.
Mr Morgan
says:Is there a way to remove this fix from the Registry once it has been applied?
MUSTAFA FIRINCI-ICTTECNICUS HELPDESK
says:In all computers, there is a secret Windows virus scanner called – MRT- ínstead of the script, which is not necessary. After switching on your computer/you must click start and then searching for and you must wríte MRT there. LOOK at a screen whích appears on the left top. Click the scanner logo MRT and then yes, Look at the options and follow the steps according to your choices.THAT IS ALL!