In this article, we will pen down the steps to avoid setup Ad Hoc Network every time in Windows 10 you turn on or reboot your PC. The main loophole after the establishment of this particular type of network is you need to establish the network each time after you start your machine. Walking through the series of steps every time is a painful task. So here we are presenting the process which will free you from establishing the network every time. After you complete the whole process given here the ad hoc network will start automatically when you start your PC. If you are curious to know about the establishment of Ad hoc network read Create Wireless Ad Hoc Internet Connection on Windows 10
You could have known the netsh command which comes in use to set up the network. Here what we do is create a registry script of the same and save on the desktop. After you double click the script this will start the network. But here the problem is not solved. You have to take care of and put effort again to start the network every time you start your Windows 10 PC. So we have stored the batch file in the Startup folder so that it runs by itself when the machine starts running.
Let’s move ahead and see to How to Avoid Setup Ad Hoc Network Every Time in Windows 10, run it automatically in conjunction with Startup whenever reside a bat file into start folder.
How to Avoid Setup Ad Hoc Network Every Time in Windows 10
Create a Batch file
- Copy the Below mentioned two commands and paste in Notepad –
netsh wlan set hostednetwork mode=allow ssid=Test key=password

netsh wlan start hostednetwork
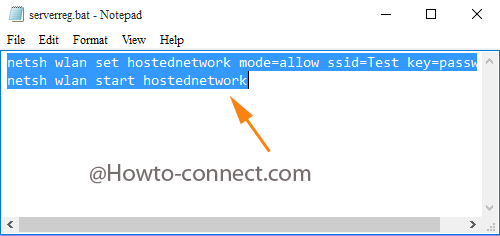
- Once you have placed the script in the notepad, Save it on the Desktop. While saving, name the file as serverreg.bat
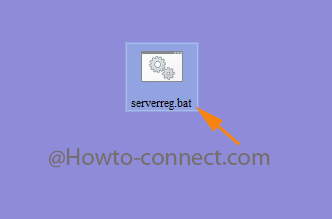
- Now, whenever you prefer to initiate the ad hoc network, implement a double click on it and you are done.
Run Ad Hoc Network Automatically
If you desire to run Ad Hoc Network automatically whenever your machine is triggered on, you need to save the above-established batch file on the Startup folder followed by giving it the administrative authorities. To do this –
- Right click on the batch established on the above section and choose Copy.
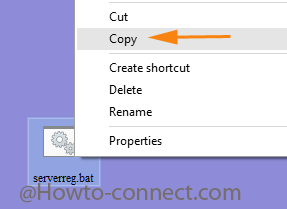
- Now, travel to this location and paste it
%appdata%\Microsoft\Windows\Start Menu\Programs\Startup\
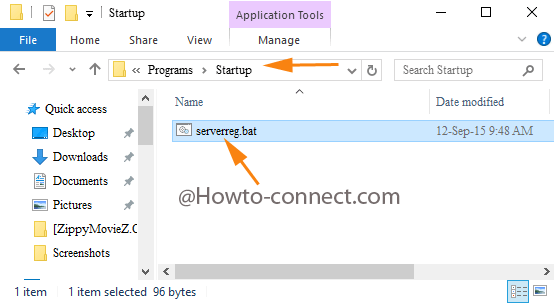
- By doing this, you ordered Windows to run this network by itself whenever the system is turned on.
- Now, after storing it there, you need to give it the authority of the administrator. To do so right-click on the file and pick up Create shortcut.
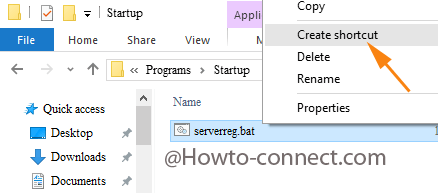
- A new shortcut of the same name will be placed in the same folder.
- Right click on the newly created shortcut and select Properties
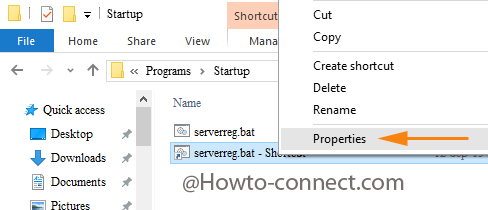
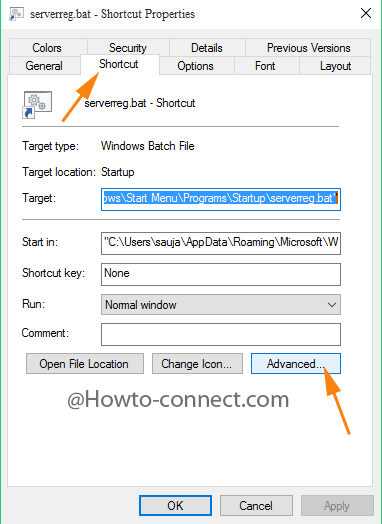
- Your action will highlight the Shortcut Properties window. Be into Shortcut tab and click Advanced button.
- In the following Advanced Properties window, tick the box Run as administrator. Click Ok button.
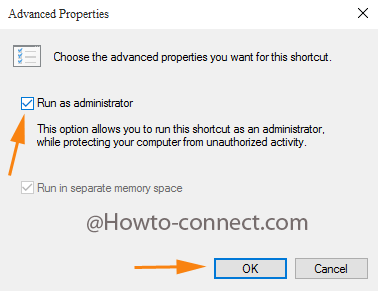
- Under the Advanced Properties hit Apply subsequently Ok buttons.
Download the Batch File
If you find it difficult to establish the batch file manually by copy and pasting the script, we suggest you to it from here.
- Get the ready-made file from here.
- Save it on your favored location and you free to run it whenever you desire.
- When want to run it automatically and you will Avoid setup Ad Hoc Network Every Time in Windows 10, obey the immediate above steps.


Hi!
Thanks for your great tutorial! Everything worked wonderfully until I updated to Windows 10 1803. Without having severreg, link or network settings changed the ad hoc does not start automatically any longer. Only a double-clicking the link brings back the Network.
Any ideas on what happened?
Thanks for all help!!
Best regards
Pepe