Windows 10 doesn’t provide a tool to directly Backup and Restore All Settings. But you have the ability to use the Synchronization feature to import and import and export your changes made in the configurations.
Microsoft account stores all the Windows Settings and options you have applied on your Windows 10. So once you sign in using this the changes are retrieved automatically.
Table of Contents
Backup All Settings in Windows 10 and Restore
Here is how to backup all Settings and restore in Windows 10 –
1] Using Settings itself
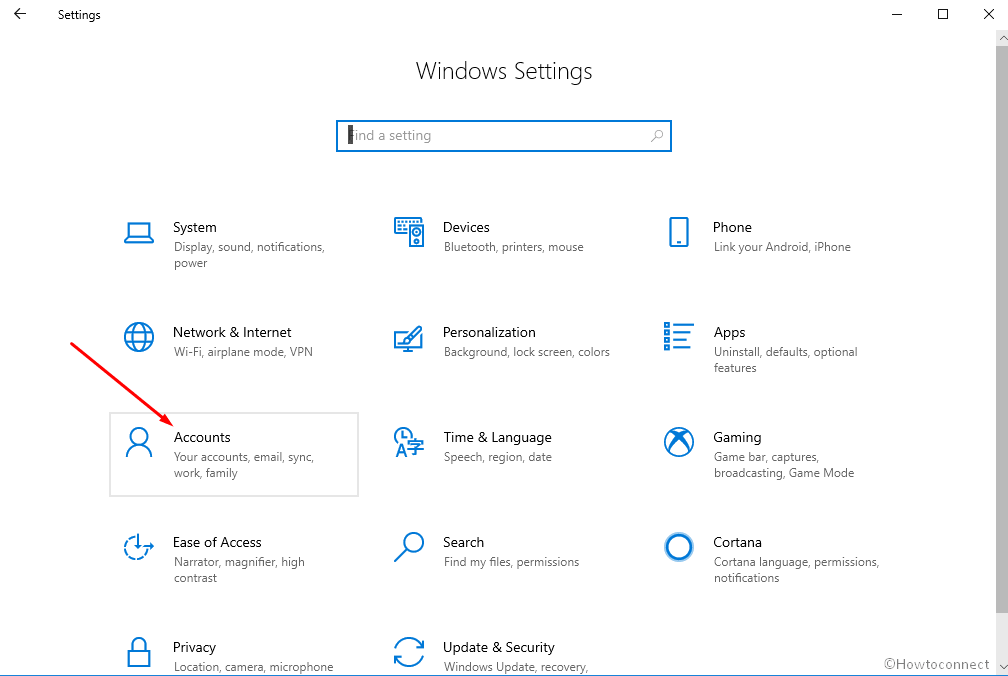
- First of all, open Windows Settings (Press Win+I).
- Click on Accounts.
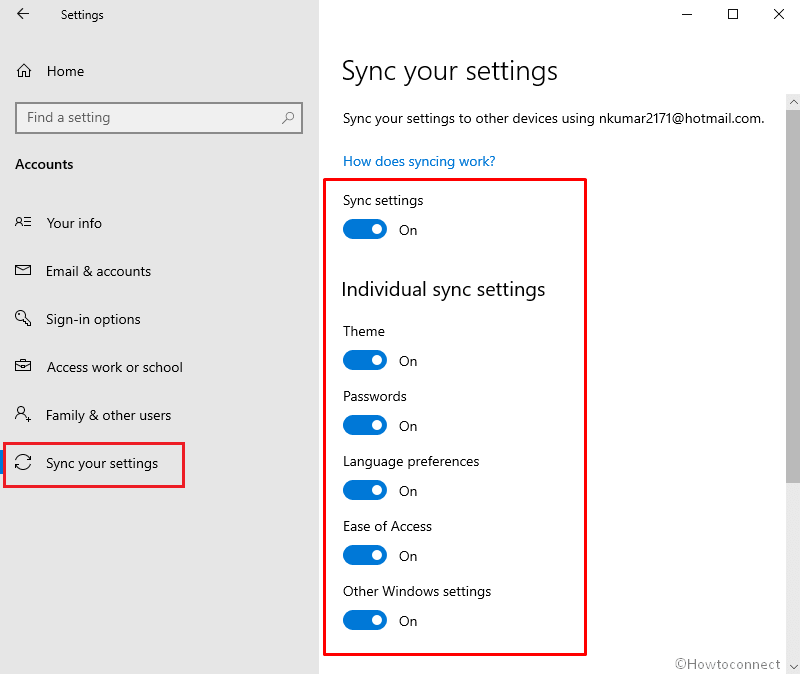
- Select Sync your settings.
- Make sure that all the toggle switches are in turned-on state. If any of these are disabled, enable them by pulling the button.
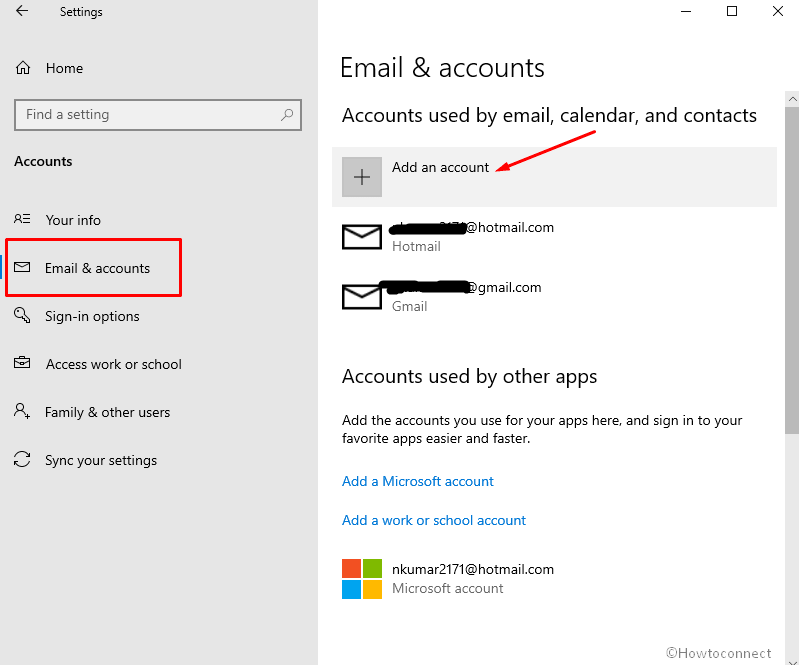
- Click on Email & accounts from the left pane from the same Settings page.
- Move to right and check if you can see the email account for which the backup and restore will be performed
- If not available here, click on Add an account (+).
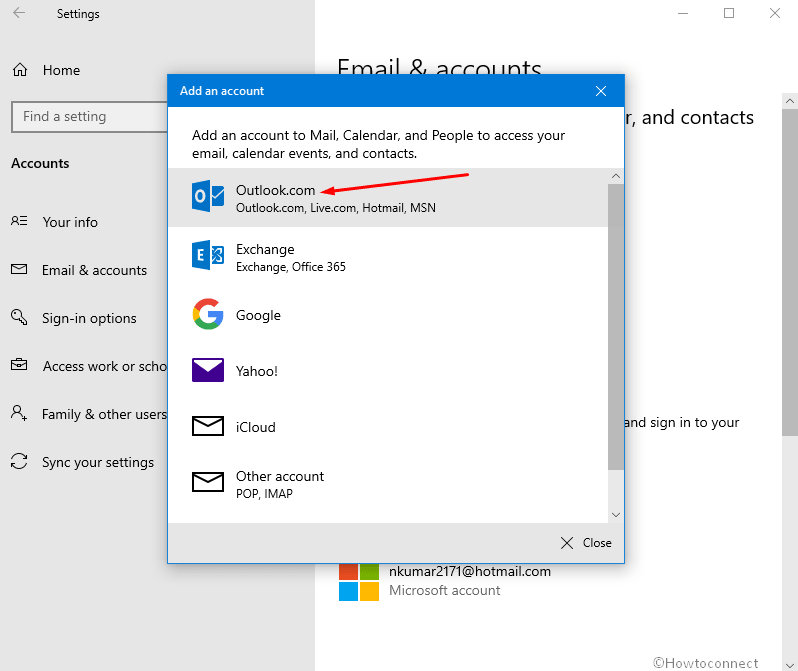
- Choose the email client Outlook.com from the list on the pop-up.
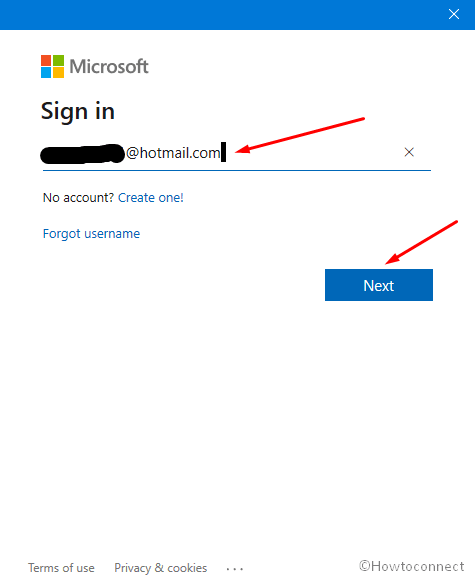
- Put in your username and click on Next.
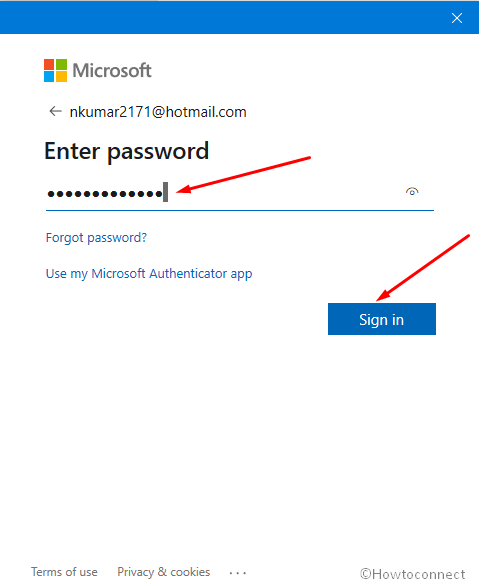
- Type your password and again select Next button.
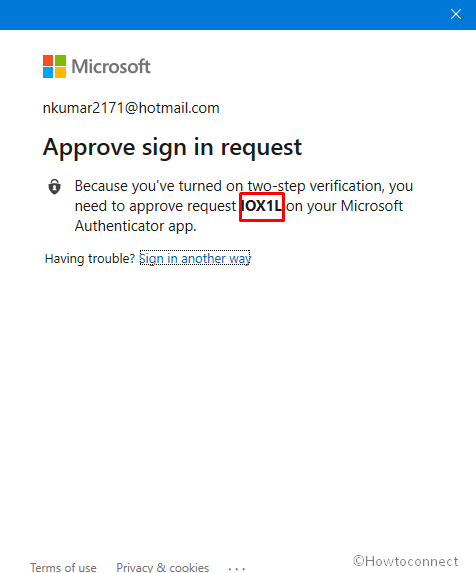
- Suppose you have enabled 2-step verification for your Microsoft account then go to your mobile device. Launch Microsoft Authenticator app and Approve to complete the signing in.
- Now restart device to store all Windows settings with the email account as a backup.
- To restore the backup in a device you only need to sign the “device” using this particular account.
- Power on your system and enter the username and password you have added in previous steps. You may also use the credentials in newly installed Windows 10.
- Open Settings to find all the options restored automatically.
2] Via Registry Editor
Sometimes you might install 3rd party software and want to restore the settings changed by the tool. Furthermore, this way will also help you to Backup All Settings and Restore in Windows 10.
- Open Registry editor. You may press Win+R, type regedit.exe and then hit Enter.
- Confirm that only Computer is being shown in the left column. Now click on File and select Export….
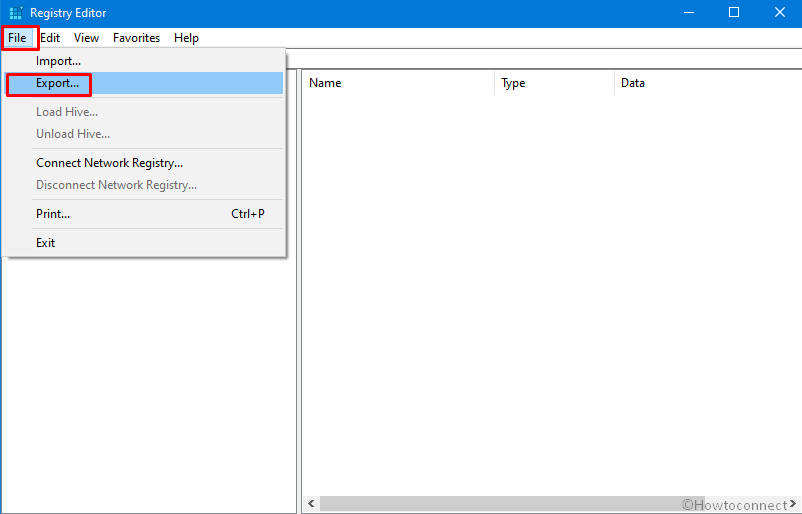
- Give a suitable name to store the registry backup and click on Save.
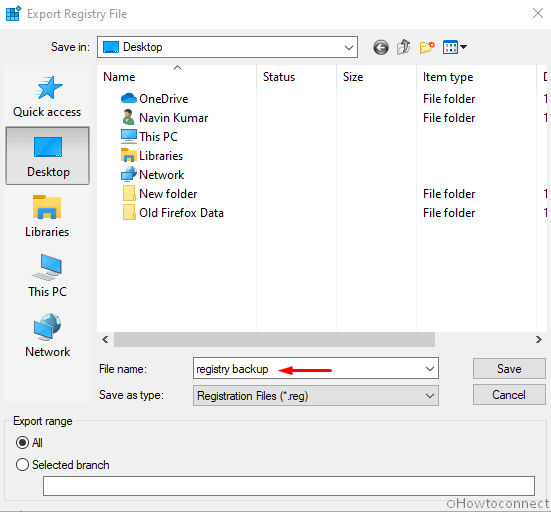
- Wait for a few moments to save the entire registry hives.
- Now go to C:\Users\user-name\
- Copy AppData folder.
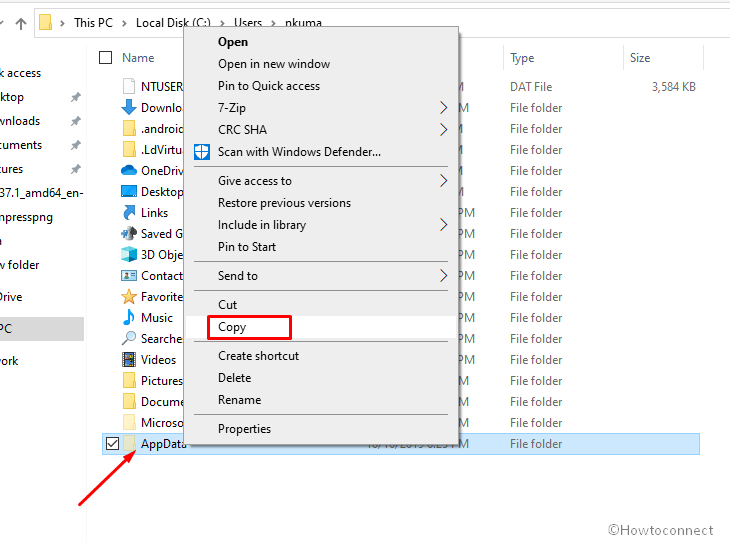
- Store both the stuff – Registry backup and AppData back up in a safe location (external hard drive)
- Install Windows 10 and restore both of these.
- Access registry editor using aforementioned way and click on “File” then select “Import”.
- Again go to “C:\Users\user-name\” and place the AppData folder.
- Last but not least, reboot the device.
1] How to Take Incremental Backup in Windows 10
2] How to Backup Product Key of Windows 10, 8.1 – 3 Steps
3] How to Backup and Restore Default Wallpapers in Windows 10
4] Windows 10 – How to Backup System Image
5] How to Customize Sync Settings on Windows 10
Methods:
1] Using Settings itself
2] Via Registry Editor
That’s all!!
