Like earlier editions of Windows, this time also you can choose number of lines to scroll with mouse in Windows 10 operating system. This feature eases up users who regularly use Excel or PDF files. After selecting the number of lines when you use the mouse to scroll, it will jump that many lines to scroll up or down, depending on your vertical scroll.
Setting the number of lines becomes very important for certain times especially when you are working on Excel sheets or on PDF. If the number of lines set is more, one scroll will skip those numbers of lines, making you miss those lines. So, you can reduce the number of lines so that you can look at every cell of your Excel sheet. Well, every user has its own requirement and as per your preference and ease of work, you can choose number of lines to scroll with mouse in Windows 10. Let us head towards the steps and see how it can be done!
Another useful post:
How to Change Mouse Pointer Size and Color in Windows 10
How to Choose Number of Lines to Scroll with Mouse in Windows 10
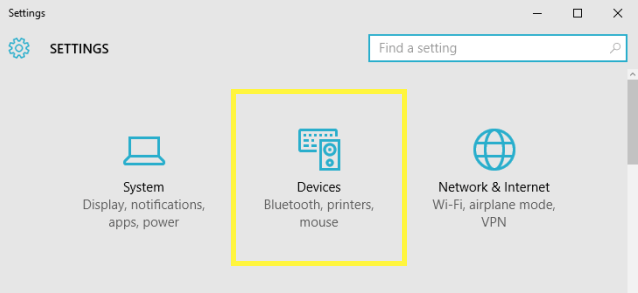
- You need to open up the Settings app on your screen and make yourself into the Devices category.

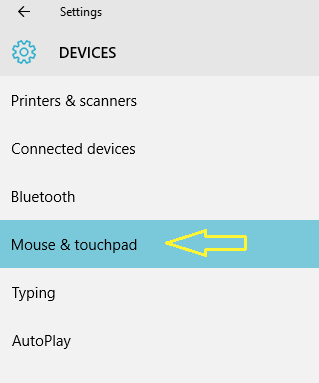
- Opt Mouse and & Touchpad section of settings from the left column.

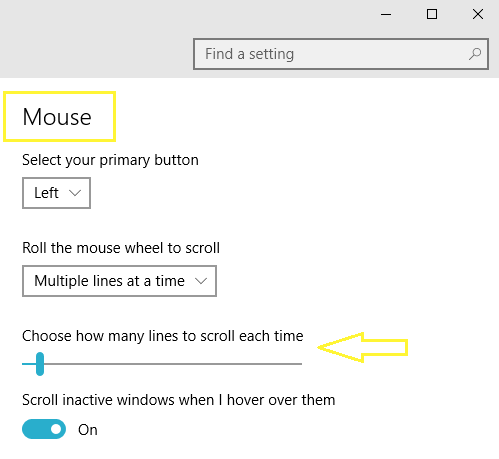
- Under the Mouse segment on the right pane, you can see a few options. One is Choose how many lines to scroll each time.

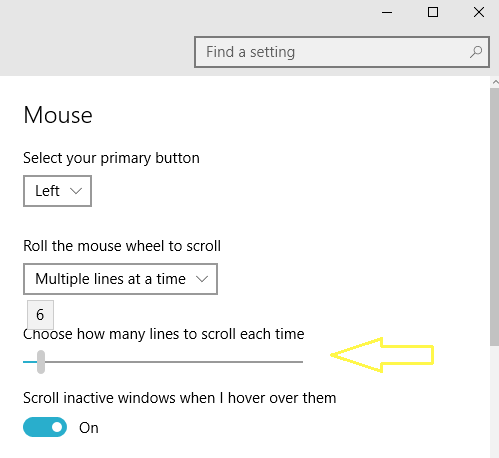
- This time you have been provided with a slider to choose the number of lines. Slide the slider towards right to increase the number of lines and move it to the left to reduce the number of lines. Set the number as per your preference.

- You are done!
These customization features have been made easily available in Windows 10. You can now easily set up the number of lines to scroll depending on your content. If you prefer to go through every line, then you can set a small number to scroll and when you want to get down without going through every line, set large number.