How to Compress Contents in OneDrive on Windows 10 – You know OneDrive is the cloud Storage service that comes as default with Windows 10. Here you use to save your important data. When you enable Sync your Settings, your data on PC in OneDrive Folder gets automatically uploaded and backed up on the Online OneDrive service.
OneDrive online store offers 15GB as Free Space for its users. After filling up the free space, you need to pay to upload more files or folders to the cloud storage. This indicates that the data crossing over the limit 15 GB will not be backed up to OneDrive Online Service free of cost whereas you have enabled Sync your Settings.
But, you have an option in OneDrive which can make out some space for you in OneDrive Folder on Windows 10 PC. You can now easily compress the files or folders in OneDrive which will reduce their sizes, thus creating some extra disk space and uploading mores data on OneDrive. If you Compress Contents in OneDrive on Windows 10, you can end up in creating some extra space in your cloud storage.
You may like to read:
Add OneDrive to Send to Extended menu in Windows 8.1 – Tips
Compress Contents in OneDrive on Windows 10
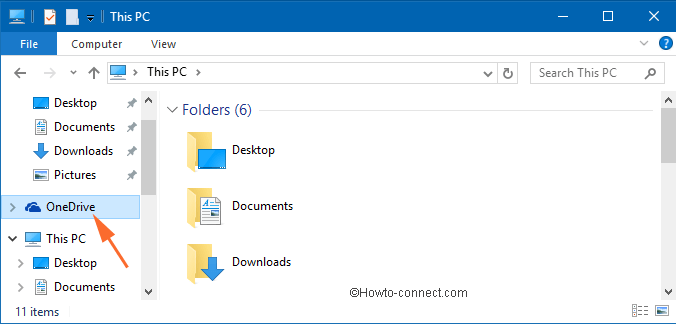
- Launch This PC on your screen. Get into the navigation pane, the left column of This PC and you can see OneDrive.
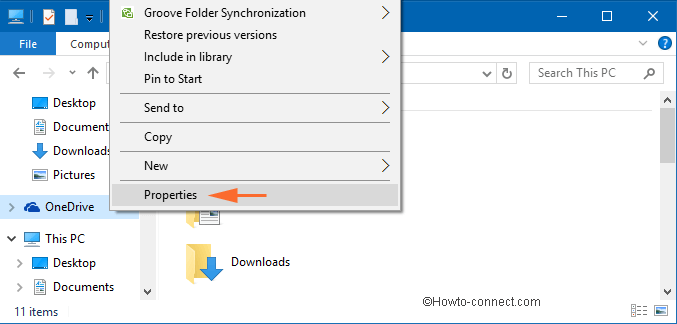
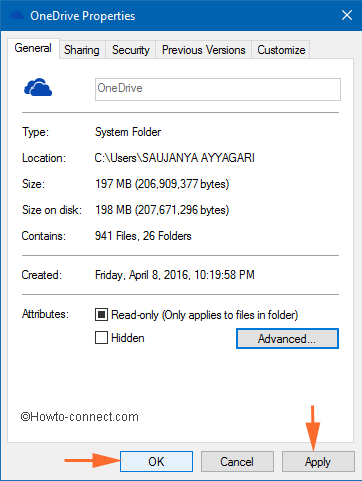
- Right click on OneDrive and choose Properties option from the menu.
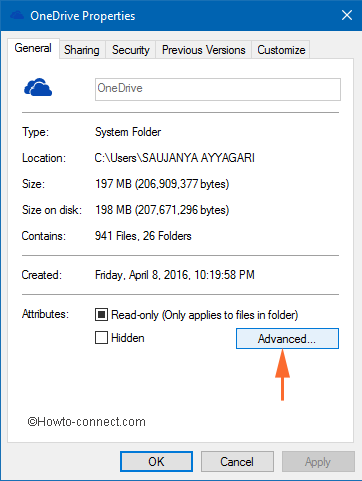
- Be in the General tab of the OneDrive Properties window. Click Advanced button at the end of the General tab.
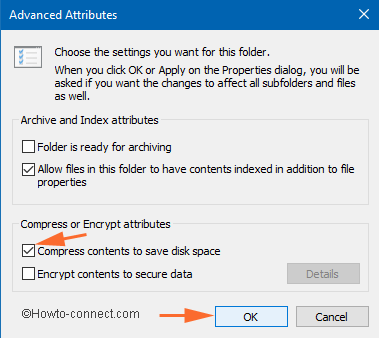
- This opens up another window of Advanced Attributes. See the last section of Compress or Encrypt attributes.
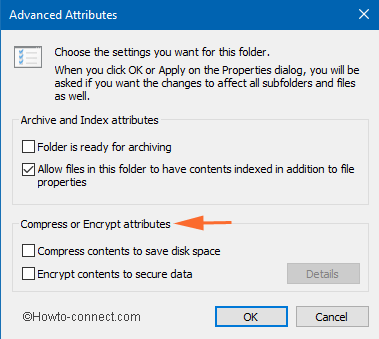
- Select the first checkbox which allows to Compress contents to save disk space followed by Ok. (To disable the compress option, simply clear the checkmark).
- Again click Apply and Ok buttons of the OneDrive Properties window.
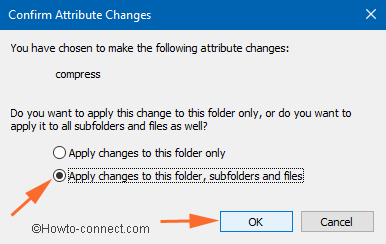
- A Confirm Attribute Changes window will pop up asking you to confirm whether you want the changes to be dome for the particular folder or for all. Select Apply changes to this folder, subfolders, and files and then click Ok button.
- The compression of the contents will occur now.
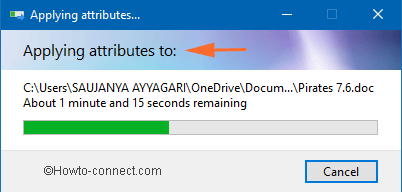
- After the completion of the compression, you can see the contents in OneDrive are compressed, by making some disk space.
Note: You can also choose to compress individual file or folder to compress. You need to right click on the particular file or folder and then continue with the steps mentioned above.
John Anders
says:I don’t believe that compressing the files locally has any affect on the size of the cloud-stored documents. It might help to save space on your hard drive or local storage, but ultimately you’ll still have the same quota usage on your OneDrive subscription whether it’s compressed or not.