Procedures to Decrypt EFS Encrypted Folders and Files on Windows 10 through Steps. – EFS is an encryption technology of Windows 10 that lets you encrypt sensitive data on your computer. You generally encrypt your confidential files and folders on NTFS drives to guard unwanted users. After encrypting, no other users on your PC will get access to move, edit, or even open the encrypted items. See an effective guide – Unblock file in Properties, Open File Security Warning, SmartScreen in this regard.
But, if you want the encrypted information to be available for all users on your system, then have to decrypt them. So, in this guide, we will learn How to Decrypt EFS Encrypted Folders and Files on Windows 10 in 3 different procedures.
Table of Contents
Methods to Decrypt EFS Encrypted Folders and Files on Windows 10
The first way we will be illustrating to Decrypt EFS Encrypted Files and Folders on Windows 10 is using context menu.
Method 1 – Using Context Menu
Step 1 – Begin this method by finding your file or folder that is EFS encrypted.
Step 2 – Moving on, perform a right-click on the item. Now, a context menu will show up with a list of many options.
Many times right click doesn’t work easily so follow Fix Right Click on Desktop Taking Too Long in Windows 10.
Step 3 – Simply, select File ownership and then click on Personal.
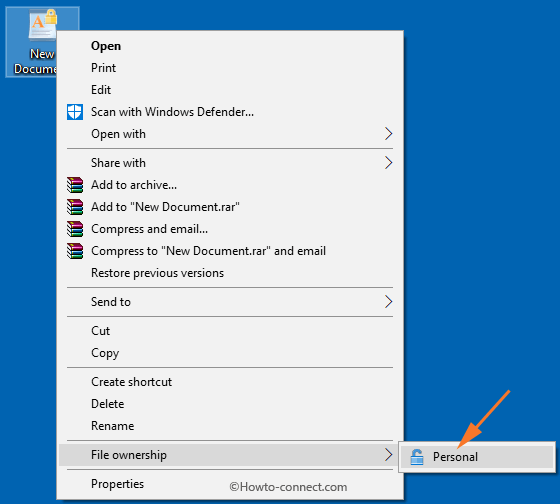
Step 4 – That’s all and you will notice that the specific file or folder is decrypted.
Method 2 – Through Advanced Attributes
Step 1 – First and foremost, choose the folder or file you wish to decrypt. Now, make a right-click on that particular folder or file.
Step 2 – Next, few options will occur, select Properties, the last one.
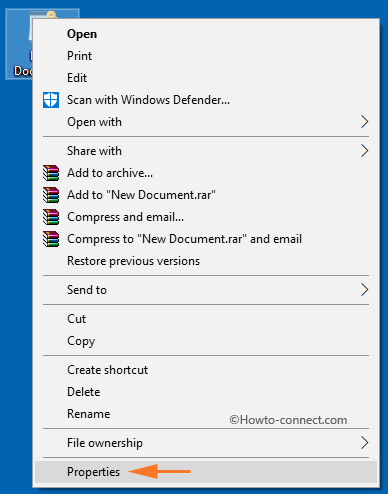
Step 3 – This will launch the Properties box of that file or folder that you have chosen. Stay in the General tab and select Advanced button that appears in the Attributes section at the bottom.
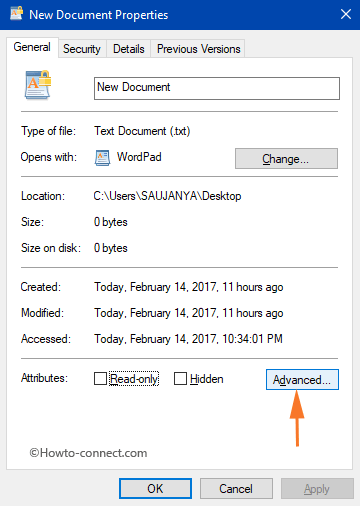
Step 4 – Now, Advanced Attributes dialog box will come up on the screen. Inside that box, you will notice four options, simply deselect the last one Encrypt contents to secure data underneath “Compress or Encrypt attributes” section and select OK button.
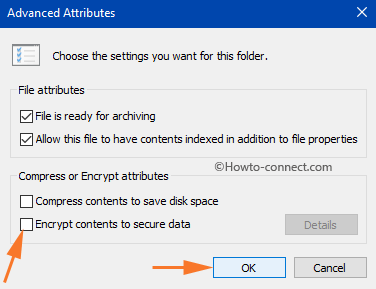
Step 5 – On the Properties window, again click Apply and OK buttons, else the modifications will not come into operation.
Step 6 – If you are decrypting folders applying this method, then a “Confirm Attribute Changes” box will occur on the screen.
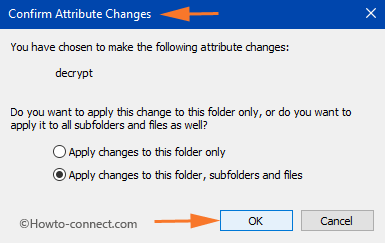
Note – No Confirm Attribute Changes box will be visible for decrypting a file.
Step 7 – As the last step, choose either Apply changes to this folder or Apply changes to this folder, subfolders, and files as per your requirement. So, select the radio button accordingly and click OK to finish.
Method 3 – Via Command Prompt
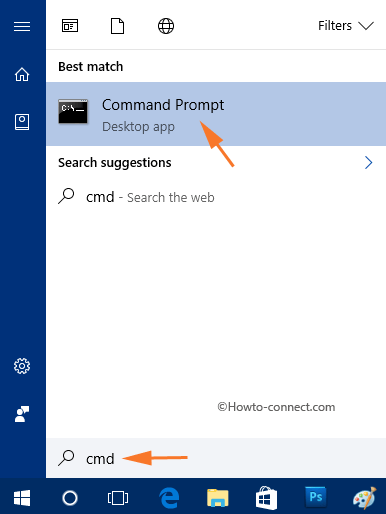
Step 1 – First of all, select the Windows logo icon on the taskbar and quickly type cmd. This will evoke Cortana with Command Prompt as Best match, select it.
See a complete guide – Windows 10 – How to Launch and Use Command Prompt.
Step 2 – Now, Command Prompt will come up on the screen, enter any of the below-mentioned commands depending on your requirement.
For Folders
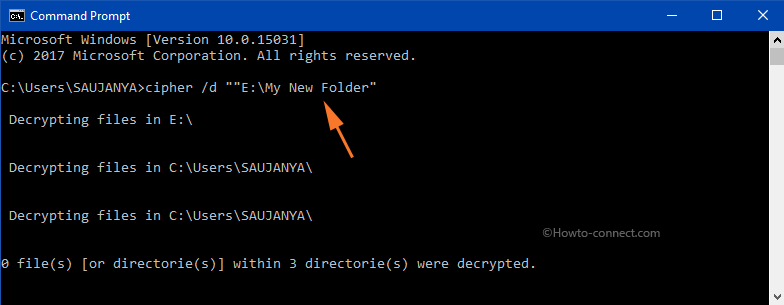
Step 3 – If you are decrypting a folder, then type any of the below commands and press Enter.
Apply changes to this folder only –
cipher /d “write full path of folder”
Apply changes to this folder, subfolders, and files –
cipher /d /s:”full path of folder”
Note – In the above command, replace the text “write full path of folder” with the original path of the folder you are decrypting.
For Files
Step 4 – To decrypt a file through Command Prompt, simply type this command and press Enter.
cipher /d “full path of file with extension”
Note – In the above command, ensure to replace the text “full path of file with extension” with the original path of the file.
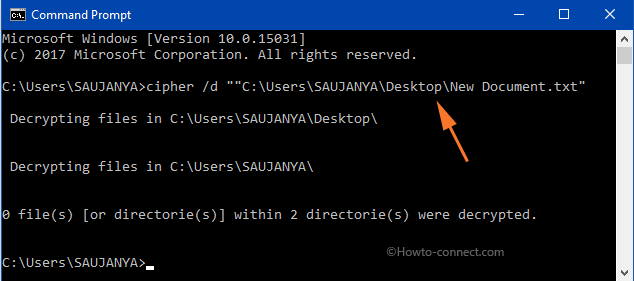
Step 6 – So, input the correct path in the command, you will be able to decrypt EFS encrypted folders and files on Windows 10.
Winding Up
Many times, multiple users get error notes while decrypting the folder or file. Well, Windows includes few other technologies to encrypt data. If you are aware of more procedures to decrypt EFS encrypted folders and files on Windows 10, please share with us in the comments form below.