In this article, we will present the procedures to disable hidden Administrative shares on your Windows 11 desktop or laptop. After installing this version on your device, Windows basically generates a few secret shared folders. They can be recognized by the dollar sign ($), located at the end of the share name. Any user with administrative access to your PC can open any partition without your permission and even also share a folder.
So, we are giving two easy methods, pick one as you wish. But we would like to suggest that you should pick the first method rather than Registry Tweaks.
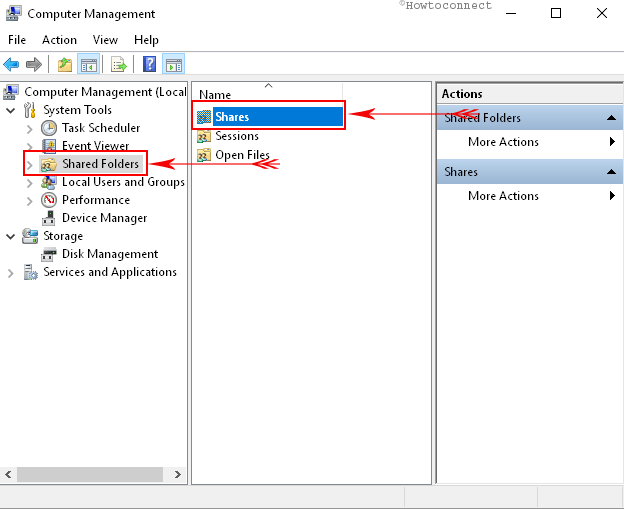
Some of the hidden administrative shares are mentioned-below which are enabled by default:
i. Root partitions or volumes,
ii. The FAX$ share,
iii. The system root folder,
iv. The PRINT$ share,
v. The IPC$ share.
Table of Contents
Disable Hidden Administrative Shares on Windows 11
Using Services
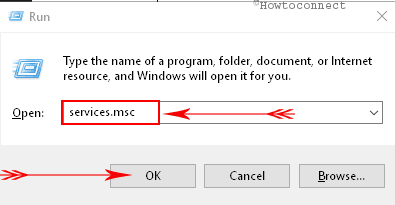
- First of all, you need to press “Windows + R” keys to open the Run dialog box and type services.msc in that box. Click OK after typing the command.
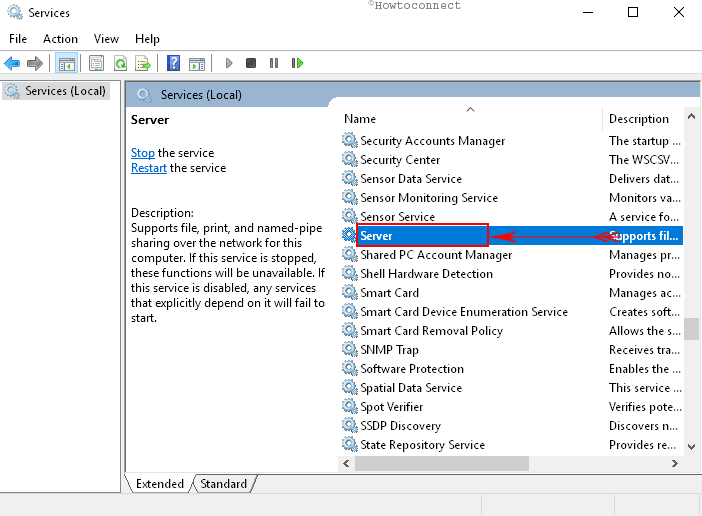
- Check for the Server service in the right pane and double-click on the same.
- A new dialog appears as Server Properties, be on the General tab. Go to the Startup type drop-down menu and then select Disabled option (see snapshot).
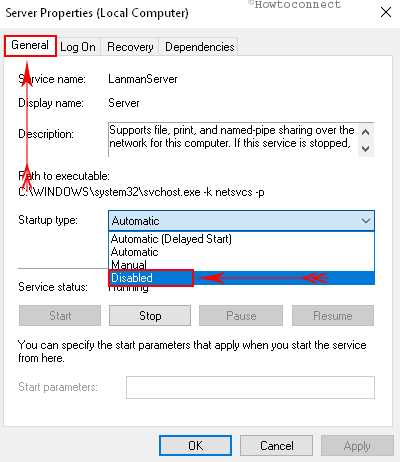
- Moving ahead, click the Stop button below to the Service status.
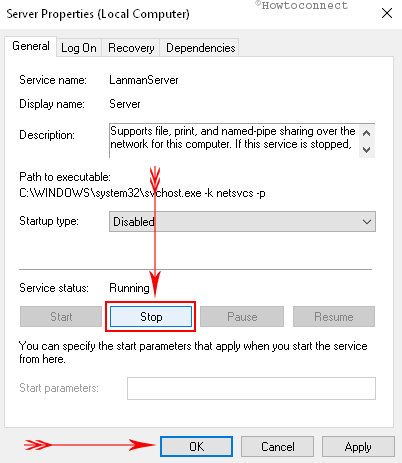
- Finally, click the Apply button followed by OK to Disable Hidden Administrative Shares on Windows 11.
See: How to Customize Access Denied Message in Windows 11 or 10
After making the above changes, all Windows shares will not be accessed.
Note: The above tweak is not suitable for those who like to keep their own shared folders and printers accessible from the network. So, you can go with the Registry Tweak method. However, be careful with the method, and as a precaution, Export Registry Editor.
Through Registry Editor
- Click on Start and type regedit. When you see the same command in the result, select it.
- Navigate the following registry keys on the left sidebar of the editor:
HKEY_LOCAL_MACHINE\SYSTEM\CurrentControlSet\Services\LanmanServer\Parameters
- When you finally reach the Parameters key, Create a new DWORD Value. To do so, right-click on Parameters and select New -> DWORD (32-bit) Value.
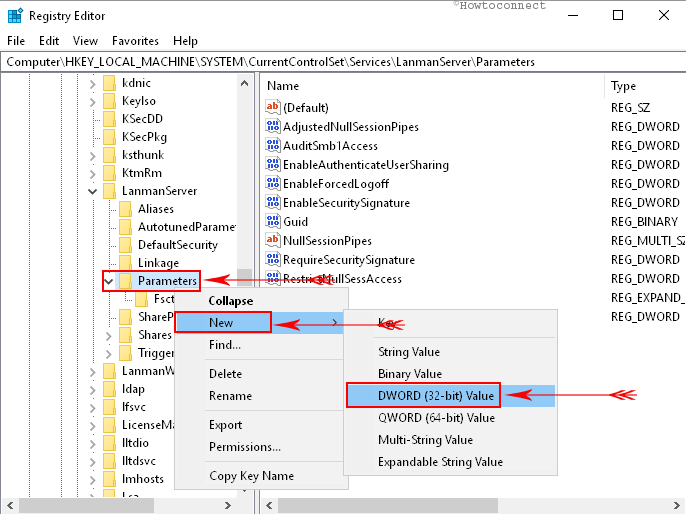
- Name this DWORD AutoShareWks and double-click on it.
- Once its edit box opens up, put its value as 0 and click OK as shown in the below screenshot.
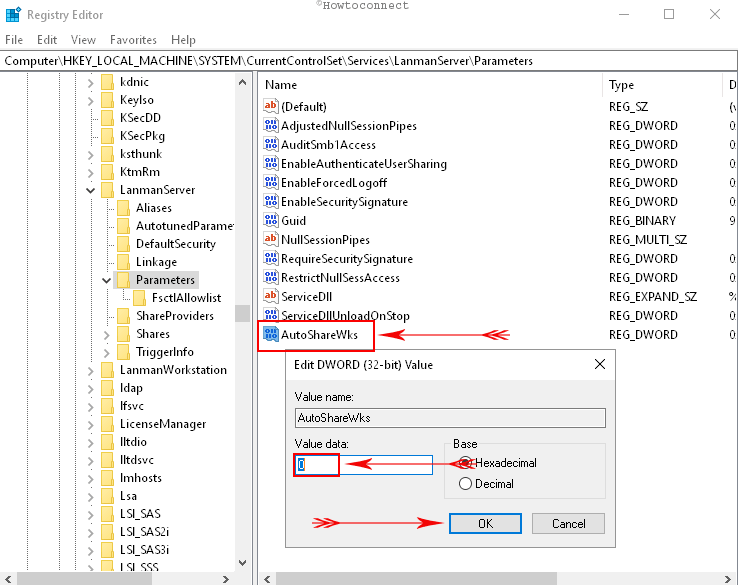
- Finally, restart the PC to make the modifications effective.
That’s all!!