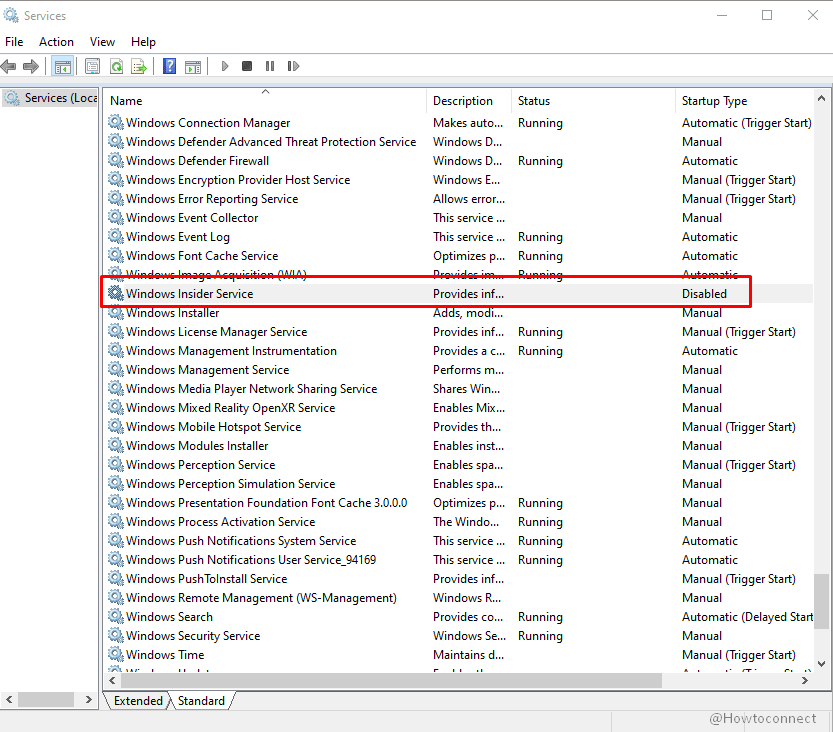
Microsoft runs a program to test the features before adding them to Windows 11/10 original version. The company develops the preview builds and experiments a feature, and ensures if it is working fine then add to a major update. This is called the Windows insider program and people who want to participate in it can join only after registering. However, all the Windows 11 and 10 computers include a service wisvc or Windows insider Service regardless of the participation in the program by users.
wisvc is counted as an unnecessary service for the users who don’t have a wish to join the Insider program. We have previously explained that excessive unuseful services may hamper PC performance. You can read the post here – Windows 11 or 10 Services to Disable for Performance. For this reason, you might want to disable Windows Insider Service in Windows 10. You will see 3 methods here for the same.
Table of Contents
Disable Windows Insider Service in Windows 11 and 10
Here is How to Disable Windows Insider Service in Windows 11 or 10 –
1] Through the Services Console
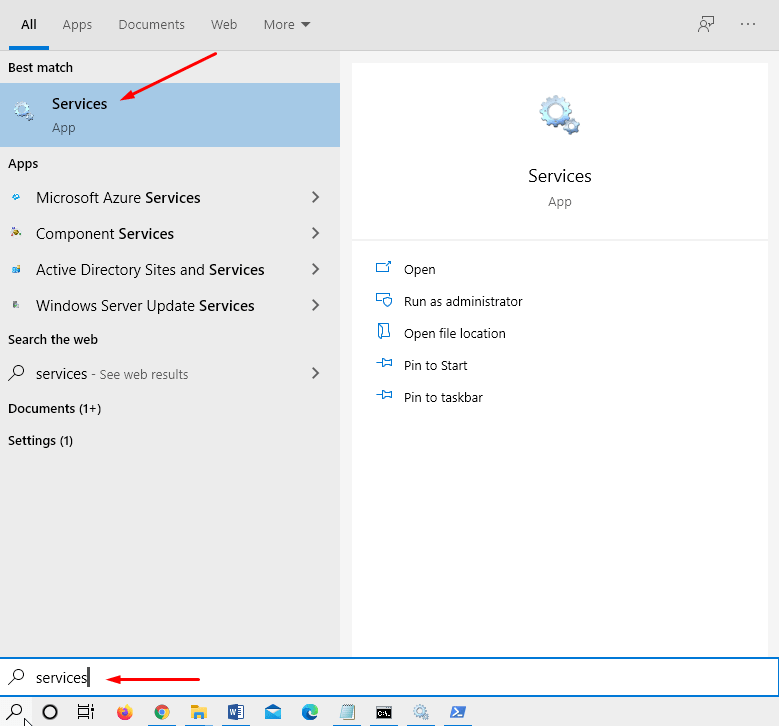
- Click the taskbar search or press – Win+S.
- Type in Services and hit the – Enter.
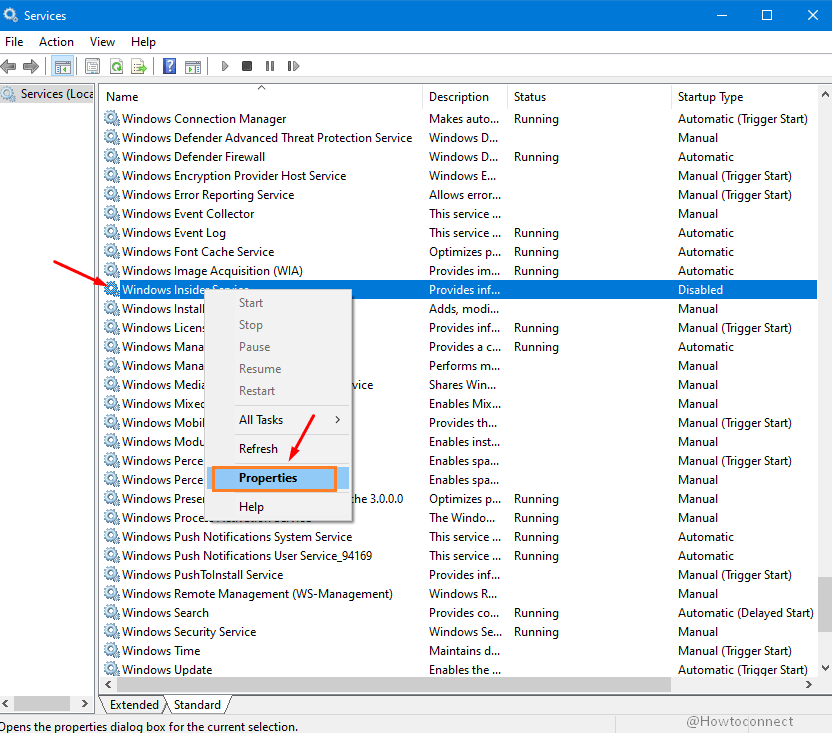
- Locate Windows insider service the Name column.
- Right-click on the same and select the – Properties.
- On Windows Insider Service Properties (Local Computer) window go to Startup type.
- Click on the dropdown and choose – Disabled.
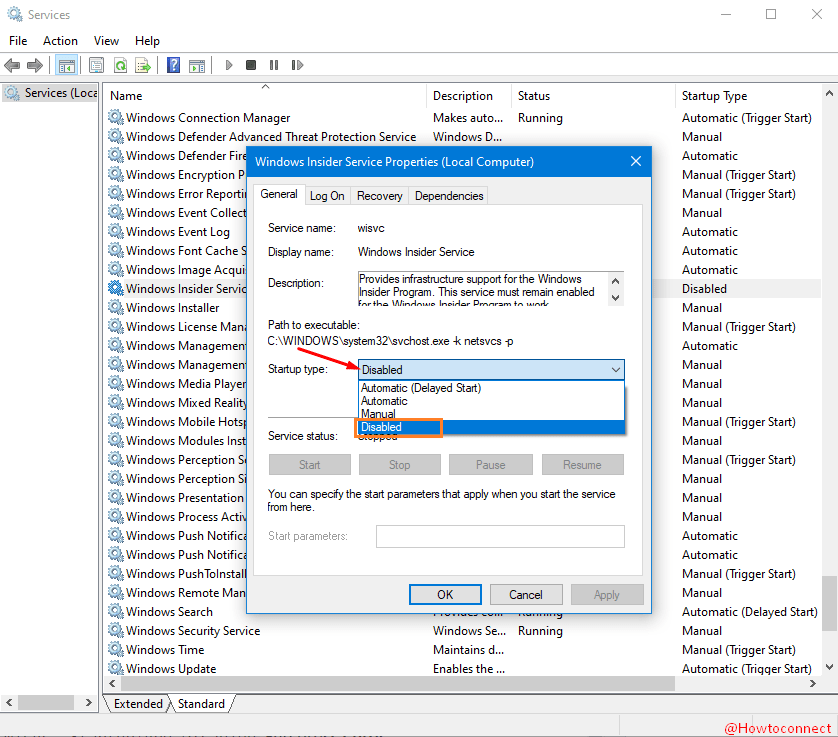
- Select Apply and then OK.
2] Disable Windows Insider Service Using the cmd command
- Press the Win+S and type – cmd.
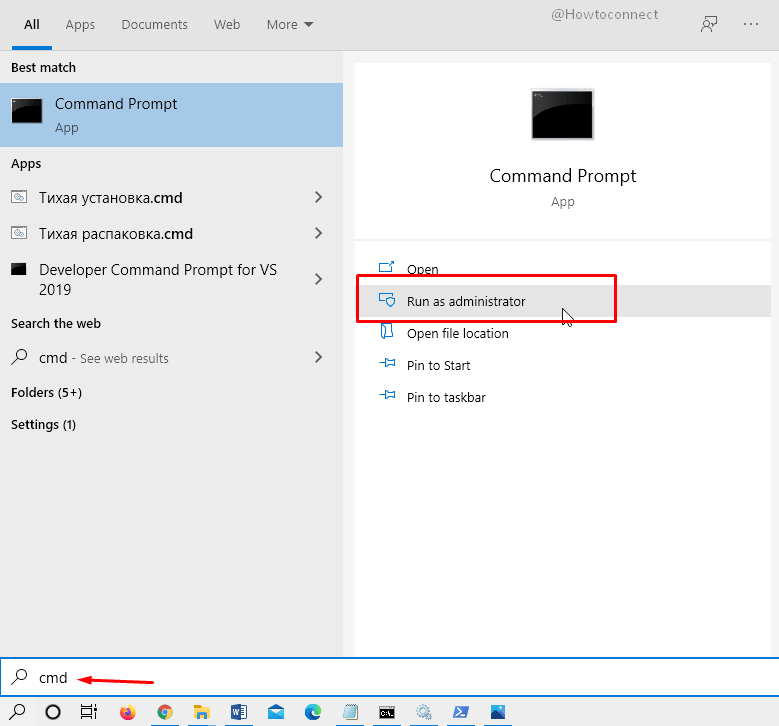
- Click the – Yes to agree with User account control prompt.
- Select the – Run as administrator from the result window.
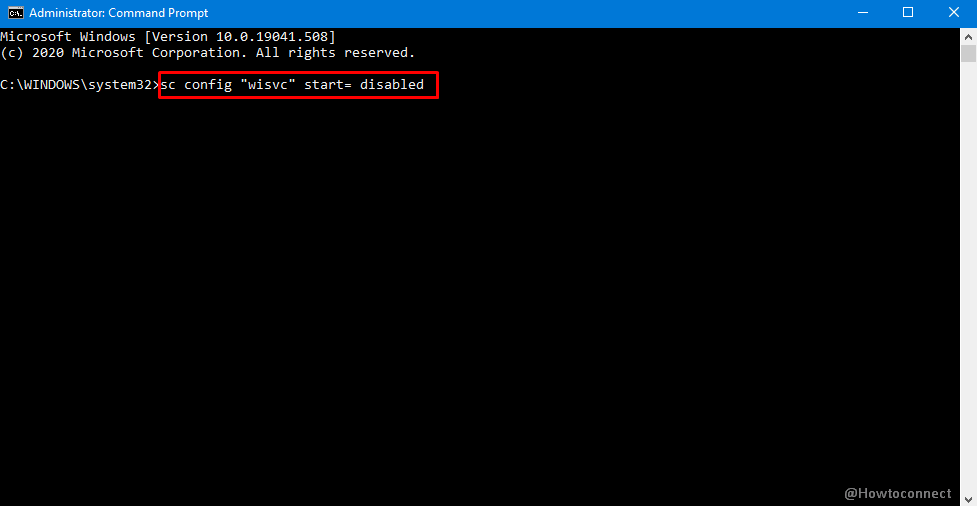
- Next, type
sc config "wisvc" start= disabledand then press Enter.
3] With Windows PowerShell
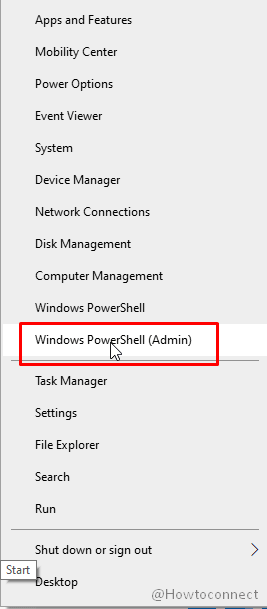
- Hit the – Win+X.
- Select the – Windows PowerShell (admin).
- Choose the – “Yes” on UAC dialog.
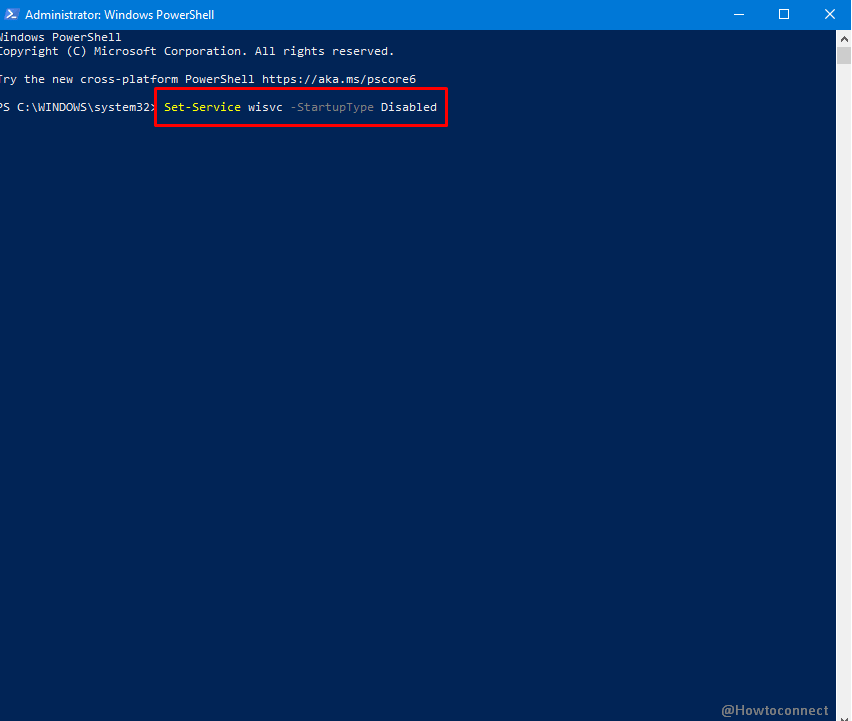
- Type
Set-Service wisvc -StartupType Disabledand press Enter.
Methods list
1] Through the Services Console
2] Using the cmd command
3] With Windows PowerShell
That’s all!!
