To make sure that wireless network is operable in your system we will discuss the method(s) to Install WiFi Driver in Windows 10 and 11. Though utmost care is taken to involve the latest versions of drivers for all the major Wi-Fi adapters, a few network adapter updates are always left. So, you need to have extra care to properly Download, Install, furthermore update WiFi Driver in Windows 10 to avoid any connectivity issues.
Various manufacturers updates network adapter driver on regular basis. However, Windows 11 and 10 automatically receive the applications from the hardware companies through ‘create a hardware submission’ page and send you through Windows update. But sometimes the drivers create issues and you require to either download, install or update them manually. You can see a clearer guide on How to update drivers in Windows 11 (Best ways).
Table of Contents
Download, Install, Update WiFi Driver in Windows 11 and 10
Here is How to Download, Install, Update WiFi Driver in Windows 11 or 10 –
Way-1: Directly using Wireless Driver’s file
In order to download WiFi driver in Windows 11 or 10, first and foremost, you need to visit the site of your PC manufacturer. You can do this by following these simple series of steps.
- Access any web browser and visit manufacturer’s official website.
- The manufacturer will ask for the model of your computer. Fill up in appropriate space there. Note – Nowadays all the Manufacturers provide an assistant tool for this work. This will ease your task so find and install it if available.
- Move to your device’s support page or the driver download page. Locate the wireless adapter driver and download it on the computer.
After downloading it, the next step is to manually install WiFi driver in Windows 11 or 10. There are two methods, so follow the steps mentioned below.
Via the Driver’s exe file
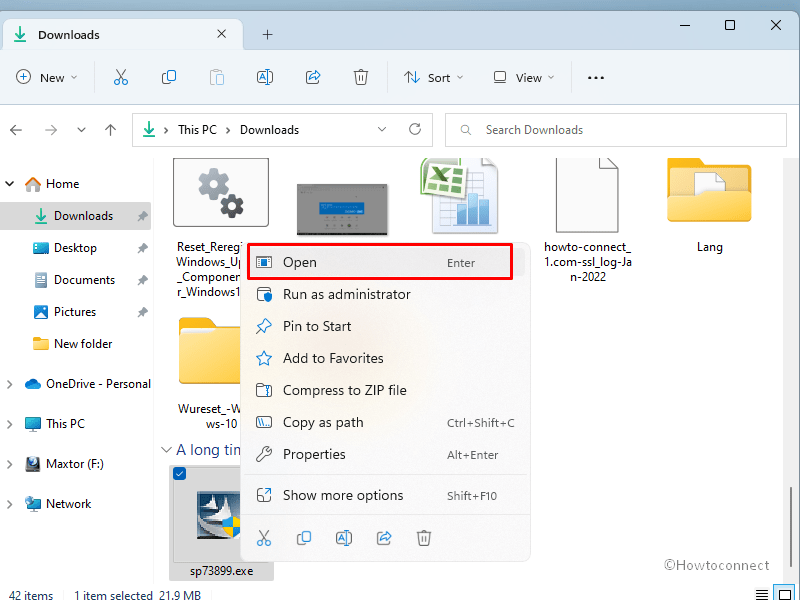
- Go to the Downloads folder where your WiFi driver’s executable file is downloaded.
- Double click on the file and select Open.
- Select Yes on the User account control prompt.
- Follow the onscreen instructions until the driver is fully installed
Using Device Manager
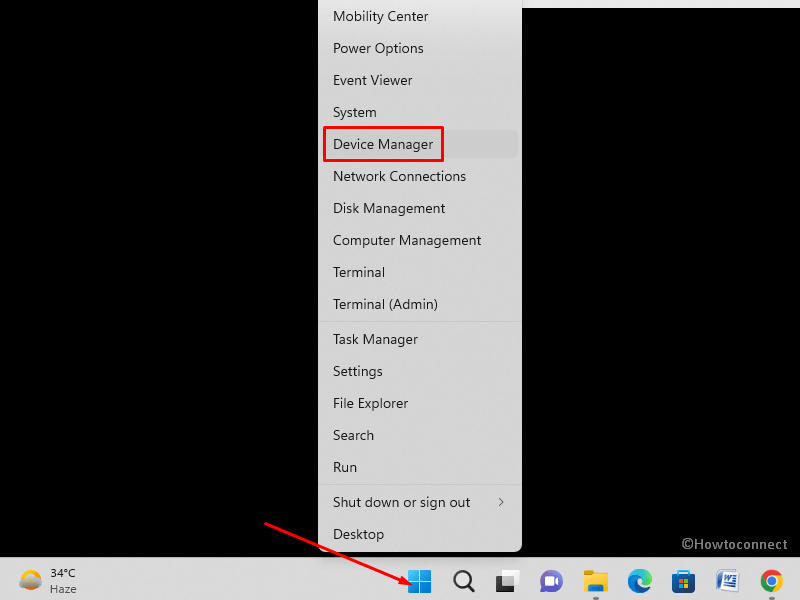
- Right-click on Start.
- Select – Device Manager.
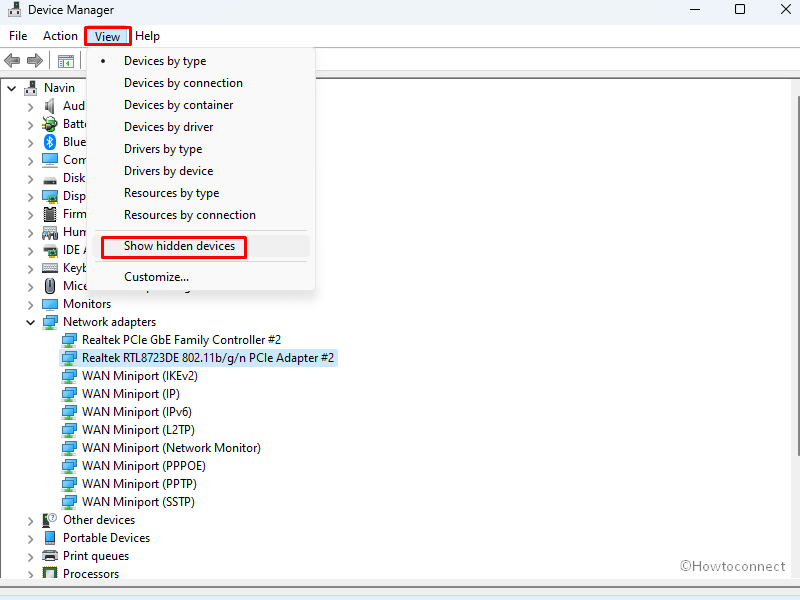
- On the Device Manager, click on View on the top menu bar.
- Select – Show hidden devices. You can read – How to See Hidden Devices in Device Manager Windows 10.
- Now find Network adapters and double-click on this.
- Locate the correct driver and right-click on it.
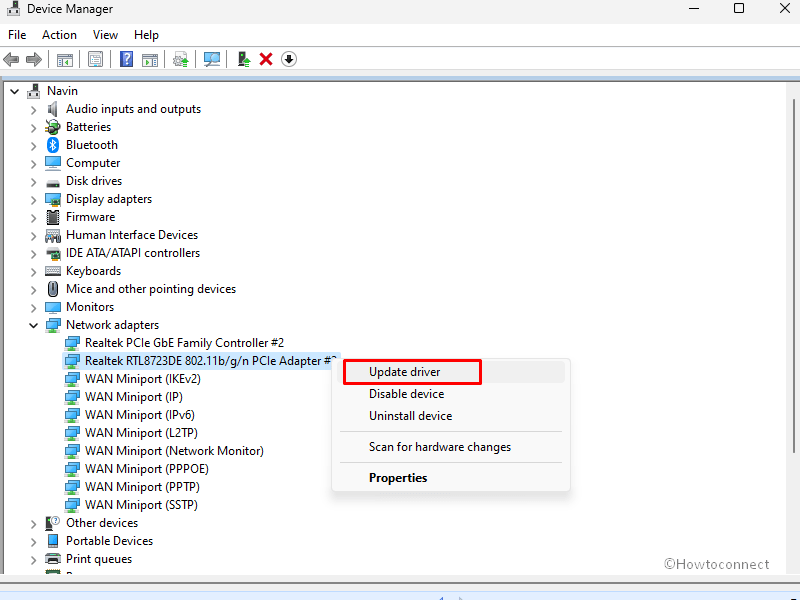
- Select – Update driver.
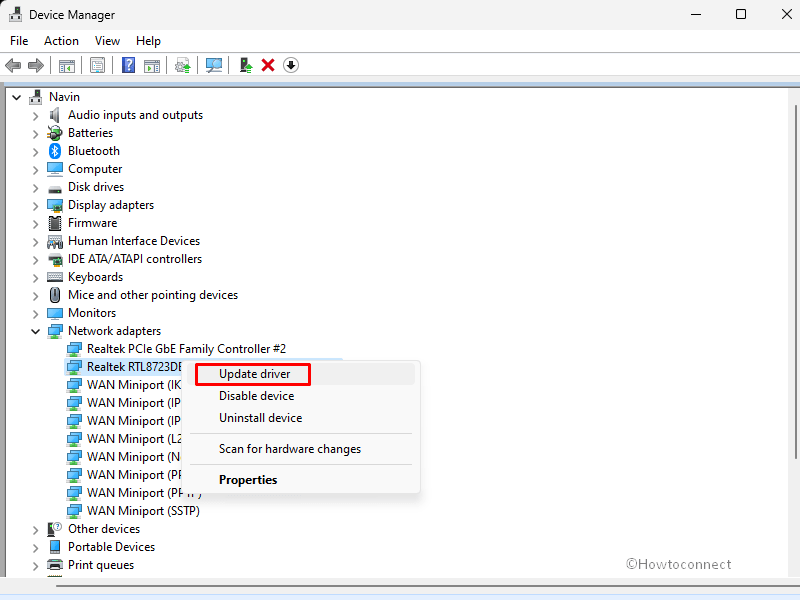
- A wizard will open with two options, go ahead with “Browse my computer for drivers”.
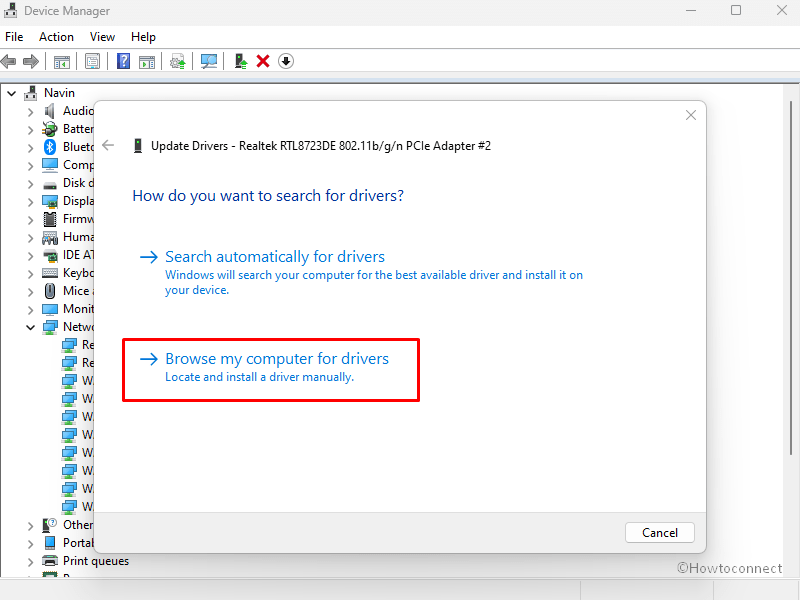
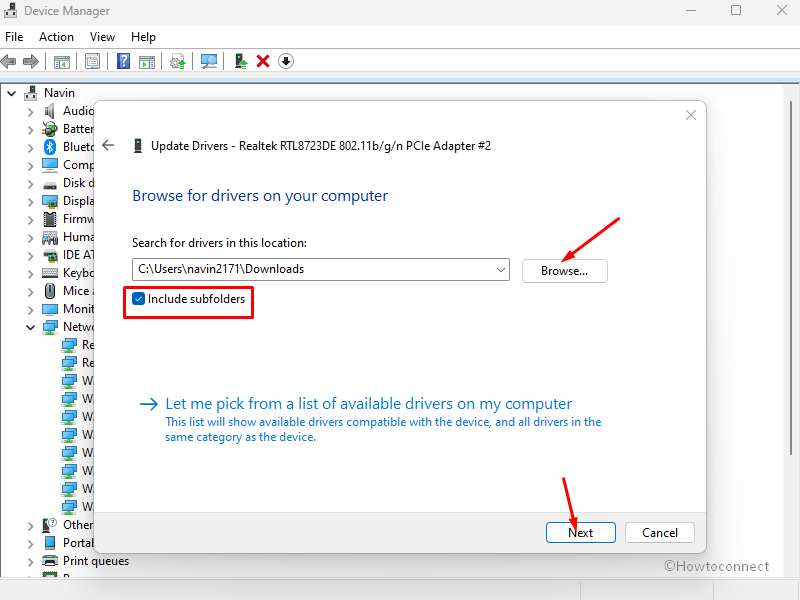
- Click on Browse and choose the Downloads folder where you placed the WiFi driver.
- Check on the box for Include subfolders. This will allow the wizard to identify the right .inf file.
- Click on Next.
You will be able to successfully Install WiFi Driver in Windows 10 once you are okay with the above-mentioned steps. All you will have is a newer version of “WiFi driver” in your system. This will address problems, introduce new functions, and include support for Windows 10.
Go through – Manually Install a Driver on Device Manager in Windows 10.
Way-2: Through Windows Update and Device Manager
There are two simple procedures to update WiFi driver in Windows 11 or 10. The one is via “Windows Update” and another one is through “Device Manager”.
Through Windows Update
Windows 11 –
- Hold down the Windows key and press I.
- Select Windows Update on the Settings app.
- Go to the right, and click on Check for updates.
Windows 10 –
- Press Win + I.
- Select – Update & security.
- On the right pane of the following page, click – Check for updates.
See – 4 Ways to Update Windows 10 and How to Include Driver Updates when Update Windows 11 or 10.
If the manufacturer of “wireless network adapter” installed in your computer has published new updates via “Windows Update Service”, the system will all by itself download as well as install that update.
Note: The only concern with this method is that the manufacturer can take more time to make the update available via this channel. However, if the wireless network adapter is from Microsoft, it might reach early.
Via Device Manager
Another simple method to update WiFi driver in Windows 10 and 11 is through “Device Manager” and to do so walk through the given sequence of steps.
- Click – Search.
- Type – devmgmt.msc.
- Click on Device Manager.
- Now, locate and double click on “Network adapters” from the Device Manager.
- Right-click on the wireless network adapter running on your computer.
- Click – Update driver.
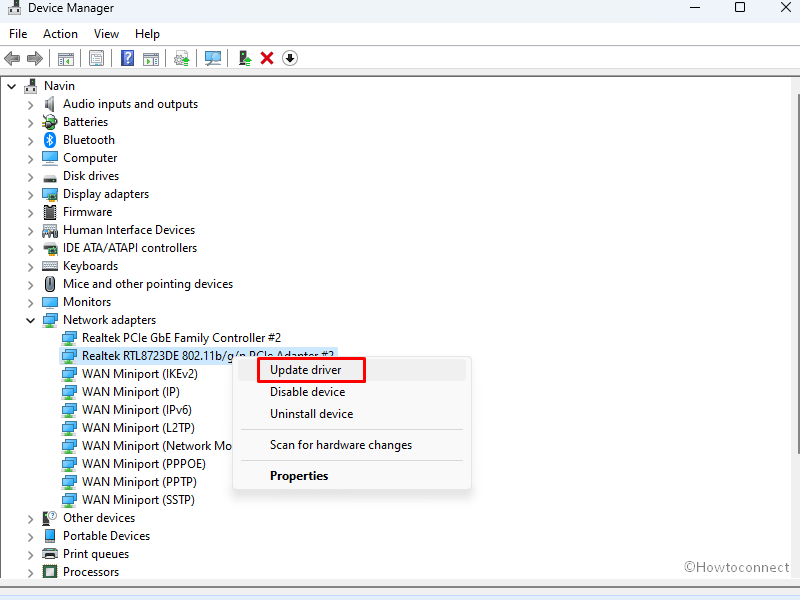
- When a new window will show up, you need to select the option labeled “Search automatically for updated driver software”.
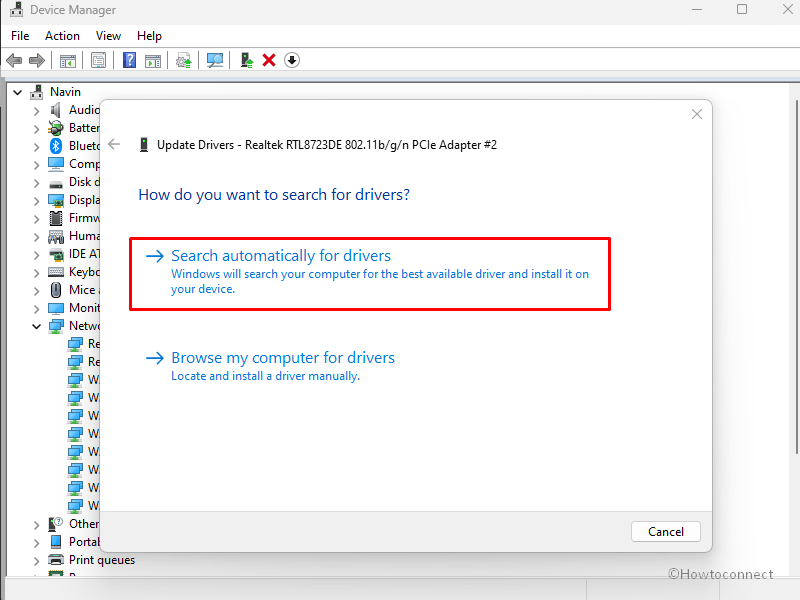
After these steps, you can download moreover install “WiFi driver” will automatically. Read – How to Identify if a Driver is Causing Issues in Windows 10 with Verifier
Methods:
Way-1: Directly using Driver file
Way-2: Through Windows Update and Device Manager
That’s all!!
