Methods and Steps to Edit OEM Support Information in Windows 10. – When you buy a PC, you might want to see its OEM Support Information. This information includes PC’s model, logo of the manufacturer, support URL, and many other details. You might follow a similar write-up – 5 Ways To Know BIOS Version of MotherBoar on Windows 10.
In Windows 10, you can easily see the OEM Support Information in two places – 1) About page of Settings and 2) inside System Properties window. But, there are two circumstances where you will not be able to see these on your computer. First, on the custom-build computers, and secondly, on the PCs that are running a clean installation of Windows. So, if your PC doesn’t show OEM Information, then don’t worry as there is a way out. Well, all thanks to Registry Editor that lets Edit OEM Support Information on Windows 10.
Before we jump into the steps, let us understand what all info you can add, remove or edit in OEM Support Information.
a) Logo image
b) Name of the Manufacturer
c) Name of the Model
d) Support Hours
e) Support URL
f) Support Phone Number.
You can edit any of the above-mentioned support items from Registry Editor.
Edit OEM Support Information on Windows 10
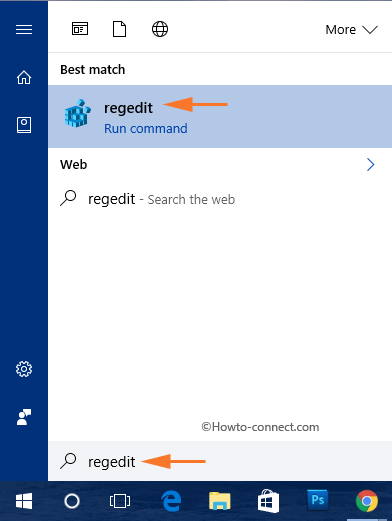
Step 1 – First of all, select Windows icon and begin typing regedit. This will quickly display Cortana with the same command as Best match.
Moreover, follow our another article on How to Access Registry Editor in Windows 10 – 5 Simple Tips.
Step 2 – So, click on regedit Run command underneath Best match.
Step 3 – UAC will pop-up on your screen. Select Yes button to continue.
Step 4 – Now, Registry Editor will become visible on the screen. So, browse to the OEMInformation key by following the below path.
HKEY_LOCAL_MACHINE\SOFTWARE\Microsoft\Windows\CurrentVersion\OEMInformation
Step 5 – Moving ahead, go to the right-hand side of OEMInformation key with a view to edit OEM Support Information on Windows 10.
Step 6 – Now, locate a blank space there and perform a right-click. From the list of options, select New => String Value.
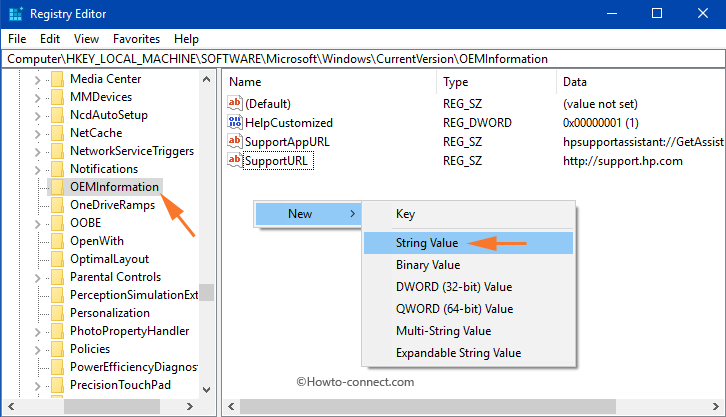
Step 7 – Go through the below supports and create one string value for each support.
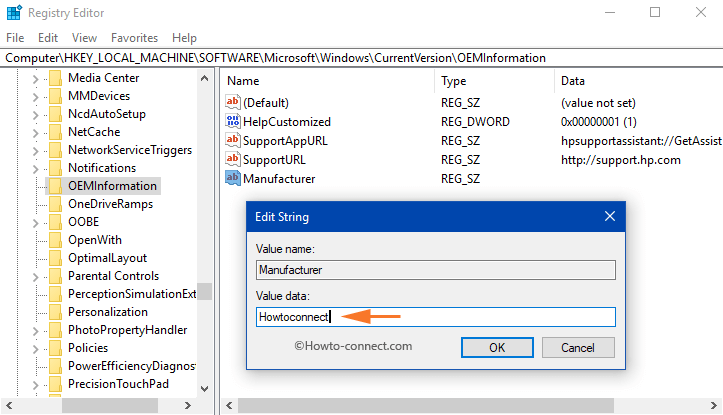
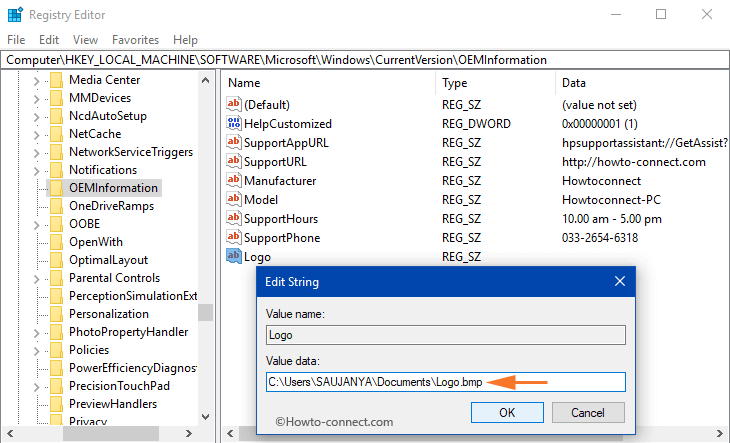
Step 8 – Next, double-click the string values and enter their Value data. Value data for each support is given below.
Manufacturer
Assign any text inside Value data field that you wish to see in the Manufacturer section. For example – I want my PC’s custom manufacturer be recognized as Howtoconnect. Finally, select OK to save the name.
Model
Type the model of your PC inside Value data box.
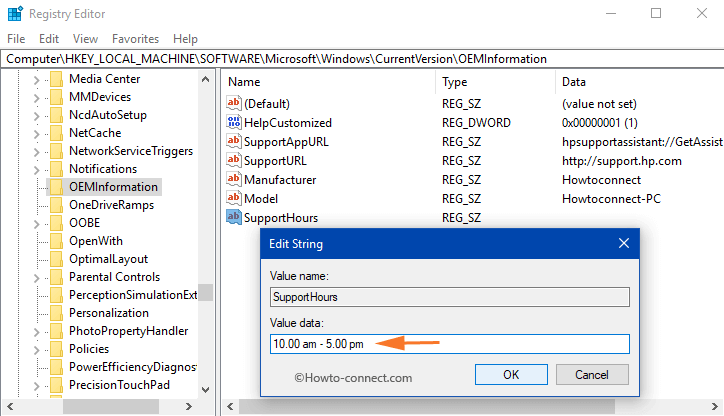
SupportHours
Assign the time slot in the string value that you want to display with SupportHours.
SupportPhone
Give a phone number in the Value data field.
Note – For both SupportHours and SupportPhone there is the limitation of 256 characters.
SupportUrl
Type the URL in the Value data field and it is the support website for an OEM.
Logo
You have to fulfill few requirement to edit a logo for an OEM support.
1. The image must not be larger than 120 x 120 size.
2. Color depth – 32 bit.
3. The image file must be in .BMP format.
So, in the Value data field, type the full path of the image file. Select OK to implement the edits.
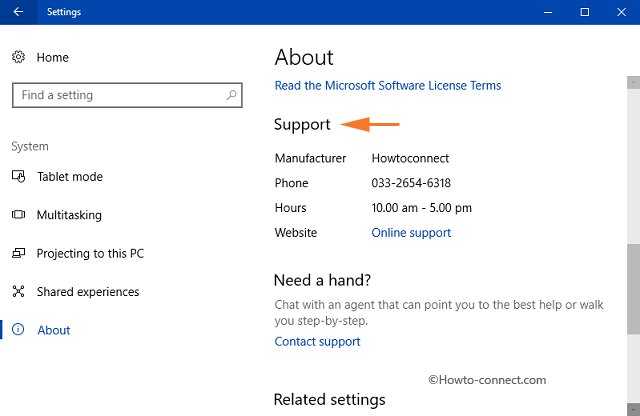
Now, launch Settings => System => About and on the right side you will find Support title. Just underneath Support, all the OEM Support Information you have edited above will be displayed.
In addition, open Control Panel and select System applet and it will show you the OEM Support Information. For reference, see the below image.
Conclusion
So, to edit OEM Support Information on Windows 10 is pretty easy and also handy to use. This is a very good way if you want to display some of your personal information on your computer. If you have more on OEM Support, write down to us.
