Procedures to Enable and Disable Automatic Update of Speech Data on Windows 10. – The speech model in Windows 10 incorporates data used by speech engine to convert text to audio or vice-versa. Generally, these models are periodically updated to enhance its accuracy and performance. So, if you want to improve speech recognition and speech models, then enable automatic update of speech data. Find more about the customizations of speech on How to Customize Speech Settings in Windows 10.
The Group Policy Editor includes a policy called Allow Automatic Update of Speech Data. This specific policy specifies whether your Windows 10 computer will get updates to speech models and speech recognition respectively.
If you enable the policy, your PC will regularly receive updates on speech models. In contrast, if you disable the setting, Windows 10 PC will not periodically get any updates on speech data.
In this guide, you will learn the steps to Enable and Disable Automatic Update of Speech Data on Windows 10 through two different methods.
Table of Contents
Enable and Disable Automatic Update of Speech Data on Windows 10
Method 1 – Group Policy Editor
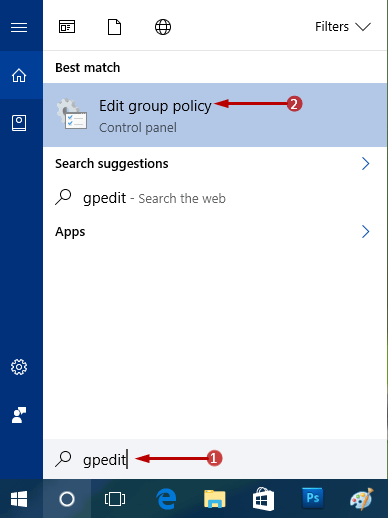
Step 1 – perform a click on Windows logo icon on the far left of taskbar. Next, type gpedit and Cortana will display Edit group policy underneath best match, click on it.
Alternatively, pursue this guide to Open Group Policy Editor in Windows 10 Using 8 Methods.
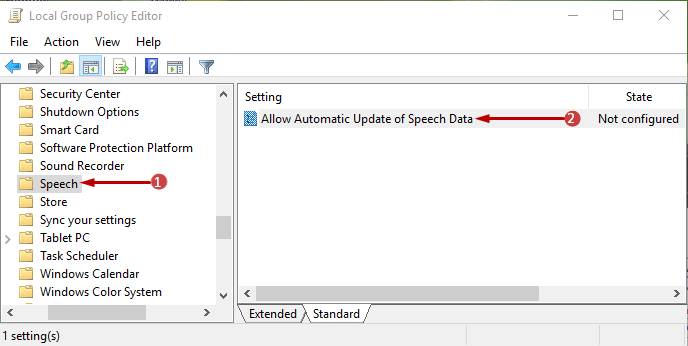
Step 2 – Now, this will make Group Policy Editor visible on the PC screen, so, navigate to the below-mentioned path.
Computer Configuration => Administrative Templates => Windows Components => Speech
Step 3 – Next, on the right pane of Speech, you will get to see a policy as Allow Automatic Update of Speech Data, double-click on it.
Enable Automatic Update of Speech Data
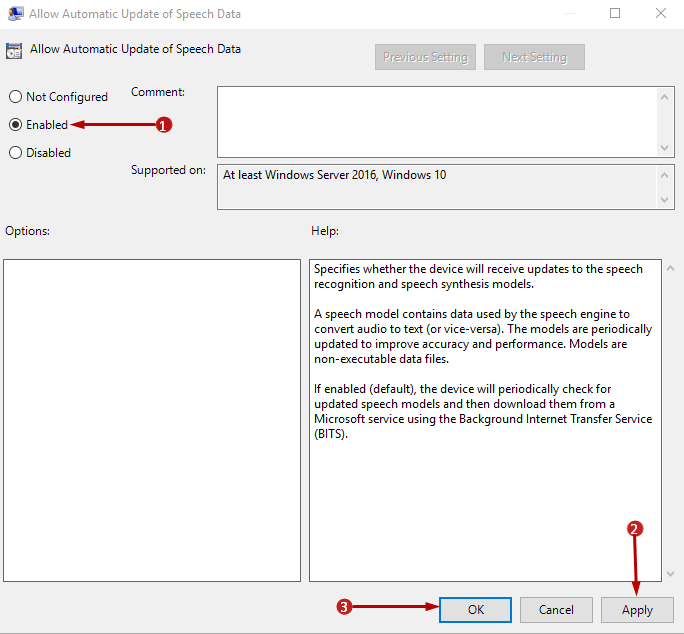
Step 4 – Moving on, another window of the same policy will appear on your screen. Select Enabled option on the upper left-hand side and finally, to implement the modification, click Apply and OK buttons.
Disable Automatic Update of Speech Data
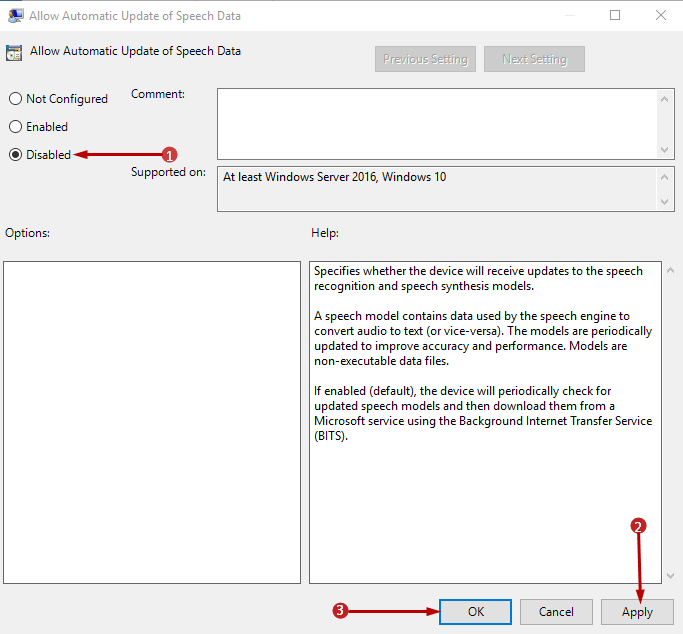
Step 5 – Now, in the window of Allow Automatic Update of Speech Data policy, select Disabled option.
Step 6 – Lastly, select Apply and OK buttons to make the modification effective.
Method 2 – Registry Editor
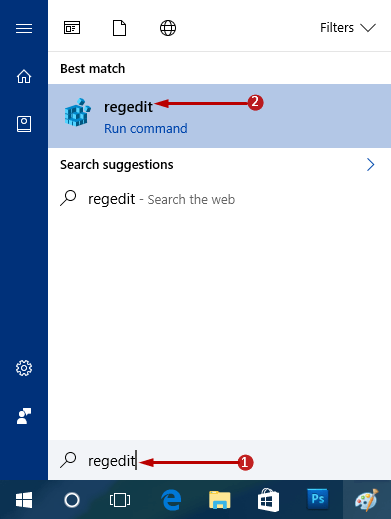
Step 1 – type regedit on the taskbar search field and click the same command that shows below the Best match of Cortana.
You can also read How to Access Registry Editor in Windows 10 – 5 Simple Tips.
Step 2 – Now, UAC prompt will evoke with its terms. Click Yes to its conditions in order to proceed.
Step 3 – When Registry Editor window will be noticeable, travel to the below key.
HKEY_LOCAL_MACHINE\SOFTWARE\Microsoft\Speech_OneCore\Preferences
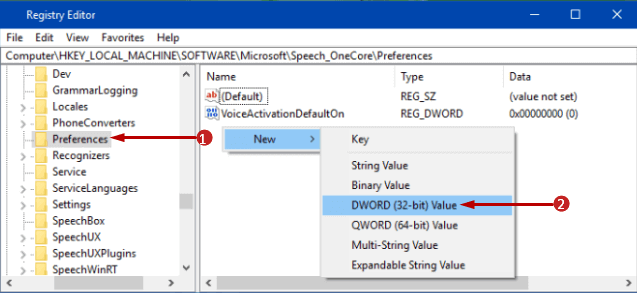
Step 4 – Move to the right pane of Preferences and make a right-click on a blank space. Hover the cursor on New and from the submenu that appears select DWORD (32-bit) Value.
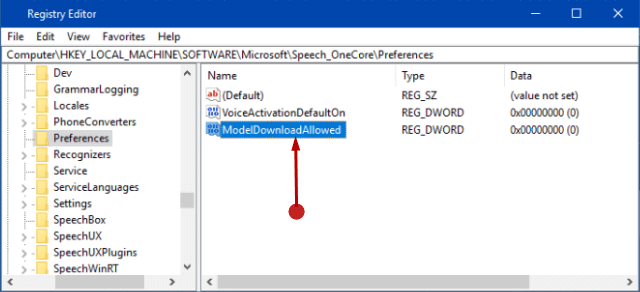
Step 5 – Now, name that DWORD as ModelDownloadAllowed.
Step 6 – After naming the DWORD, do a double-click on it. A small edit box will open up.
Enable Automatic Update of Speech Data
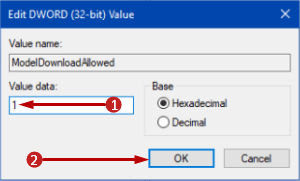
Step 7 – Set the Value as 1 and select OK button and this will allow the updates to download.
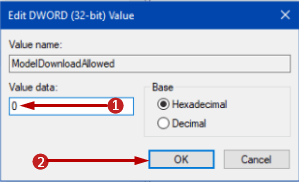
Disable Automatic Update of Speech Data
Step 8 – Insert 0 in the Value data field and click OK to not allow the updates to download.
Conclusion
Finally, we are hoping that more on speech models and its update will come in the future. But, as for now, completing the above steps will Enable and Disable Automatic Update of Speech Data on Windows 10 quite smoothly. If you know more about speech models and its update methods, please do share them with us in the comments form below.