Guide and Steps to Enable Keyboard Backlight Windows 10. – Computers from few brands have a specific type of keyboard which illuminates through characters and gaps between keys. The keyboard continuously glows due to this LED illumination feature. For certain users, the feature is not working because the keyboard backlight is disabled.
A built-in light sensor helps the Backlit KB work automatically. It automatically turns on in low light and turns off in More brightness. But on few Windows 10 computers, Keyboard Backlight Settings doesn’t perform up to mark. In this case, users need to manually activate the feature. So you will see here Disable and Enable Keyboard Backlight Windows 10. You find further 2 ways for this.
Enable Keyboard Backlight Windows 10
You can follow two ways to do the same – first through Windows mobility center and the last through the default application which controls the keyboard settings.
Way 1 –
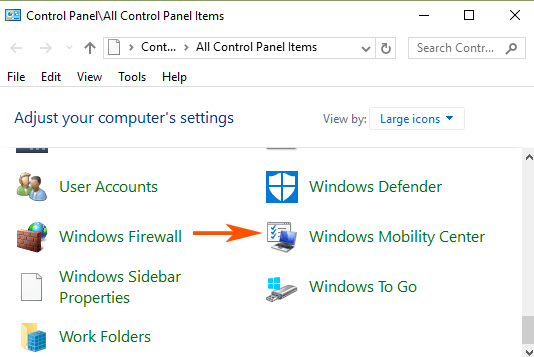
Step 1 – Click the Start button, type cp, and then press Enter.
Step 2 – Control panel will be visible on the screen, locate Windows mobility center. Once you find this application click and open.
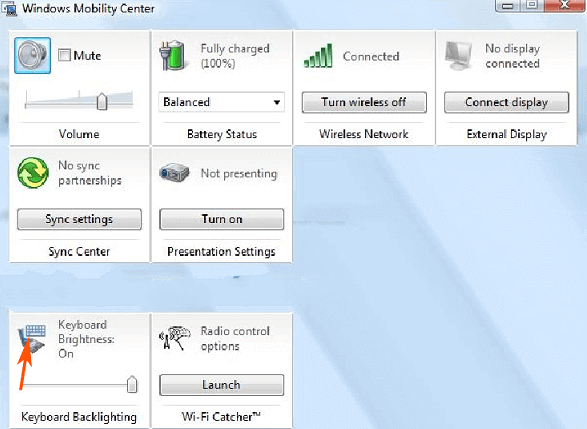
Step 3 – Locate a tile Keyboard backlight on Windows mobility center. Click the icon of keyboard backlighting.
Step 4 – Keyboard backlit pop-up will appear, select On under Keyboard lighting. If you adjust the keyboard brightness, select the option either Bright or Dim. A few more Keyboard backlight options are available here so customize on your own preferences.
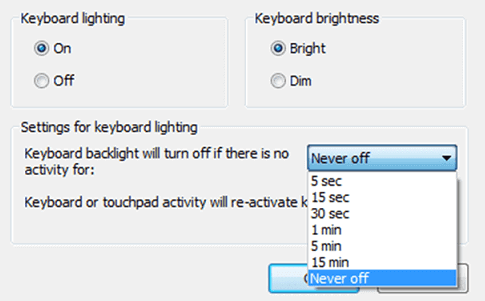
Step 5 – At last, click OK to implement the changed settings.
Way 2 –
Many Companies manage Keyboard backlight settings through an inbuilt application. So you can check whether the application exists or not.
Step 1 – Press the start button and type Keyboard backlit. You will find the setting of the concerned options.
Step 2 – Every brand gives its own type of controlling application for the keyboard setting. So you need to research something here to Enable Keyboard Backlight Windows 10.
If you find issue when you enable Keyboard Backlight
Many times, Keyboard Backlight does not work properly with Windows 10. In this case, you need to troubleshoot the keyboard.
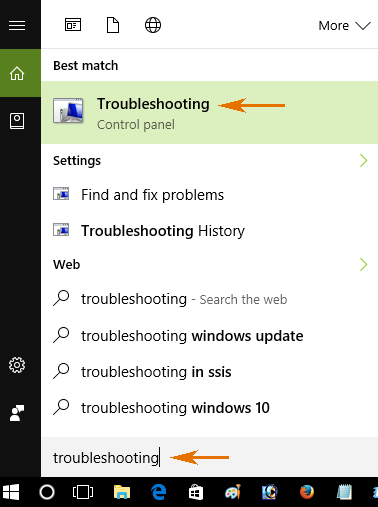
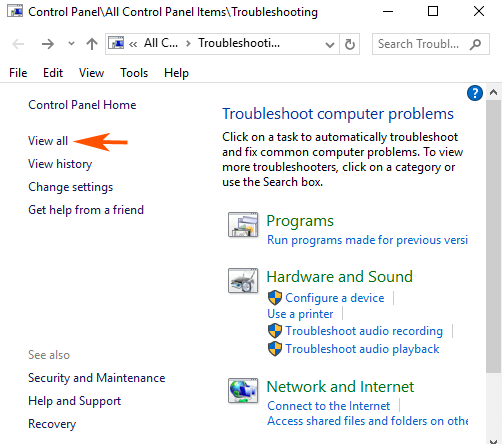
Step 1 – Open the start menu and write troubleshooting. Once you see the same troubleshooting under Best match, press Enter key.
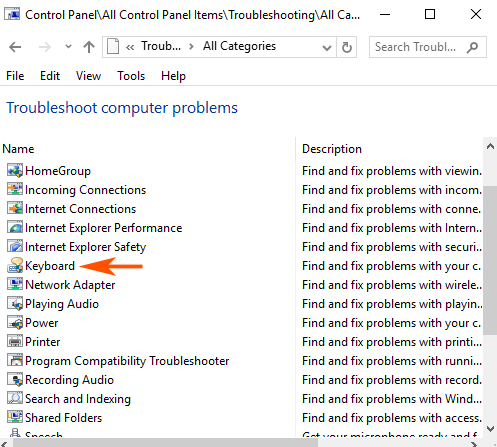
Step 2 – Select View all option in the right pane and allow the list of various troubleshooters to appear on the screen. Now search Keyboard in the list.
Step 3 – Click on Keyboard from the troubleshooter’s list.
Step 4 – Soon the Keyboard Troubleshooter comes out on the screen. Click Next.

Step 5 – It will scan the system for trouble and then displays the found problem in the list. Follow the on-screen instructions and this will fix Keyboard Backlight enabling or disabling issue.
Conclusion
So these are the methods for how to Enable Keyboard Backlight Windows 10. Moreover, if you find any problem in activating the tool troubleshooter will all set. If you meet with another issue or tip in Keyboard Backlight kindly do write below.
My laptop is a Satellite P75-A7200. It use to have backlighting. How do I turn it back on?