As you know that Telnet is a network protocol that allows users to log on a remote computer of the same network. It is quite a useful pre-installed Windows Program. Security measures play an important part and sometimes they can force you to enable Telnet program in Windows 11 or 11.
Act of enabling Telnet in Windows could be done either way as System Command or Control Panel. Both ways are to be shown simultaneously in this particular article.
Table of Contents
Enable Telnet Program on Windows
Here is How to enable Telnet Program in Windows 11/10/8/7 Step by step –
Way-1: Using Command line
If you are tech-savvy you would be accustomed to Graphical User Interface and have idea about olden Command Line Interface. We recommend System Command application here to enable Telnet due to its sharp effectiveness. Just follow the below consecutive steps and enable Telnet with less effort.
On Windows 11 and 10
- Click on – Search.
- Type in – cmd.
- Right click Command Prompt.
- Select – Run as administrator.
- Click Yes on the UAC pop up.
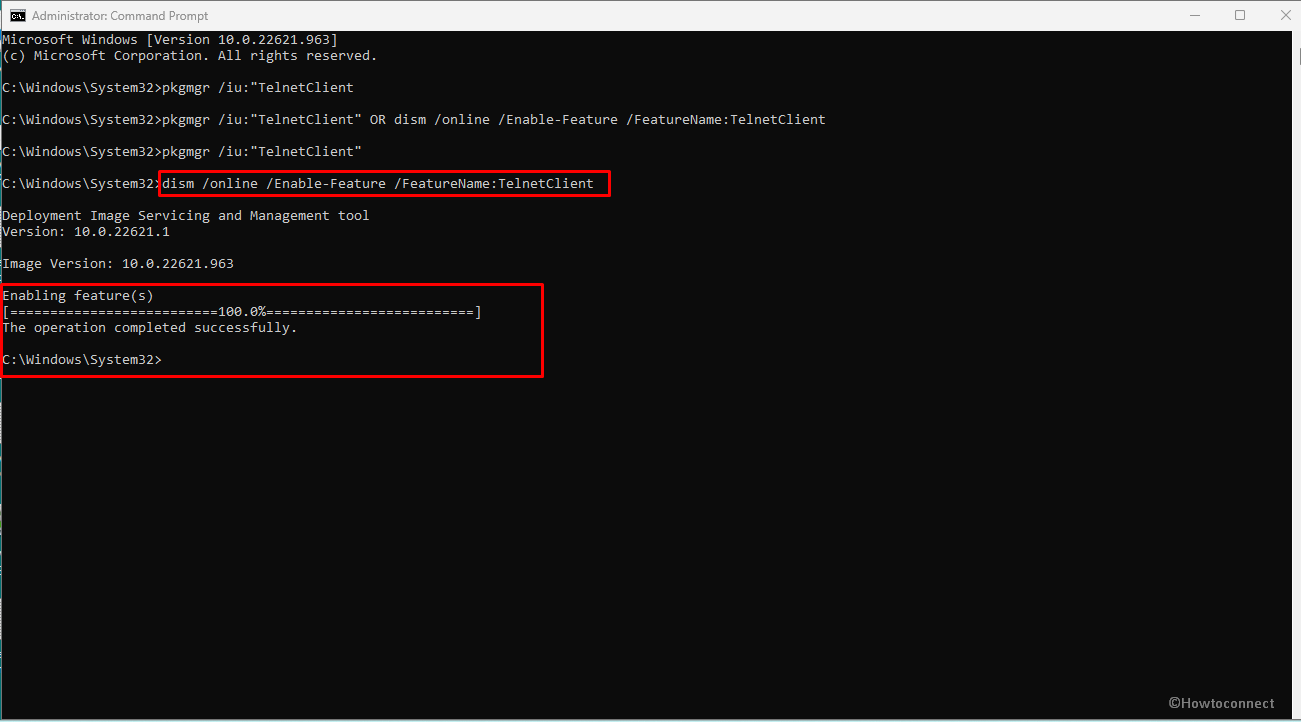
- Type the following command –
dism /online /Enable-Feature /FeatureName:TelnetClient
- and press the Enter key.
- You will see Enabling feature (s) on the Command prompt. Stay until it shows The operation completed successfully. Exit the program as the Telnet client Program is enabled.
On Windows 8
- Press Windows+X.
- Select Command prompt (Admin).
- Run the above command.
Way-2: Via Control Panel
It is one of the elegant ways to enable Telnet in Windows 7/8/10/11. This way requires the following steps.
- Open Control Panel. For this, click on Search and type control panel. Press Enter.
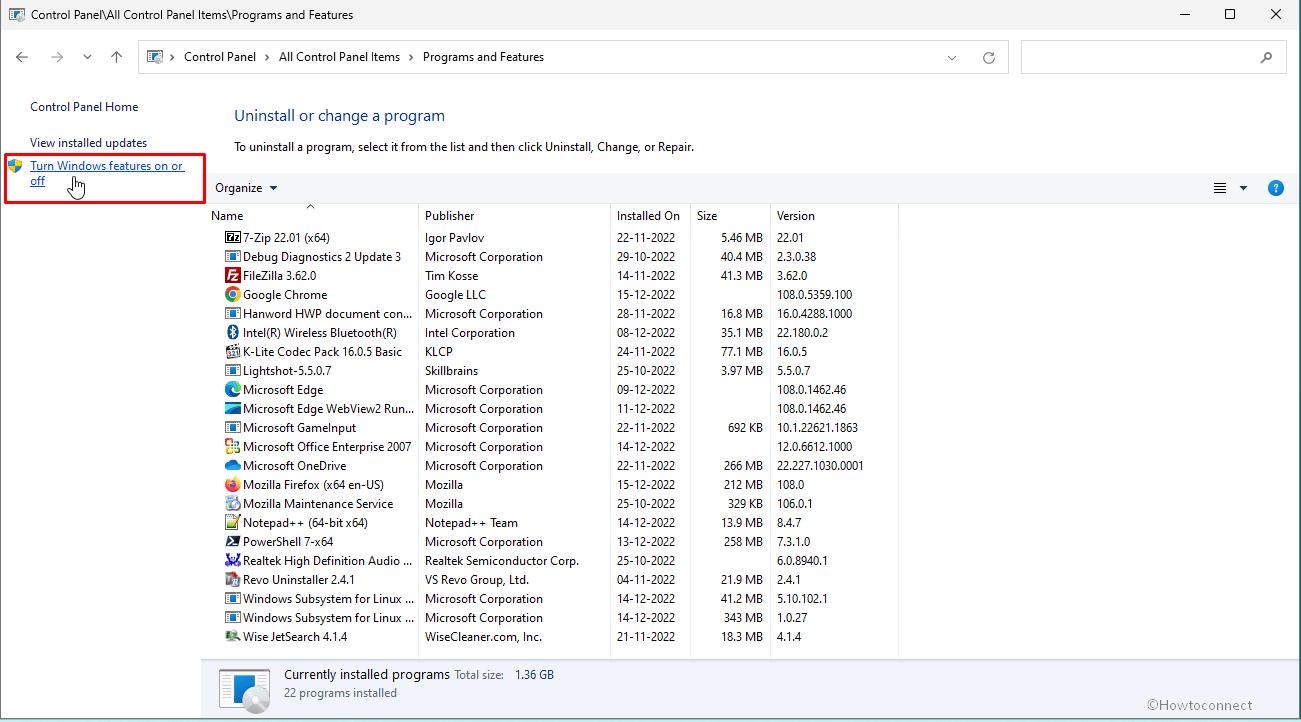
- Select Programs and Features.

- Now click on Turn Window Features on or off.
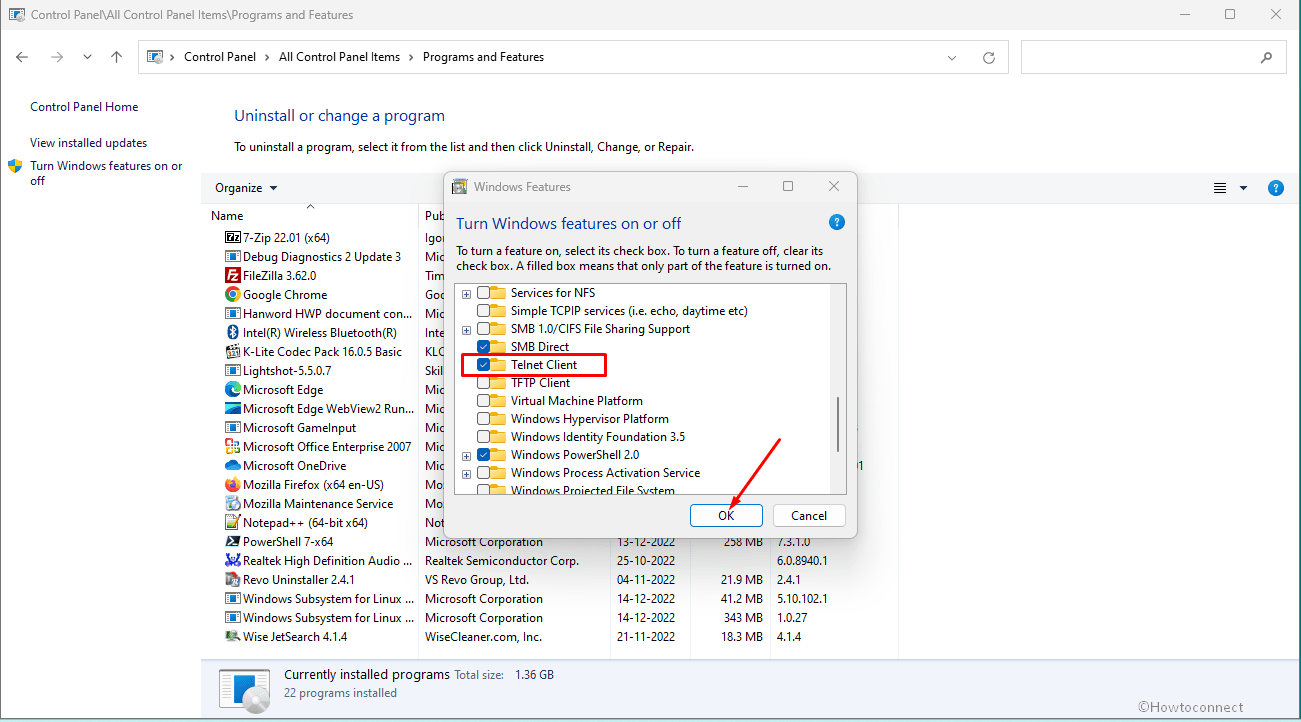
- Check the boxes Telnet Server and Telnet Client.
- Click OK.
- Windows will search files and install this feature in a small amount of time.

That’s all!!