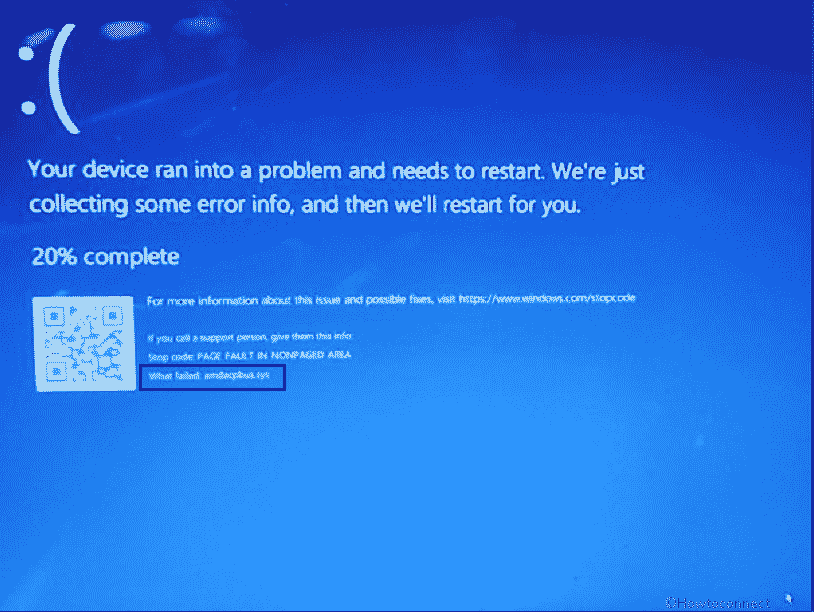
We have previously covered some blue screen errors related to AMD Graphics driver, for example, amdppm.sys, AuthenticAMD.sys, amdkmdag.sys, and AmdRyzenMasterDriver.sys. Such an issue is amdacpbus.sys which occurs with system crash and sometimes also with reboot loop.
Full error message is What failed: amdacpbus.sys that appears with SYSTEM_THREAD_EXCEPTION_NOT_HANDLED, Page fault in nonpaged area, SYSTEM_SERVICE_EXCEPTION, etc. This BSOD error code is generated when startup or running the PC. amdacpbus.sys refers to AMD Audio CoProcessor driver and is developed by Advanced Micro Devices. This means corrupted audio drivers are the main reason for this bug check and you will need to reinstall them.
Table of Contents
amdacpbus.sys Blue Screen error
Here is how to Fix amdacpbus.sys Blue Screen Error BSOD in Windows 11 or 10 –
Way-1: Uninstall and Reinstall AMD drivers
Since the culprit amdacpbus.sys is a part of AMD Audio Co-Processor driver uninstalling and reinstalling audio and motherboard drivers from the respective official websites will solve the issue.
- Press Winkey and R.
- Type – appwiz.cpl.
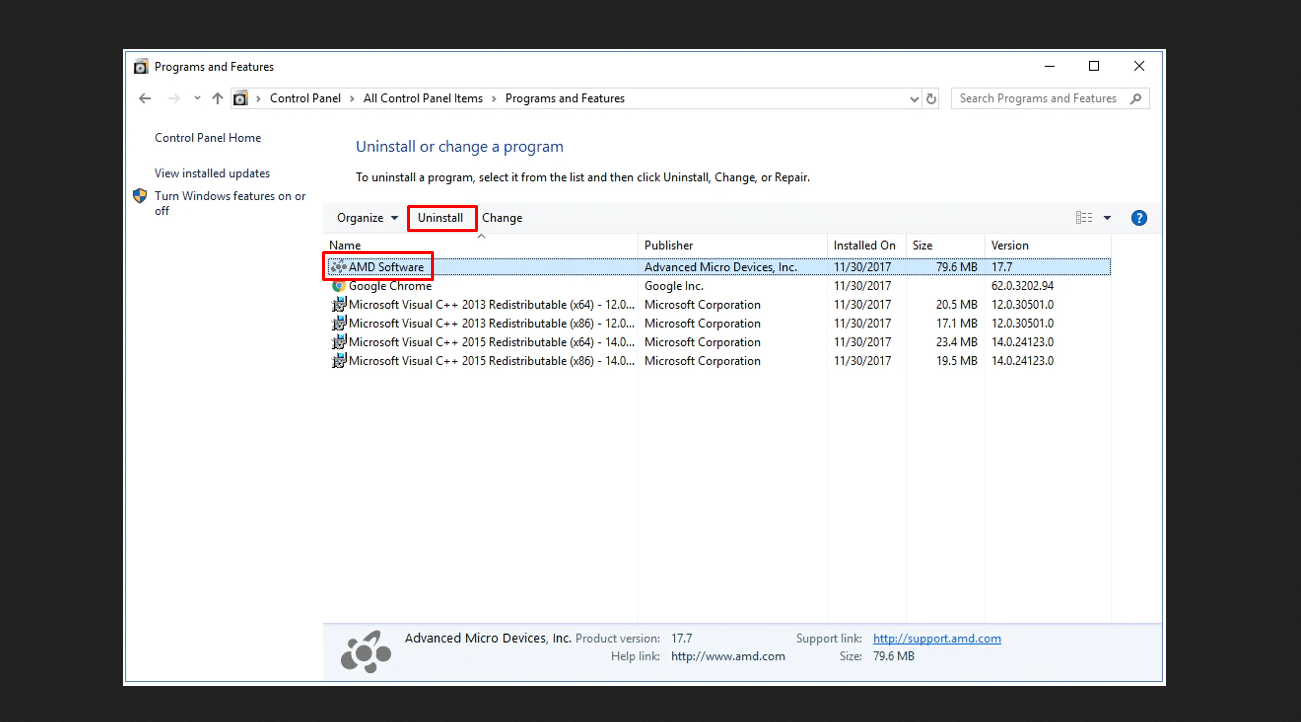
- Find AMD on the Programs and Features window and select it.
- Click on Uninstall.

- Follow the instructions and remove the driver completely.
- Restart the computer and check if the BSOD error is fixed.
- Now navigate to the official website of AMD and discover the latest version of the same programs which you have uninstalled.
- Download the setup files of the respective drivers and install them successively.
Analyze the issue using BlueScreenView and WhoCrashed: A Tool to analyze Dump and reveal culprit driver on Windows.
Way-2: Run DISM utility
Running DISM command line tool is found useful to fix “What failed: amdacpbus.sys” system crash in Windows 11 and 10, so, follow –
- Click on Start and type cmd.
- Press Ctrl + Shift + Enter.
- Select Yes on the User account control dialog box.
- Once the Command prompt is open, copy-paste the following lines of commands one at a time following by pressing Enter
DISM /Online /Cleanup-Image /CheckHealth
DISM /Online /Cleanup-Image /ScanHealth
DISM /Online /Cleanup-Image /RestoreHealth- After completion of the process of each of the commands, restart the computer.
To know in detail, read – What is DISM in Windows 10 (Deployment Image Servicing and Management)?
Way-3: Remove the third-party apps
3rd-party suites often cause conflicts with system files and other programs installed on computer which lead the system to crash and fall into bug check ending with BSOD.
Removal of the programs is the easiest method coming to mind when encountering amdacpbus.sys blue screen error. Therefore, move forward with the steps –
- Hold down Windows key and hit I.
- Select Apps from the Settings app.
- If you are running Windows 11, click on Installed apps. Find out the third program and click on 3 dots hamburger menu for that. Select “Uninstall” and confirm the prompt. Go with the instructions if shown.
- If you are on Windows 10, click on Apps & features. Expand the program by clicking on it and select Uninstall. Follow the further instructions.
- In the end, restart the system and make sure that amdacpbus.sys error is solved.
Way-4: Use System file checker to fix amdppm.sys Blue Screen error
SFC aka System file checker is a fundamental command-line tool competent to remediate corrupted or missing installation files which is the most common reason behind BSOD.
amdacpbus.sys Blue screen error is the result of conflicts between third party programs and system components, outdated drivers, the presence of malware, etc, this tool is the appropriate option to use.
- Launch the administrative mode of Command prompt. Type cmd.exe in Windows search and select – Run as administrator.
- Click Yes on the User account control prompt.
- When the admin command prompt opens up, type –
SFC /scannowand hit the Enter - Quickly, the utility will scan and check the integrity of files. When you see the message ‘100% completed ‘and ‘Resource Protection did not find integrity violations’ reboot the system.
- Make sure that the BSOD does not persist further otherwise follow the next method.
Way-5: Evacuate disk to arrange some room
amdacpbus.sys BSOD might also be generated after running out of disk space. Don’t worry, Disk cleanup is a built-in arrangement to wipe out unnecessary chunks of files and folders stored in the form of temporary files, leftovers, and residues of external software, cache, and other.
Once you out these data, the essential files start functioning properly. As a result, the bug checking halts, and your computer becomes errorless –
- Click on taskbar search and type cleanmgr.
- Hit Enter key then select (C:) on the Disk cleanup Drive Selection prompt.
- Click – OK.
- The tool will present you with a window; click Clean up system files on that.
- Once again choose drive (C:) and select ‘OK’.
- On the next window, check all the boxes located under Files to delete.
- Select OK and give your approval by clicking on Yes.
- Hold on and after completion reboot the device.
Way-6: Install pending Windows updates
Quality updates are intended to rescue different problems in Windows and this can be a solution in this case of error. You need to check for updates and install them if some are in pending state to fix amdacpbus.sys BSOD.
- Click on – Start.
- Type – updates.
- Hit – Enter.
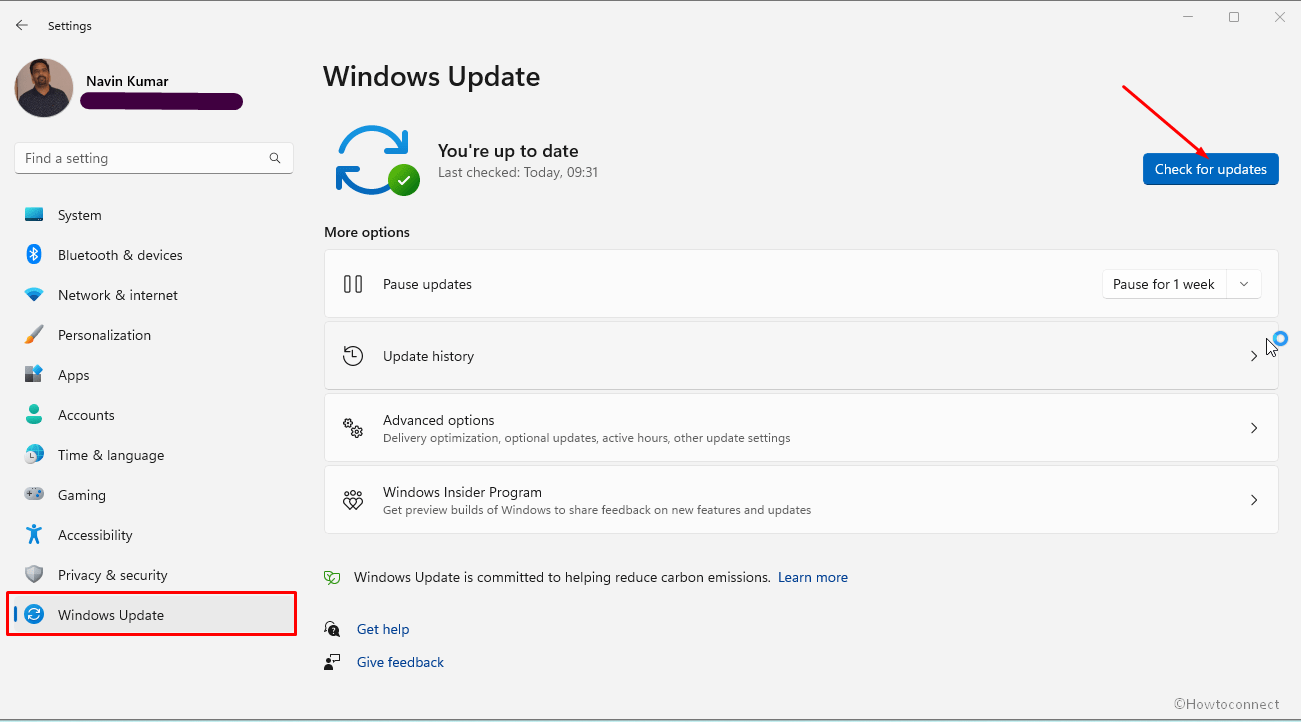
- Click on – Check for updates.

- Give some time to the system to complete scanning and download if any update is pending.
- After downloading is finished, click on Restart now.
Way-7: Uninstall the recent Windows update
Several times, Windows updates create problems instead of implementing improvements and bug fixes to the computer. Buggy updates are the root cause for this which might force the system to trigger amdacpbus.sys.
Hence it is necessary to confirm whether any patch was installed before the SYSTEM_THREAD_EXCEPTION_NOT_HANDLED blue screen was initiated. For this, navigate to the following location then closely and carefully check the updates in the list –
Windows 11:
Settings > Windows update > Update history
Windows 10:
Settings > Windows update > View update history
Once you are confirm that this error occurred after receiving a patch or build then follow –
For Windows 11 –
- Press Win+Q.
- Type updates and hit Enter.
- On the Settings app, click – Update history.
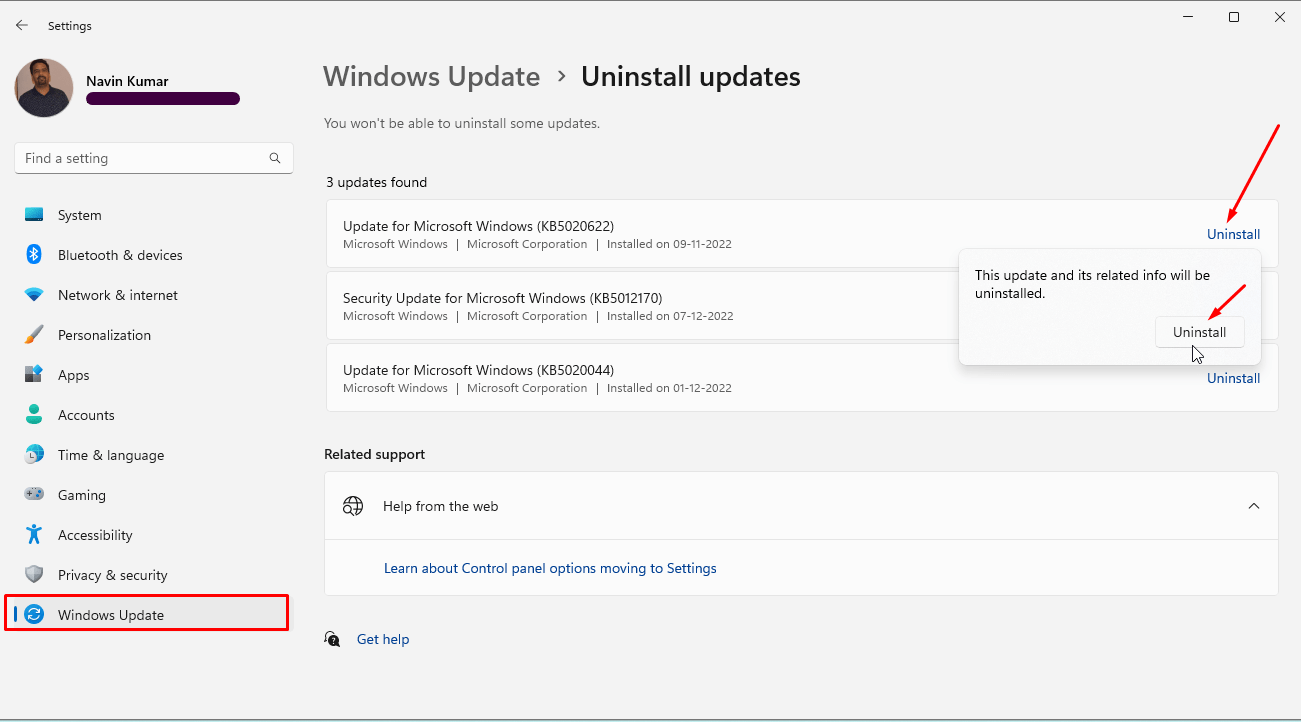
- Then click – Uninstall updates.
- If a warning dialog comes, select – ‘Uninstall’.

For Windows 10 –
- Hold down – Windows logo+I keys.
- Select – Update & security.
- Now click on View Update history. From the next page, select “Uninstall updates”.
- A new window prompts up named Programs and Features > Installed updates. Find the update, right-click on it and select Uninstall.
- Once a confirmation dialog shows, click on Yes.
- The PC will restart a couple of times and complete the process. The error should no longer occur now.
Methods list:
Way-1: Uninstall and Reinstall AMD drivers
Way-2: Run DISM utility
Way-3: Remove the third-party apps
Way-4: Use System file checker
Way-5: Evacuate disk to arrange some room
Way-6: Install pending Windows updates
Way-7: Uninstall the recent Windows update
That’s all!!
