The error message ‘atidxx64.dll caused an access violation’ often occurs when atidxx64.dll is attempted to be loaded, either while Windows is booting up or, in certain situations when it is already operating. Dynamic Link Library (DLL) files, such as atidxx64.dll, are essentially a “handbook” that holds information and guidance for executable (EXE) files to perform, such as sapisvr.exe. All those files were developed so that various programs (for example, Windows) could use the same atidxx64.dll file. Therefore, they preserve significant bandwidth usage and enable your computer to perform more efficiently.
Apparently, whatever renders the Atidxx64.dll DLL file so essential and effective simultaneously makes them extremely prone to crash errors. One of the most prevalent situations where the ‘atidxx64.dll caused an access violation’ error message comes alive is in the scope of games – players of Fallout 4, Genshin Impact, Final Fantasy, Battlefield 4, etc. There are many more circumstances that could possibly trigger this issue. Errors that cause application crashes are undeniably frustrating, but we’re here to help you discover the solution. If you find yourself in one of the scenarios listed above, use the troubleshooting tips below to address your atidxx64.dll problem. See – Fix BGI DETECTED VIOLATION Blue Screen Error BSOD in Windows 10 or 11.
Atidxx64.dll caused an access violation on Windows 11 or 10
Here is how to fix Atidxx64.dll caused an access violation in Windows 11 or 10 –
Way-1: Uninstall recent Windows update
When a game or app suddenly starts showing error, buggy Windows update is the most possible reason. Therefore, in the case of Atidxx64.dll caused an access violation; once this error appears, first check if any ‘update’ is installed recently. If yes then uninstall the same using below steps –
- Press Windows and R.
- Type – appwiz.cpl.
- Hit – Enter.
- Click the link ‘View installed updates‘ on the Programs and Features window.
- Locate the Windows update (in the form of KB…) installed sorting by date and time.
- Once found, right click on the update.
- Select – Uninstall.
- If prompted click – Yes.
Way-2: Run the app or game with compatibility mode
You may uninstall and reinstall crashing game in a variety of methods, including using the Control Panel, the Apps & Features area in Windows settings, or the built-in capability in a gaming platform like Steam. Bear in mind that bigger games will require some time to re-download, so it could take time.
- Find Steam apps/Common/Thief Simulator, whichever you are running and getting trouble.
- Go to the setup file of the app.
- For this, click on Search, and type the game or app name.
- Right-click on the result and select Open file location.
- Now, right-click on .exe file and choose Properties.
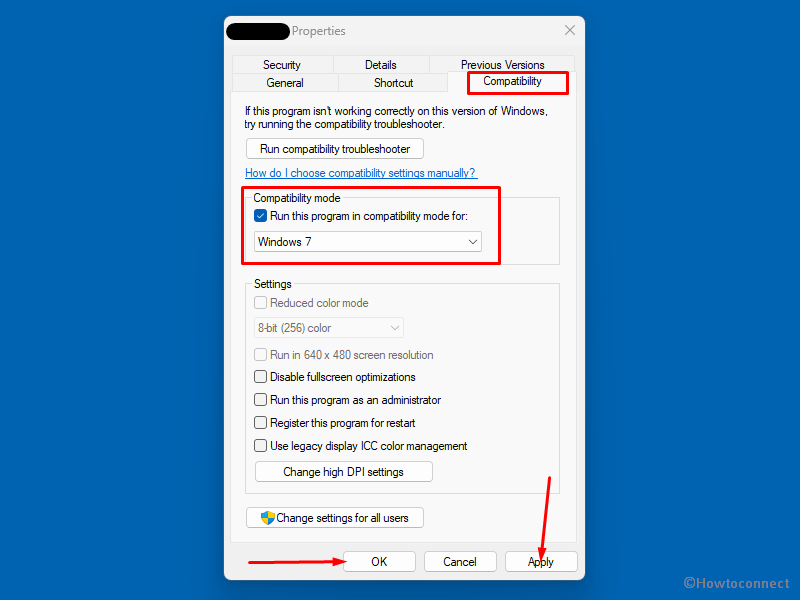
- Click on Compatibility tab.
- Check the option – Run this program in compatibility mode for.
- Select Windows 7 from drop down.
- Click Apply and OK.
- Then, launch the game.
Follow – How to Change Settings in Compatibility Mode Windows 10.
Way-3: Uninstall GPU Drivers and install an up-to-date version
Obsolete or damaged GPU drivers are one of the most common factors for the atidxx64.dll crash problem. Therefore, you must uninstall your GPU driver as follow and install it manually:
- Right-click on – Start.
- Select – “Device Manager”.
- Expand the Display adapters by double clicking on it.
- Right-click on the GPU.
- Select – Uninstall device.
- Check the box for Attempt to remove the driver for this device option.
- Click on Uninstall.
- Reboot the PC.
- Go to the manufacturer’s website of the GPU and download the up-to-date version of the adapter.
Way-4: Consider Reinstalling the Game
Certain Game app sometimes creates conflicts on Windows due to the presence of bugs in the game itself. Removing and then reinstalling the application is the lone solution in this situation. However, before this, you need to check if any update of the game is available and install in case it is. Then go ahead with the guide –
- Right click on Start.
- Select – Run.
- Type appwiz.cpl.
- Locate the game or app you need to remove.
- Select the app and click – Uninstall.
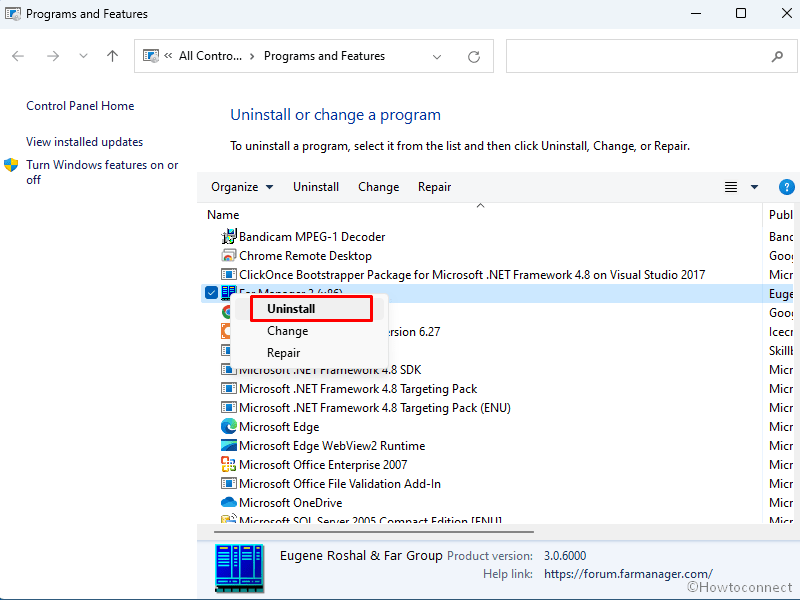
- Follow the further instructions.
- After the program is successfully uninstalled, reboot the device.
- Go to the game’s website, download, and install.
Way-5: Remove third party Firewall or antivirus
Apart from the above methods, when you do have Avast (or another virus protection/firewall), it may pile up with the rendering engine and end up causing a crash. Having it turned off will not improve matters in most cases since it maintains the operations running in the background. We recommend uninstalling it (a reboot is required afterward) and if this does not help, kindly follow the guidelines –
- Click – Start.
- Select – Settings.
- Once on the Settings, click on – Apps.
- From the right pane click on – Apps & features.
- In the list of all installed programs, find the third party firewall or antivirus and click on it.
- Select Uninstall and go with on-screen instructions.
See – How to uninstall apps on Windows 11 (Easy methods).
Way-6: Run SFC /Scannow to fix Atidxx64.dll caused an access violation
The System File Checker (SFC) is a feature that integrates over every Windows version that enables people to examine and repair damaged system files. To fix broken or damaged atidxx64.dll data file, use the SFC tool. To do so, launch Command Prompt as your administrator:
- First, click – Start.
- Type – cmd.
- Press – Ctrl + Shift + Enter.
- Select Yes on User account control.
- Type –
SFC /scannow
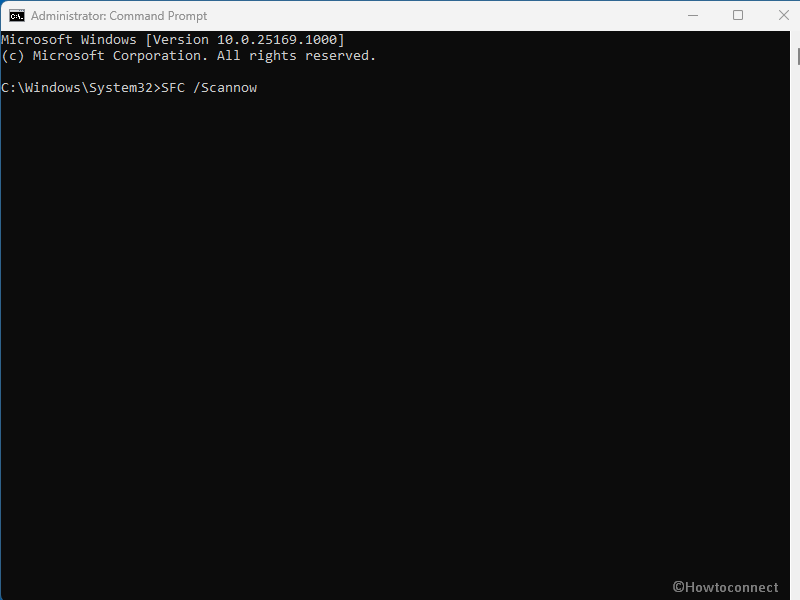
- Press – Enter.
- SFC tool will begin searching for atidxx64.dll and other system file abnormalities.
- Once finished, restart the computer and check if the error still exists or it is solved now.
Note: Please take note that this scanning may take some time to complete, therefore try to be patient while it is in process.
Way-7: Install Windows update
You must check Windows Update regularly to avoid every type of issue because the maker company perpetually works on bug fixes and pushes them through patches. Mostly atidxx64.dll caused an access violation error messages are the results of an out-of-date Windows operating system. Simply follow these steps to install Windows Update:
- Click on Search.
- Type – “Updates“.
- Hit “Enter.”
- Once on the Settings app, click – Check for Updates.
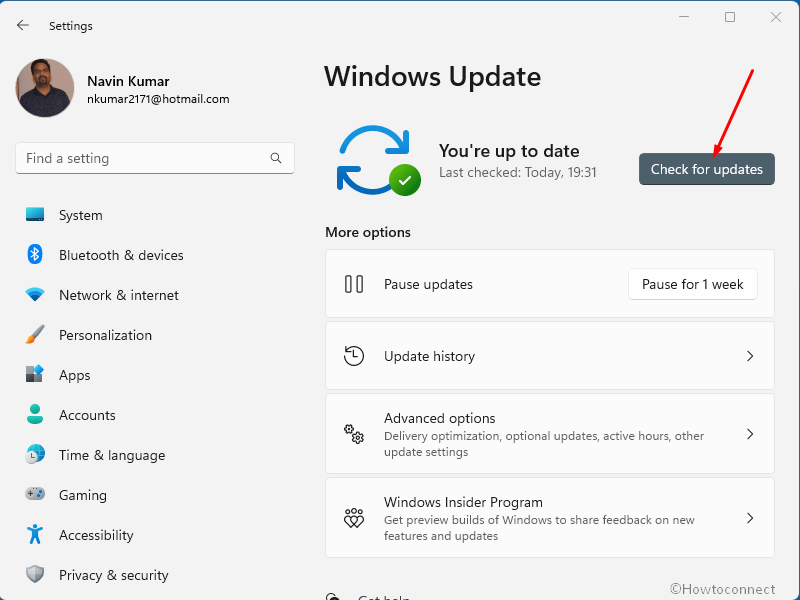
- Allow the updates (if available) to download.
- After downloading is complete, select – Restart now.
Way-8: Perform System Restore
Suppose all methods failed and none is helping then this may work wonder to fix Atidxx64.dll caused an access violation. The tool will bring your system back to the state when there was no glitch. All you need to move with the steps carefully –
- Press Windows and R.
- Type – rstrui.
- When System Restore wizard appears, check – Choose a different restore point.
- Click – Next.
- Select a Restore point that suits you.
- Again select – Next.
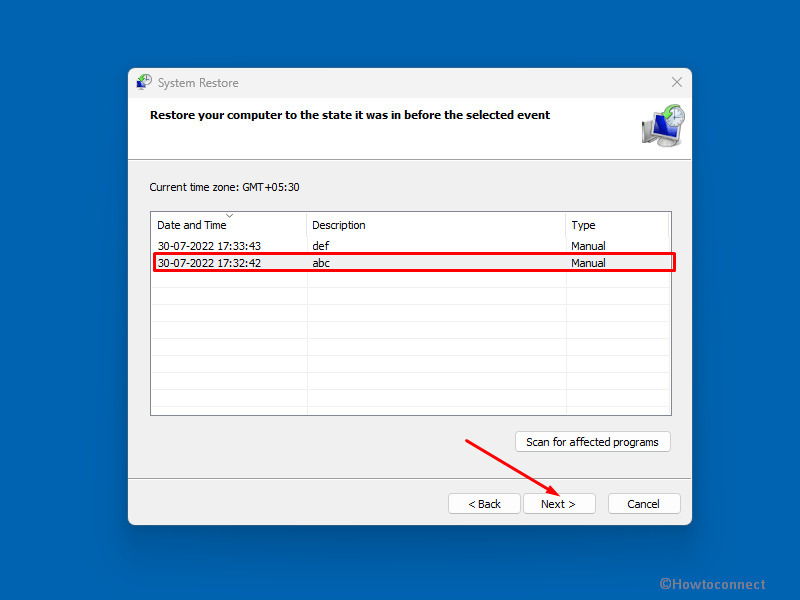
- Review the selection and click on Finish.
- Click Yes on the warning pop up.
Assuming that this solution does not resolve the atidxx64.dll crash error, please check out the following method.
Having followed this method, you need to install the most recent GPU drivers. Device manager is not the right alternative for this, therefore go to the websites of your hardware manufacturers (AMD, Nvidia, Intel, etc.) and download them from there.
Note: If all those methods fail to solve the atidxx64.dll caused an access violation error, consider downloading and Replacing Your atidxx64.dll File. Remember that this is a complex process. so, don’t go for it if you are an inexperienced user.
Methods:
Way-1: Uninstall Windows update
Way-2: Run the app or game with compatibility mode
Way-3: Uninstall GPU Drivers and install an up-to-date version
Way-4: Consider Reinstalling the Game
Way-5: Remove third party Firewall or antivirus
Way-6: Run SFC /Scannow
Way-7: Install Windows update
Way-8: Perform System Restore
That’s all!!
