If you have installed Intel® Driver & Support Assistant you might notice spikes in CPU usage in the Task Manager. The issue may cause freezing of gameplay, hanging desktop, and slow PC performance. Of recent, some users report that DSA service is not working smoothly and using 100% of the CPU. This problem occurs on the computer running build 19042.685 and sometimes can not even let see streamings and videos.
DSA Service High CPU resource usage may cause game lag during playing Warzone, Minecraft, Runescape, or other. The issue may even lead to the Blue Screen of Death error.
DSA Service High CPU Usage in Windows 10
Here is how to Fix DSA Service High CPU Usage in Windows 10 –
1] Uninstall DSA
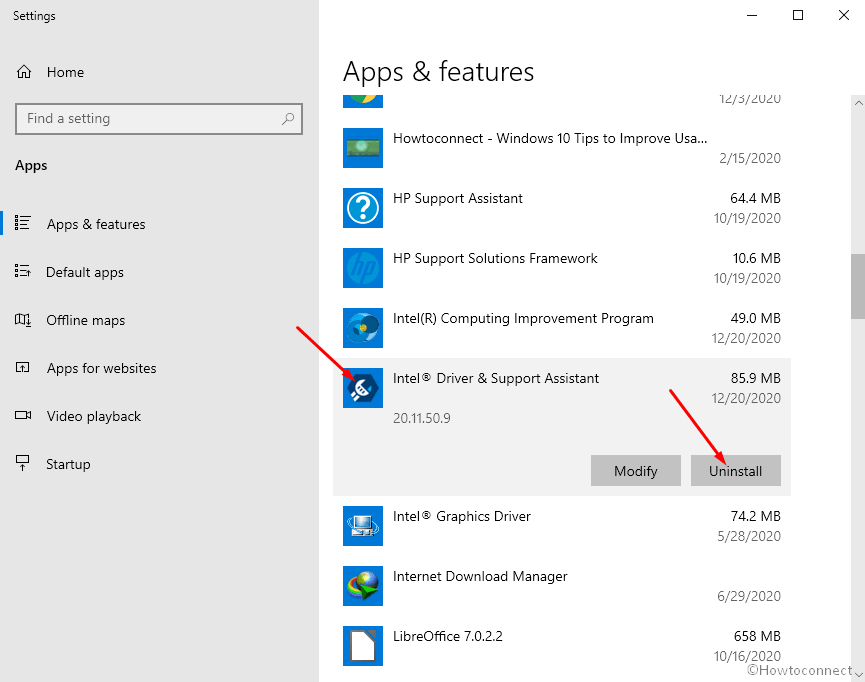
Removing Intel® Driver & Support Assistant from the system has worked effectively to fix this issue. After uninstalling this utility you will no longer encounter high resource usage.
- Click the Search icon on the taskbar.
- Type – apps & features.
- Press – Enter.
- Scroll down and find – Intel® Driver & Support Assistant.
- Click the same to expand.
- Select – Uninstall.

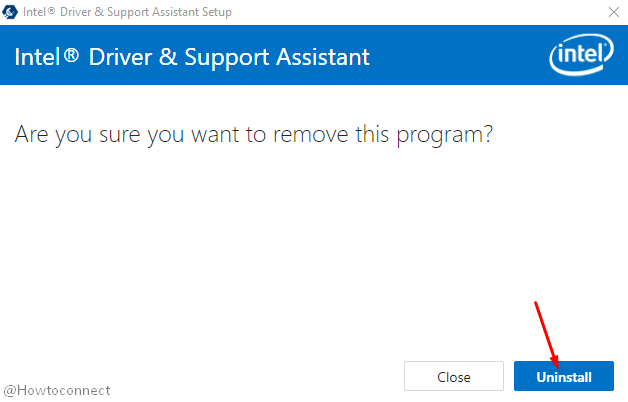
- Once a small pop-up appears, again click – ‘Uninstall‘.
- If a User account control dialog shows up, choose – Yes.
- When the Intel DSA wizard will appear; click – “Uninstall”.

2] End Task Driver & Support Assistant to Fix DSA Service High CPU Usage
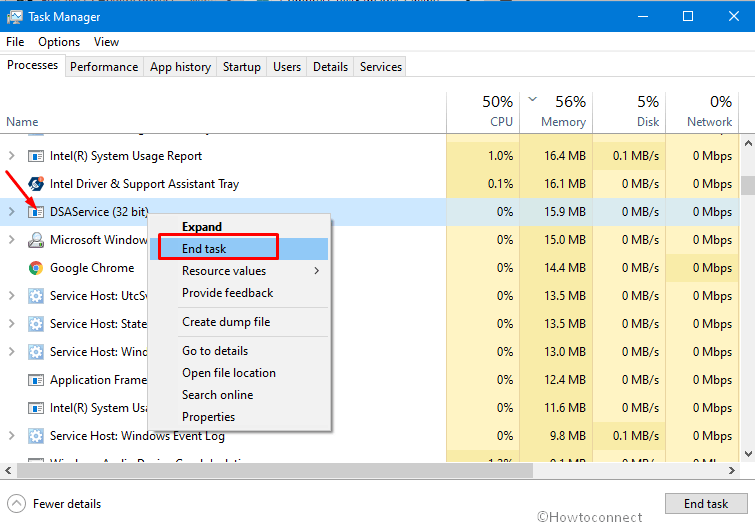
This is a temporary solution to DSA 100% or maximum resource usage trouble. When you experience that your game is lagging or PC is slowing down or freezing go to the Task Manager and End task the process. Furthermore, prevent the utility from running the utility in background by disabling it in Startup.
- Press – Ctrl + Shift + Esc.
- In the Processes tab, locate – DSAService (32 bit).
- Right-click on the same and click the – End task.

- Now go to – Startup tab.
- Next, right click on Intel Driver and support assistant and select Disable.
3] Update the DSA to the latest version
Intel has been reported about this issue so after some time the company may come with the update having bugfix. So, install the most recent version of DSA from the official website –
- Go to this webpage.
- Click – Download now.
- After the downloading is completed double click – “Intel-Driver-and-Support-Assistant-Installer.exe”.
- Follow the onscreen instructions and complete the installation of DSA.
4] Registry tweak to fix DSA Service High CPU Usage
A simple registry tweak might help you to fix DSA Service High CPU Usage in Windows 10 or 11. DSA.exe process consumes 25% of the processor on a machine having 4 CPUs. If your PC has a single processor, the DSA.exe mostly causes 100% usage of CPU. In The log file ds_agent.log also confirms this problem by showing error lines frequently:
2019-01-30 17:21:23.000000: [Error/1] | Invalid input. | .\VP.cpp:206:`anonymous-namespace'::CVulerabilityProtection::Check | EC8:26E4:dsp.vp.serviceThis occurs due to missing Run key in the following string of Registry Editor –
Computer\HKEY_LOCAL_MACHINE\SOFTWARE\Microsoft\Windows\CurrentVersion\RunSo ensure that the Run key exists. In case, the key is not in the hive create a new one and restart your PC.
In most of the cases of DSA Service High or 100% or High CPU Usage uninstalling the tool has worked so give priority to the 1st method.
Methods list
1] Uninstall DSA
2] End Task Driver & Support Assistant
3] Update the DSA to the latest version
4] Registry tweak
That’s all!!
