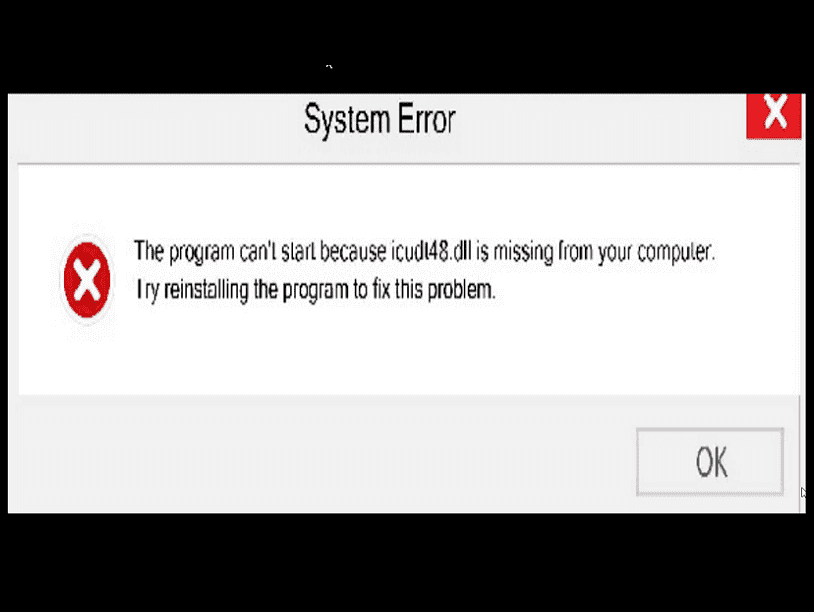
Problems related to Dynamic link library are most usual which occur frequently to prevent a program from starting. Windows users have specifically raised their concerns over the frequent occurrence of lcudt62.dll error. When this glitch occurs a message appears saying, “The program can’t start because Icudt62.dll is missing from your computer. Try reinstalling the program”.
When any file, program, or application gets lost, damaged, corrupted, or missing from this extension Windows may trigger the missing error message. lcudt62.dll is a developmental data file created by ThinkSky which is crucial for the structuring of Unicode components. Another notable reason for this issue is the presence of threats that may break the system files structure and registry to manipulate the different Windows components. lcudt62.dll error might also be generated by improper installation of that particular application.
Table of Contents
Icudt62.dll is missing error
Here is how to fix Icudt62.dll is missing error in Windows 11 or 10 –
Way-1: Register the DLL File
Icudt62.dll error might be the outcome of corrupt registration of the DLL file. However, you can easily register this again using regsvr32 command by following How to Register DLL File in Windows 11 or 10 64 and 32 bit. Moreover, you can move ahead with the below guidelines –
- Press WinKey + R.
- Type cmd.
- Press – Ctrl + Shift + Enter.
- Once Window Command Processor pop-up box will appear, then select ‘Yes’.
- Then, in the command prompt paste
regsvr32 /u icudt62.dll.
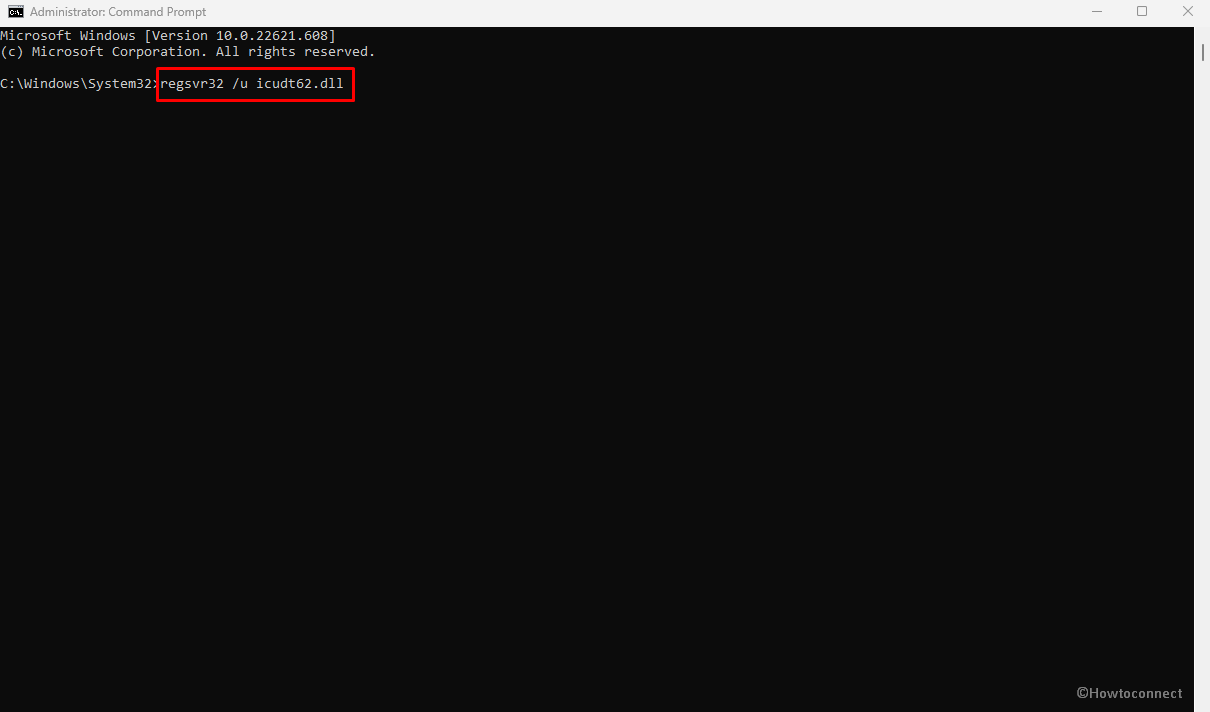
- Press – ‘Enter’.
- Now, copy-paste –
regsvr32 icudt62.dll.
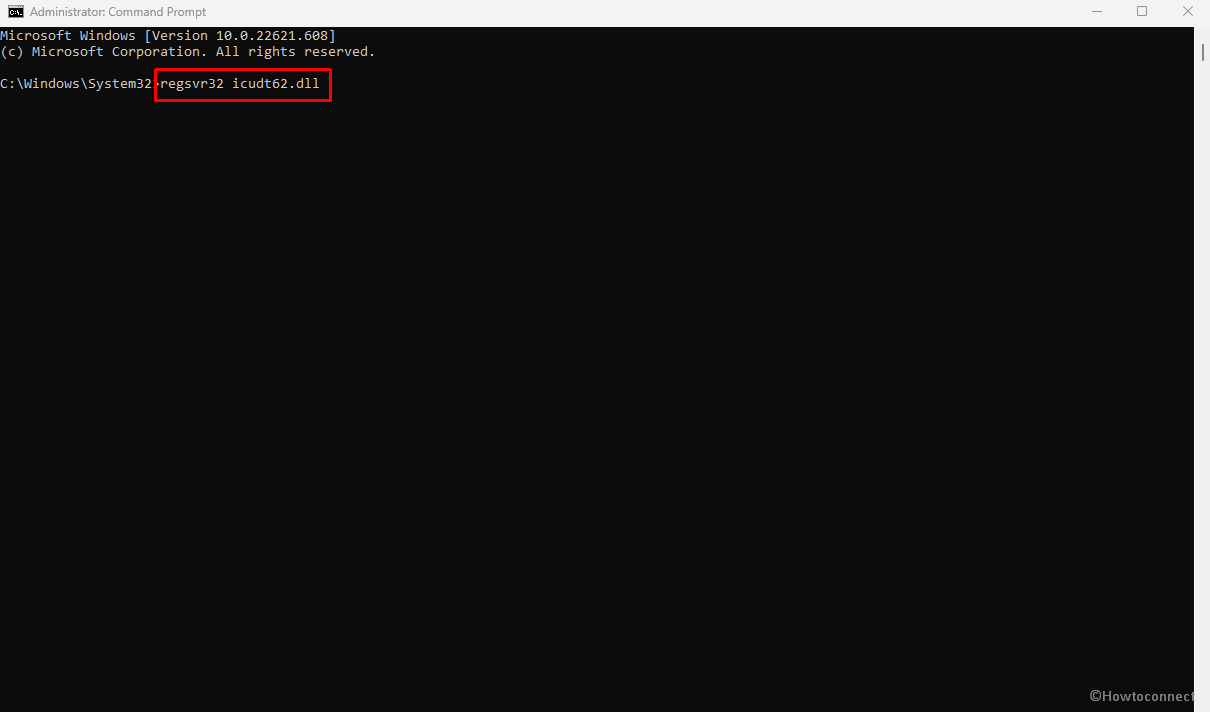
- Hit Enter to execute the command.
- Finally, start the application.
Way-2: Reinstall the program showing error
Some programs like ThinkSky incorporate Icudt62.dll to manage various functionalities. When they are Incorrectly installed the app couldn’t find the DLL at its startup and Windows generates missing error. Reinstalling these apps may solve the issue so walk behind the steps to fix The program can’t start because Icudt62.dll is missing from your computer –
- Right-click on – Start.
- Select – Run.
- Type – appwiz.cpl.
- Press – Enter.
- Find the program in the list that is creating the issue.
- Right-click on it and select – Uninstall. Note: If you remove the program with the help of Revo uninstaller it is better because this can also clean the leftovers and traces. For this, you can follow – Use Revo Uninstaller On Windows 10 to Force Uninstall Stubborn Programs.
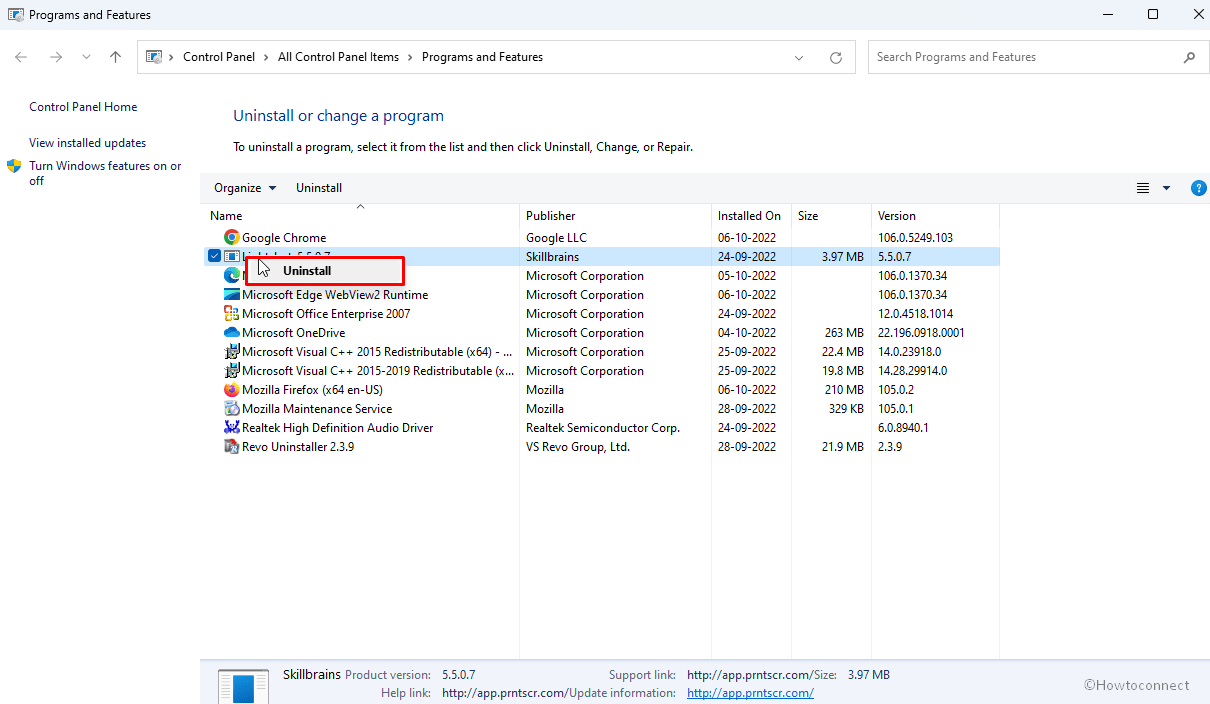
- In case of confirmation prompt, select Yes and complete the removal.
- Now visit the website where the program is located and download its most recent version.
- Install this using the setup file from your Downloads folder.
Way-3: Install DirectX to fix Icudt62.dll is Missing
If the registration of DLL couldn’t fix then installing DirectX by downloading from the trustworthy official Microsoft site may work. This tool will install complete libraries of DirectX drivers which should have a fresh icudt62.dll. This way the error would be fixed –
- Launch a browser and go to Google search.
- Type “DirectX End-User Runtime Web Installer”.
- Hit – Enter.
- Click the Official Website Link from the result page.
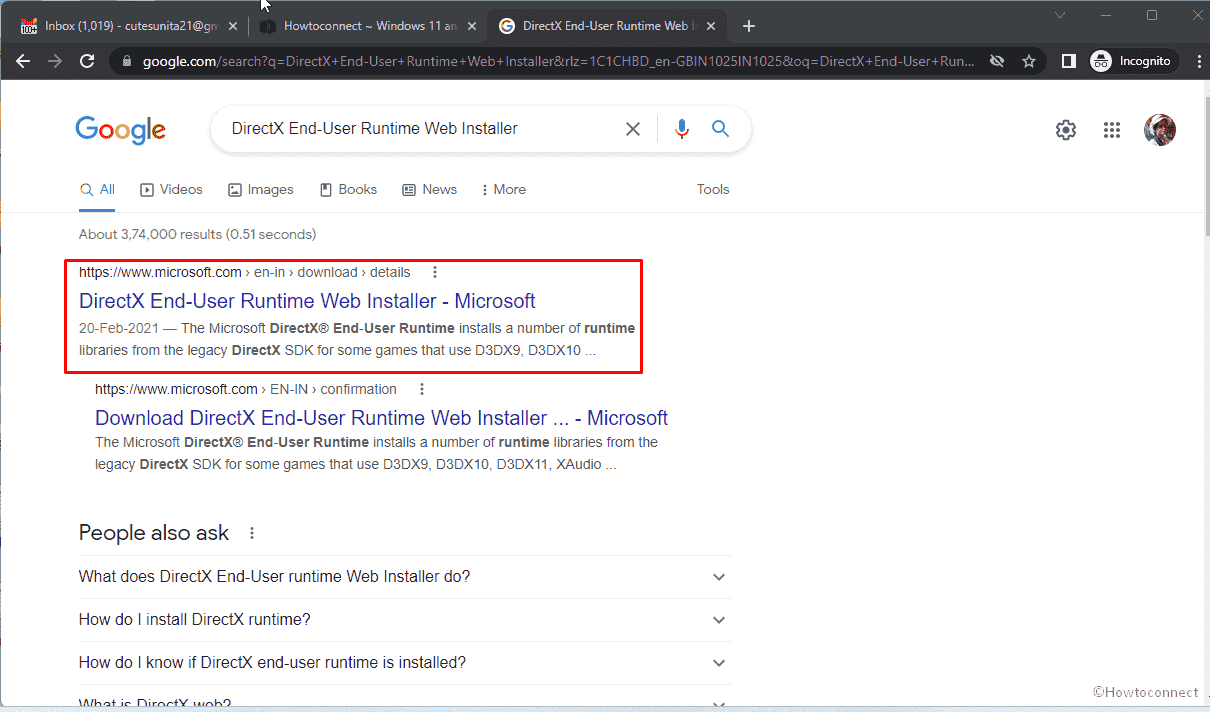
- And, download the DirectX using the link there.
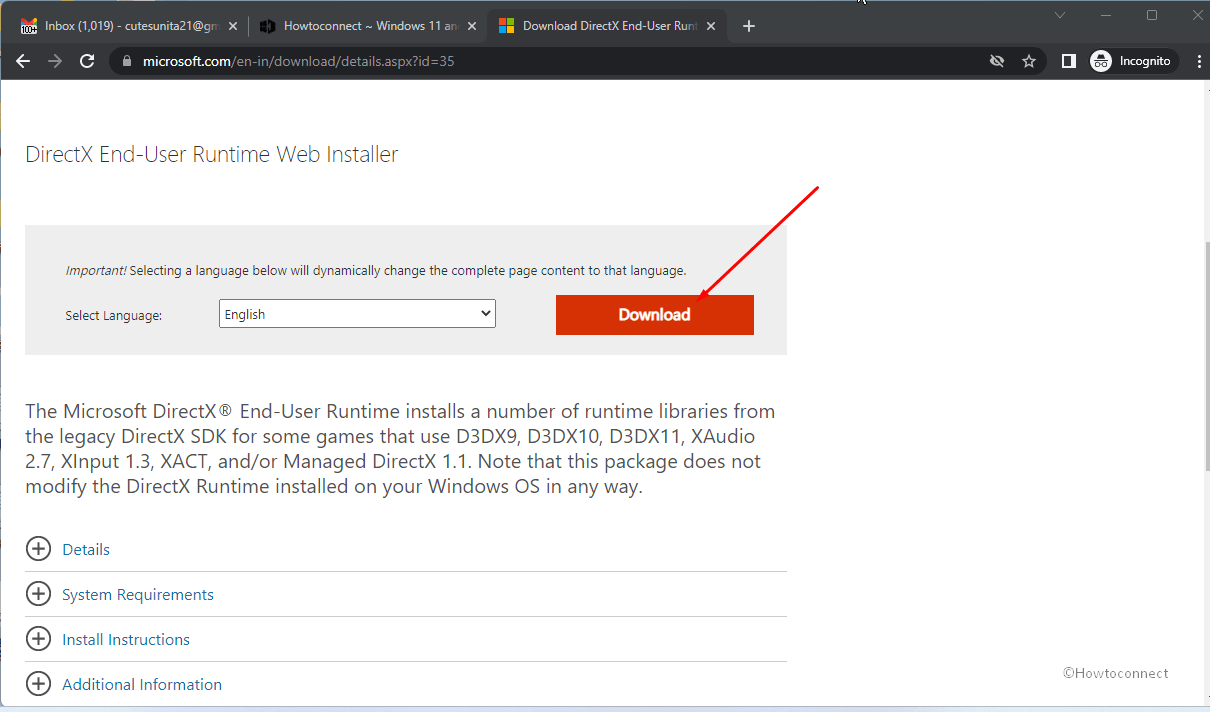
- Double-click on dxwebsetup.exe and install all the DirectX components.
- In case, you are missing any .dll file, especially icudt62.dll, the chances of downloading those files are most likely to fix your concerned issue.
However, if your system still shows the message of icudt62.dll is missing you need to then go with the next method.
Way-4: Run DISM and System File Checker tools
Corrupted system files and .wim are the primary reason for this dll error in Windows. But not to worry, System File Checker and DISM tool will help to rectify these problems to clear the drawback. So, when you are unable to start a program and come across an error pop-up lcudt62.dll missing, follow some easy steps –
- Click on Search from the taskbar.
- Write “cmd” (without quotes).
- Right-click on Command prompt.
- Select – Run as administrator.
- Once Command Prompt window is opened, copy the syntax and paste them into it –
SFC /Scannow.
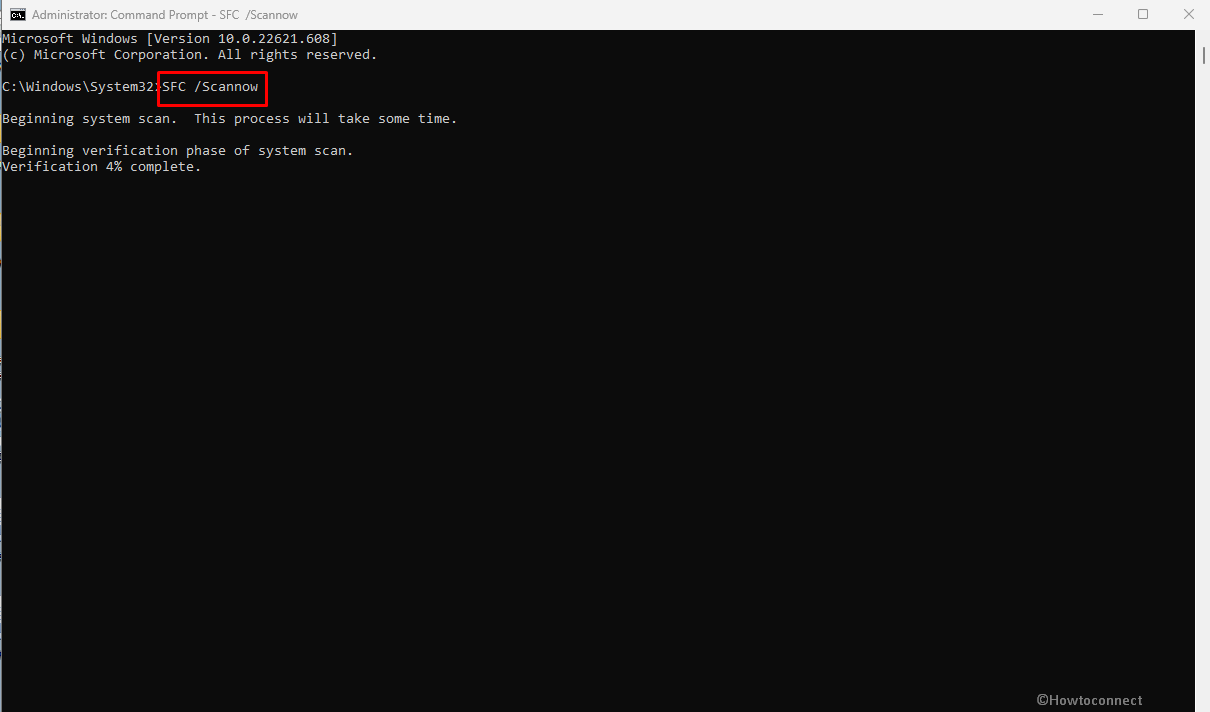
- Press ‘Enter’ to start the system scan.
- Once completed, restart the system and check if the error still persists.
- If, it further displays an error, then open Command prompt as administrator.
- Type or copy-paste the following commands and press Enter –
DISM /Online /Cleanup-Image /RestoreHealth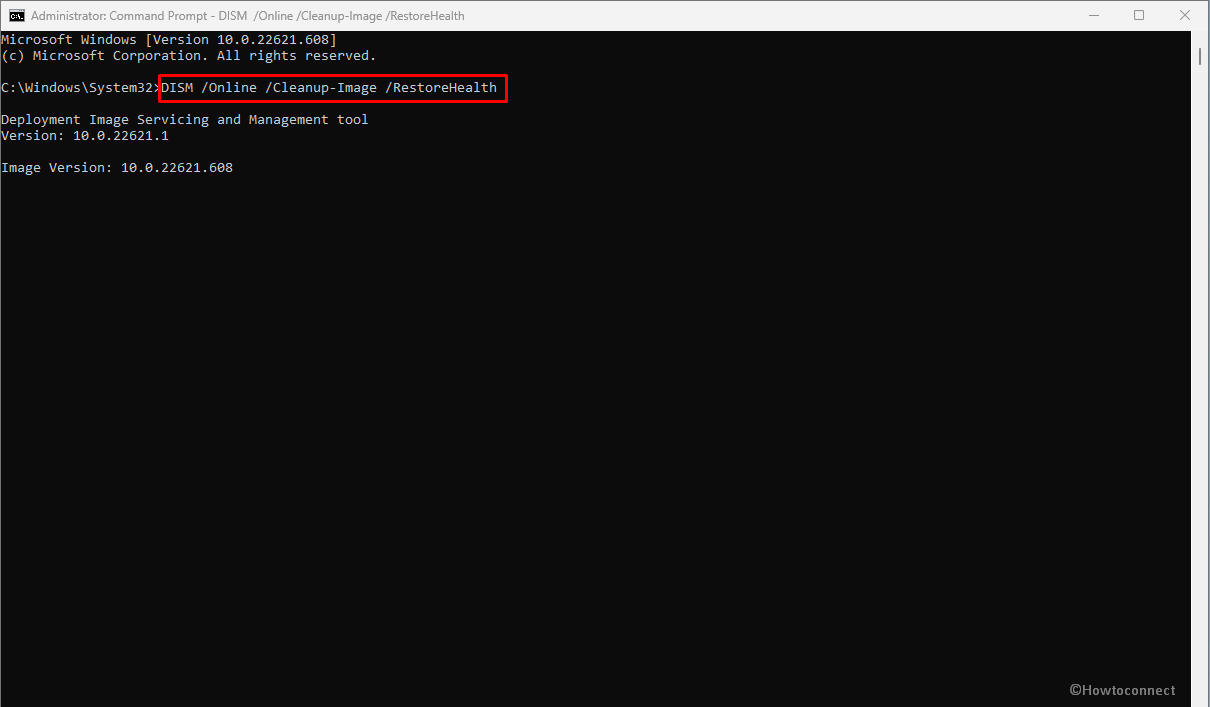
- If, the icudt62.dll is missing error persists then move forward with the next way.
Way-5: Directly Replace the file
One of the best ways to solve this error is to directly download lcudt62.dll (64-bit or 32-bit which is supporting) from an authentic website and replace this with the original file. There are multiple sites that offer DLL files but a few of them are trustworthy so carefully follow the steps –
- Navigate to ‘dll-files.com’.
- Enter the name of the missing dll file, in our case, it would be ‘lcudt62.dll’.
- A list will appear, select the particular dll file, and it will redirect you to that file page, then select the missing file based on your system bit (32 or 64).
- Press ‘Download’.
- The file will be downloaded in your specified folder, unzip the file into any folder and location of your choice.
- Then, go to ‘file explorer’ (Windows+E), and under the View section (it will be present within the Ribbon) select ‘Options’.
- Select View, under Advanced settings, go to Hidden Files and Folders, and select the option of ‘Show hidden files, folders and drives.
- Apply the changes and close it.
- Now, go to C Drive, search for the ‘Windows’ folder, open it and look for the ‘System32’ folder.
- Paste the downloaded ‘lcudt62.dll’ file into ‘System32’ folder and ‘Restart’ your device.
Way-6: Run Full or Offline Scan of Windows Defender
Nowadays when everything has shifted to information superhighways like the Internet, encountering malicious software on your system has become part and parcel of life. This malware damages the system and corrupts all your application files leading to missing errors like these getting displayed.
Thus, if you still face the DLL is missing error problem, you could either run a full or offline anti-virus scan using the below guidelines –
- Save all the ongoing tasks before starting this method.
- Click on Start.
- Type – Full scan.
- Virus & threat protection page will appear; click on the Scan options link.
- From the next Window, check Microsoft Defender Antivirus Offline Scan.
- Click on – Scan now.
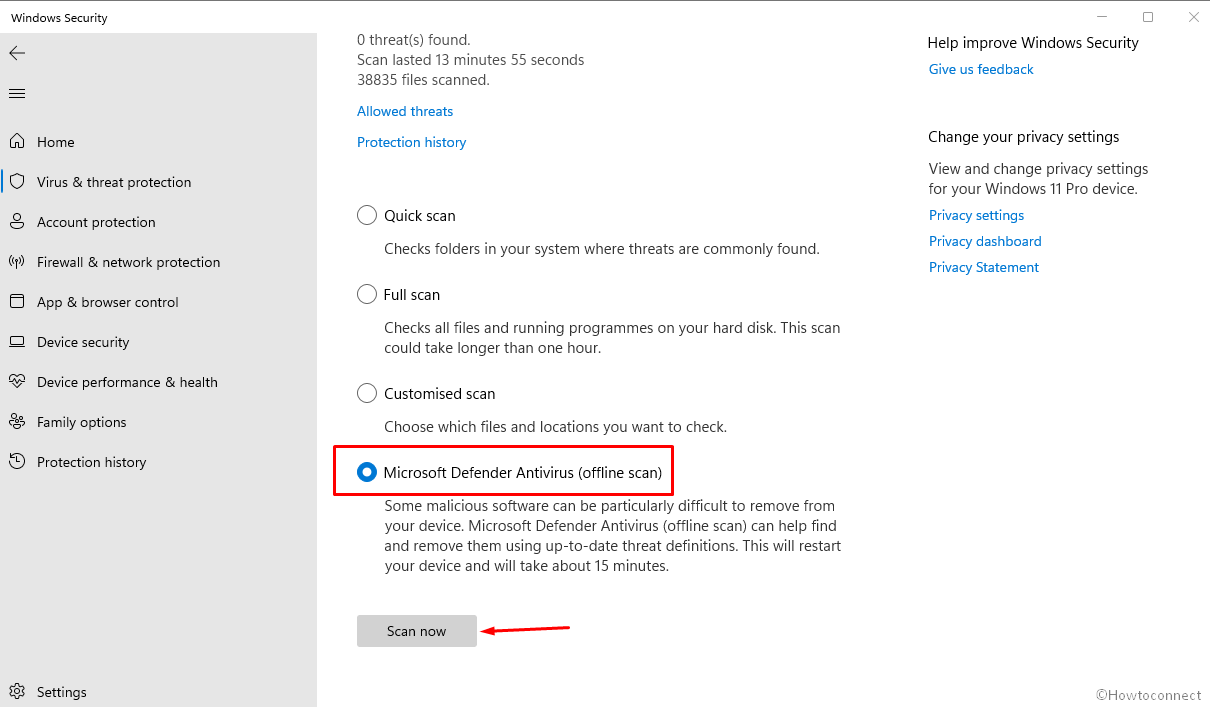
- This will restart the computer and start the offline scan.
- After coming back to the desktop pursue the recommendations of the tool to clean threats if found.
Way-7: Install Windows update if pending
Windows update is a modus operandi the system receives to fix persistent bugs and add improvements. Furthermore, the process ensures protection from upcoming and existing threats that can harm the computer and generate various error codes. At times, the update can rescue this DLL error
- Click on Windows Search.
- Type – updates.
- Press Enter.
- When Windows update Settings loads, click on – Check for updates.
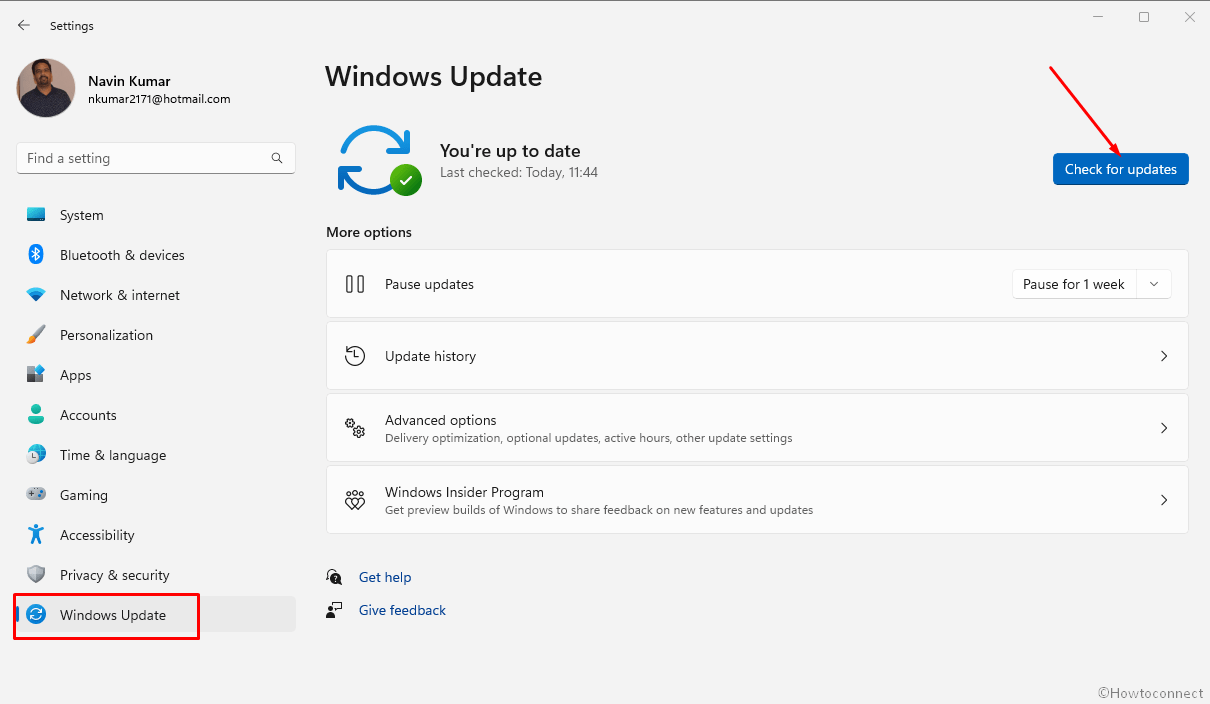
- Allow the update to download and reboot the computer when you are asked to do so.
Way-8: Remove Visual C++ Redistributable package and reinstall the library
Incompatible or obsolete version of Visual C++ Redistributable package might also cause Icudt62.dll is missing message to appear. To rectify this error you will need to uninstall the library and install the supporting package so advance with the steps ahead –
- Go to Contol Panel > Programs and Features and right-click on “Visual C++ Redistributable package”.
- Select Uninstall and follow the guidelines on the screen to finish the removal.
- Type Visual C++ Redistributable package in the browser’s search box and press “Enter”.
- Go to official location of the program from result page.
- Download the latest version of the package and install it on your computer.
- Check if the DLL error is resolved.
Way-9: Bring System Restore into operation
As an assumption, suppose the Dll error still persists and can’t be fixed using any of the above methods then this process is working for everyone. This is like a recovery tool that will restore the system to an earlier date and time to bring back the normalcy of the computer. All you have to do is to go along with the method –
- Click on the – Windows Search.
- Type – rstrui.
- Hit – Enter.
- When a Window appears, check the option – Choose a different restore point.
- Click on Next.
- Select a restore point of the date and time when the problem wasn’t happening.
- If you don’t find any then check the box against – Show more restore points.
- Now, click – Next.
- Select Finish.
- You will come across a pop up saying “Once started, System Restore cannot be interrupted. Do you want to continue?”. Click on Yes and allow the process to round off.
Methods:
Way-1: Register the DLL File
Way-2: Reinstall the program
Way-3: Install the DirectX
Way-4: Run DISM and System File Checker tools
Way-5: Directly Replace the file
Way-6: Run Full or Offline Scan of Windows Defender
Way-7: Install Windows update if pending
Way-8: Remove Visual C++ Redistributable package and reinstall the library
Way-9: Bring System Restore into operation
That’s all!!
