Are you also getting Intel High Definition Audio Driver Problem in Windows 10 after installing the update? Many other users encounter no sound issue on the computer and look for solutions to code 28 and HDMI audio issue. Follow this post to fix all these problems including learning how to download Intel High Definition Audio Driver easily and quickly.
You can also get help from the solutions to Audio Output Device is Installed in Windows 10 when you notice no sound after receiving the latest update. Commonly. If this doesn’t work, get to the following ways.
Intel High Definition Audio Driver Problem in Windows 10 Solutions
Here is how to fix Intel High Definition Audio Driver Problem in Windows 10 –
Update Intel High Definition Audio Driver
Way-1
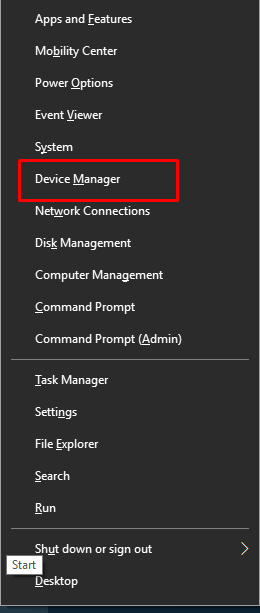
Step-1: Press Win+X and select Device manager from the list.
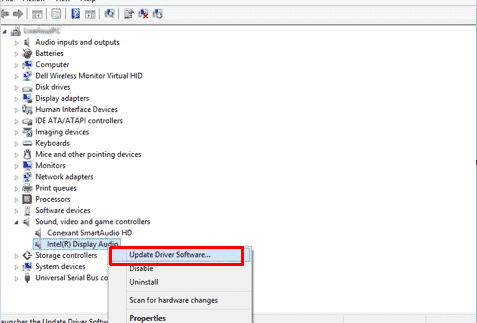
Step-2: Locate Sound, video and game controllers and double click on this one to expand.
Step-3: If you find Intel High Definition Audio then right click on it and select Update driver.
Step-4: When a wizard appears, select the first option “Search automatically for updated driver software”.
Step-5: Sometimes you find Intel High Definition Audio under Other devices. So double click on “Other devices” and expand it.
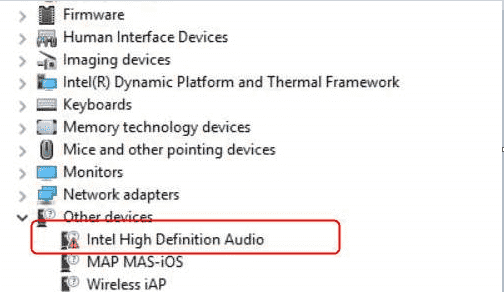
Step-6: Now right click on “Intel High Definition Audio” and choose Update driver from the list.
Way-2
- Right click on the Speaker icon from the right end of the Taskbar and select Sound.
- Go to the Playback tab, right click on the Speaker in the box and select Properties.
- Click on Properties button in the Controller Information section.
- Now shift to Driver Tab. At last click on Update driver.
Download & install the appropriate Intel High Definition Audio Driver manually
Alternative option to install the latest Intel High Definition Audio Driver is manually through Manufacturer’s website. Because of the software’s shortfall, Windows 10 fails to emit sound. This workaround may fix Intel High Definition Audio Driver Problem in Windows 10 in seconds.
Go to Drivers & Software Download page of Intel.
In the search bar, write “Model Number and Intel HD Graphics” then hit Enter.
Important: If you don’t have an idea about the model of your Intel graphics card, go with these steps to check it out.
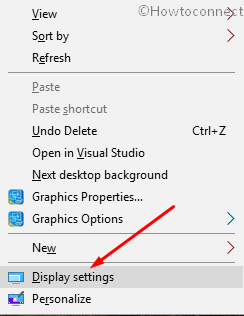
Right-click any blank area somewhere on your desktop to choose Display Settings, the second last option.
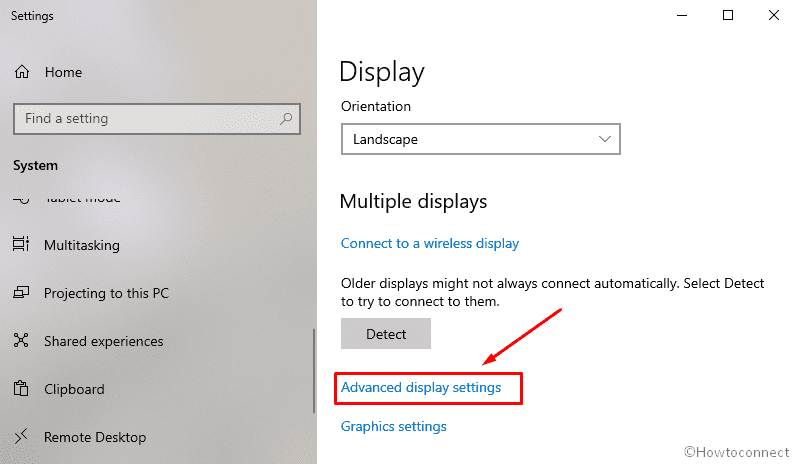
Scroll down in the right pane of the following page and click “Advanced display settings”.
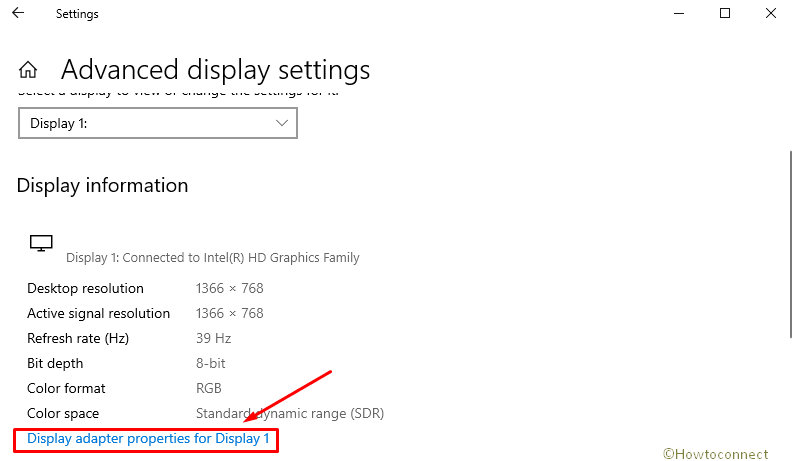
Go to the bottom and of the next page and select “Display adapter properties”.
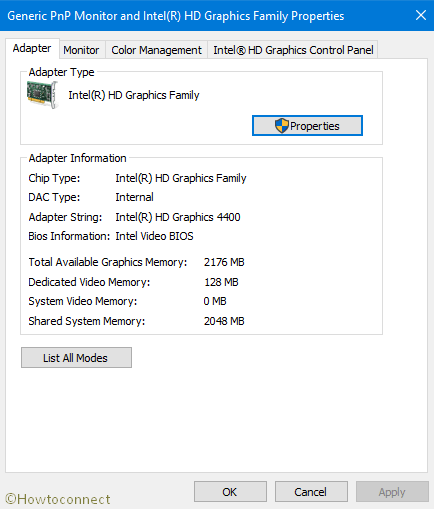
See the graphics model number showed in the Adapter Information section of the Adapter tab.
Go back to the Intel webpage, choose Windows 10 64-bit or Windows 10 32-bit (according to your PC) from drop down menu.
Choose the first item of the page as it is the latest version.
Click the .exe file to download and install by prompts easily.
Restart your computer to make modifications take effect.
That’s all!!
