Laptop Shutting Down Automatically Problem in Windows 10 in the middle of a critical task is pretty annoying. The problem causes losing important data and running game but also have a bad impact on your PC. Usually, it occurs either for hardware or faulty software. In this article, we will chart out the most likely solutions to tackle unexpected Shut down.
This error mostly occurs because of various reasons such as High usage of CPU, incorrect power plan, Sleep mode or GPU driver issues. However, you can solve this issue by using a few easy working solutions.
Table of Contents
Laptop Shutting Down Automatically Problem in Windows 10
Here’s How to fix Laptop Shutting Down Automatically Problem in Windows 10 –
Turn off Sleep Mode
While enabling sleep mode is a great way to reduce power consumption when the system is idle, but a common observation is that it creates Random Shutdown. To change this, follow the below process –
Step-1: Make a joint Press of Win+I to launch the Settings app and do a click on System.
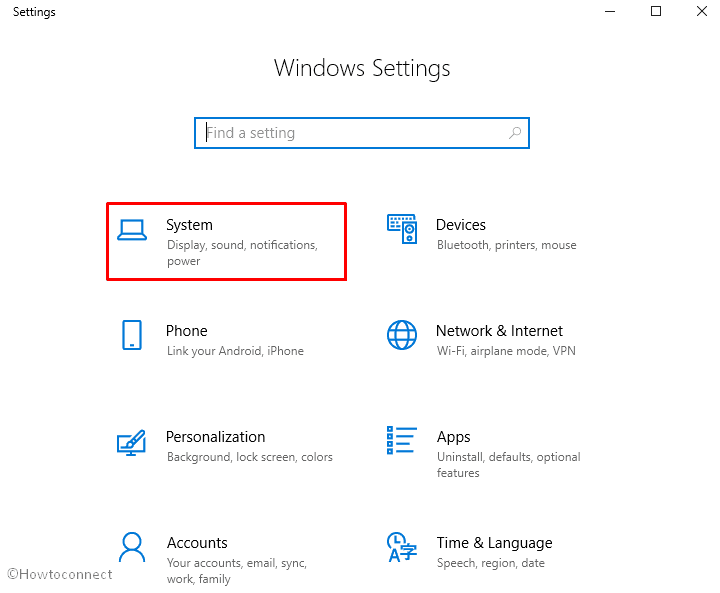
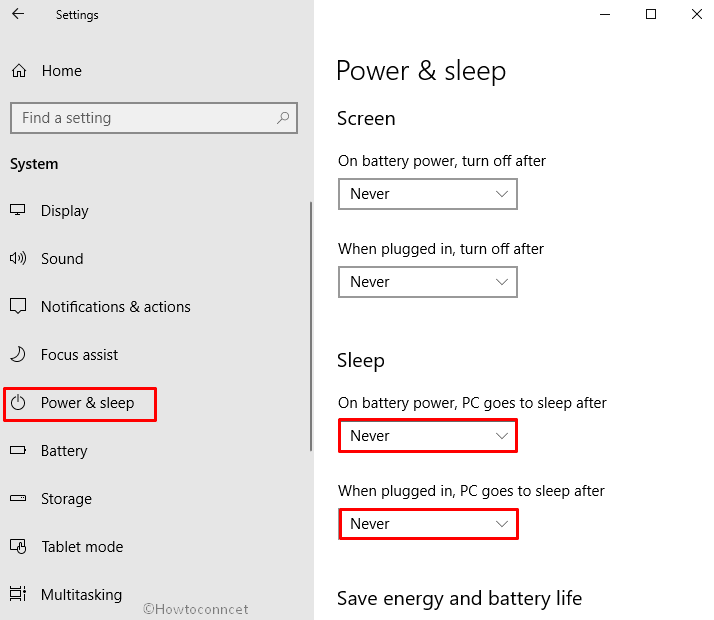
Step-2: Then Select Power & Sleep from the left pane.
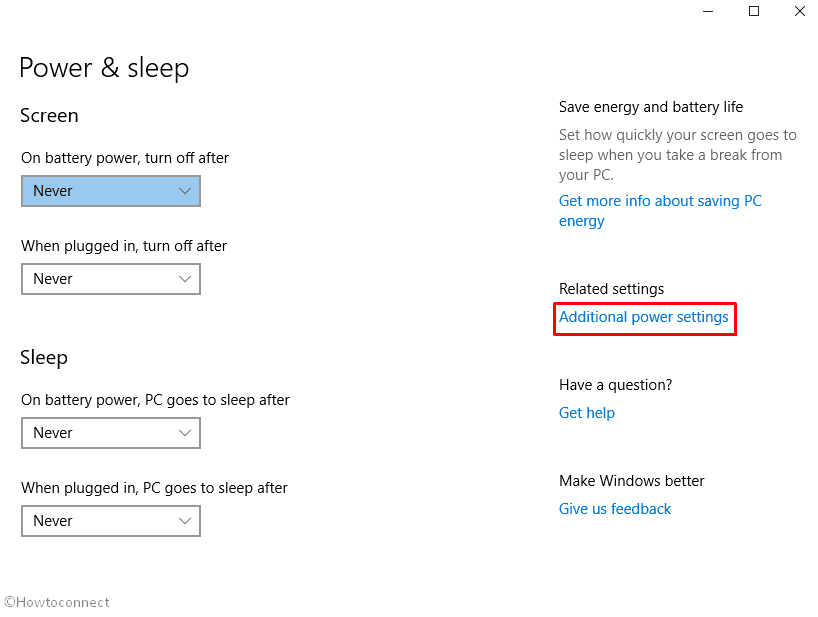
Step-3: Switch to the right pane. Thereafter, Select Never from the drop-down menu of both On battery power, PC goes to sleep after and When plugged in, PC goes to sleep after located under Sleep section.
Install the latest version of GPU
Graphics Processing Unit might be the culprit for Windows 10 shutting down automatically. Check if you are using the latest version of GPU in this situation. If not, follow the steps below to install the latest version –
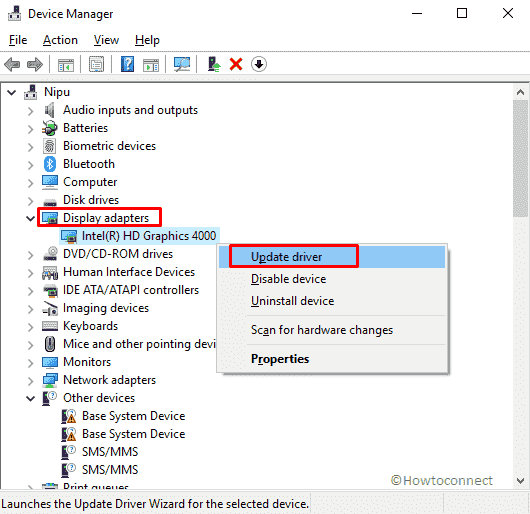
- Perform a right-click on Start button and Select Device Manager from the list.
- Once the console rolls in, locate Display Adapters and make a double-click on this one to expand.
- Here, you will get the GPU name, do a right click on it and Select Update driver.
- A dialog box will ask you to choose between 2 options, click Search automatically for updated driver software.
Now the system will automatically download the updated driver for you once it’s found. You can also get it manually from the manufacturer’s website.
When you have done, Restart the PC and check if the randomly shutting down issue is resolved now.
Check if your system is overheating
Overheating may cause Laptop Shutting Down Automatically Problem in Windows 10 because motherboards are programmed to close everything to prevent noteworthy damage to your CPU. To control the heat, ensure the below points –
- Check if the PC fans are running well and if faulty or broken, you need to replace.
- Also, clean your system regularly especially the fans and filters as the accumulation of dust can cause overheating.
- Changing the thermal paste is also an effective way to cool your PC.
Disable Fast Startup
The Fast startup is an added feature from Microsoft to speed up things in a stable manner. While the setting enhances the user experience but also causes Laptop Shutting Down Automatically Problem in Windows 10 as well. Hence, you will be better if disabling it as follows –
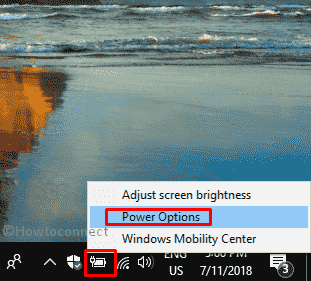
Make a right click on the Battery icon located in the Notification area and Select Power Options. If it doesn’t exist there follow Fix Battery Icon Disappeared in Windows 10.
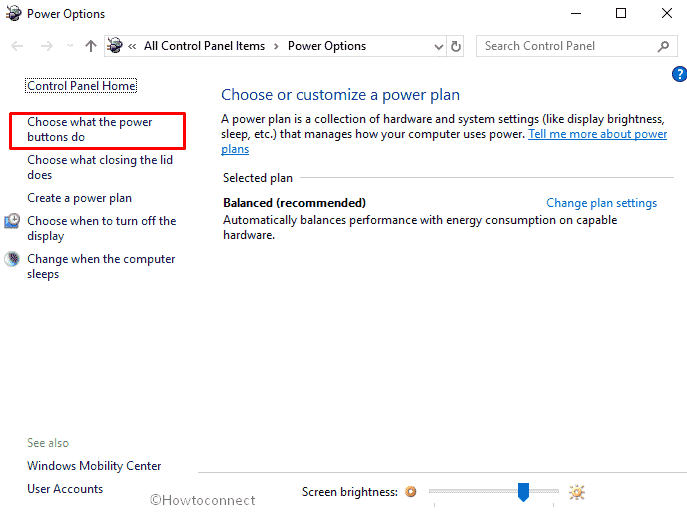
Once the Power Options Window rolls in on the screen, click on “Choose what the power buttons do”.
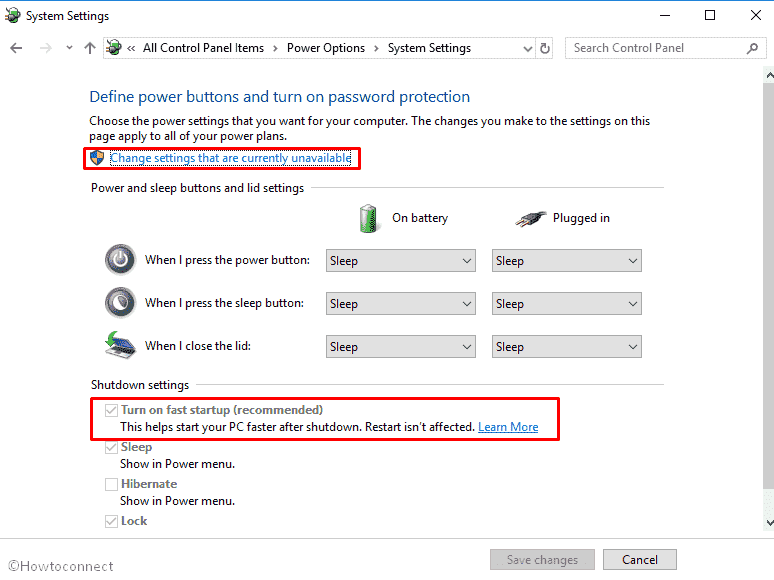
Perform a click on Change settings that are currently unavailable.
Now go in the downward direction and uncheck the box of Turn on fast startup in the Shutdown settings section. Click on Save changes.
Check HDD
Laptop Shutting Down Automatically Problem in Windows 10 may occur if your Hard Disk Drive is defective. Here is the process of checking HDD –
Press Win+S simultaneously and write down cp in the box.
When the result shows up, Hit Enter on your keyboard.
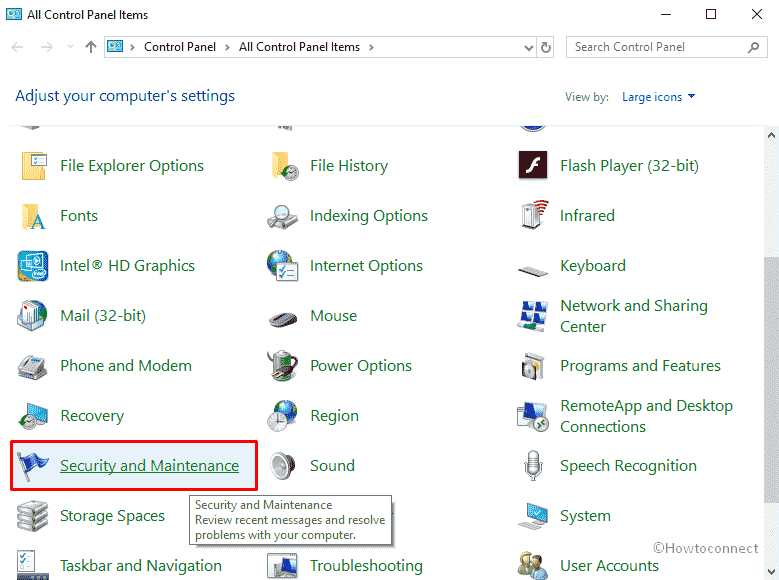
Once the Control Panel applet appears, do a click on Security and Maintenance.
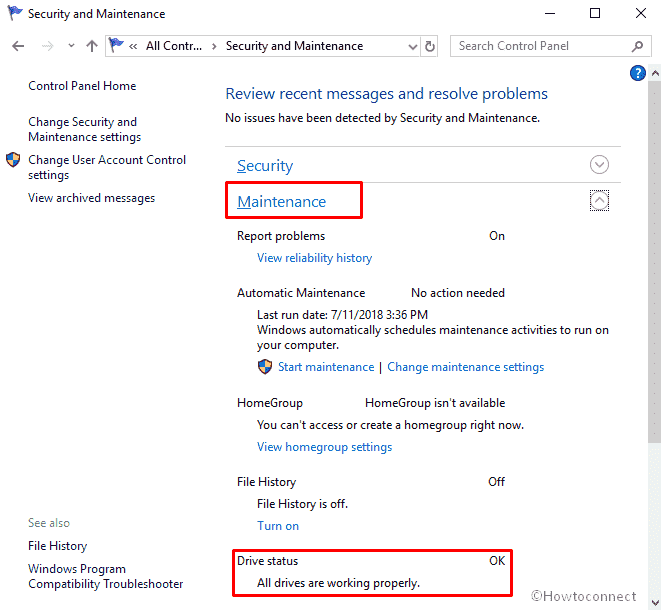
Now, perform a click on Maintenance in order to expand its options.
Check out the Drive status section. If the system has some issue with any hardware, there would be an option asking to scan the drive.
Read – How to Check Faulty Drives with Chkdsk in windows 10
Change Advanced Power Settings
Power settings can also cause Laptop Shutting Down Automatically Problem. Follow the below steps to alter advanced power settings –
Step-1: Press Win+X hotkeys and let the Power user Menu appear.
Step-2: Select Power Options from the visible list.
Step-3: When a new Window turns up, do a click on Additional power settings from the right corner.
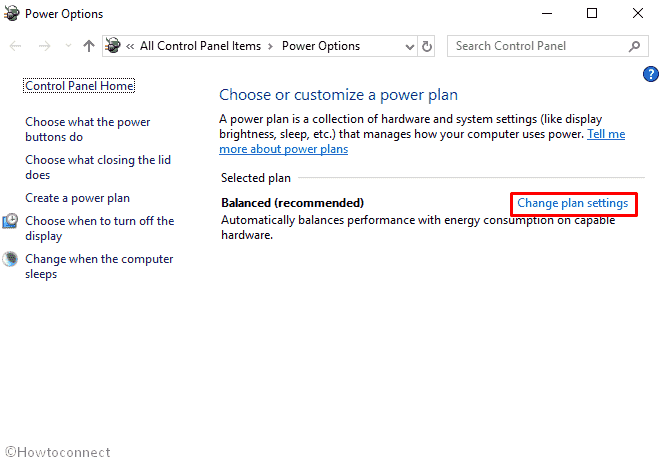
Step-4: Now click on Change plan settings located beside Balanced.
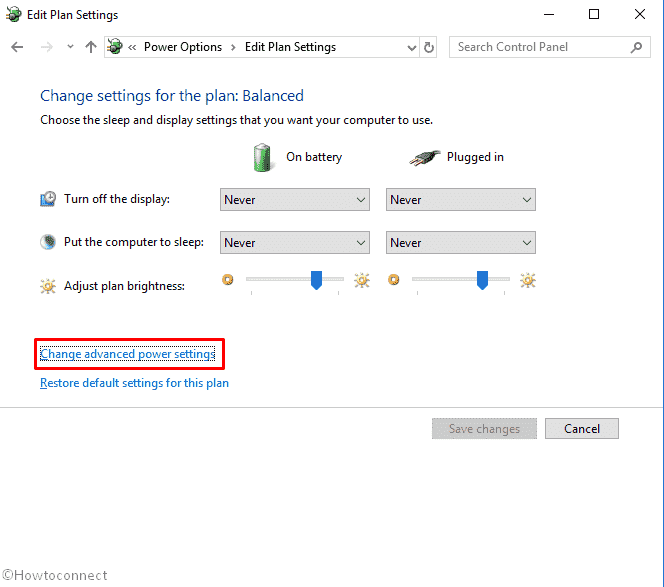
Step-5: Select “Change advanced power settings” from the bottom left of the window.
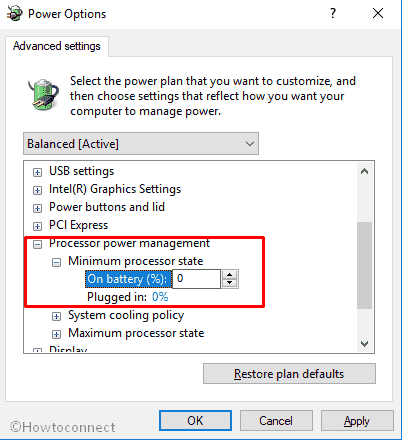
Step-6: On the Power Options, locate Processor power management and expand it by double-clicking.
Step-7: Set the value to 0 in Minimum processor state for both On battery and Plugged in options.
Step-8: Navigate to Hard Disk and make a double-click on it.
Step-9: Then expand Turn off hard disk and reduce the value until it shows Never. The same method will go for “plugged in” and “On battery”.
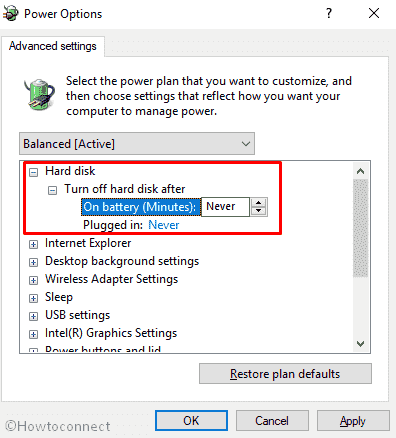
Step-10: Lastly, click on Apply and OK.
Update BIOS
Though updating BIOS is a little labyrinthine, you can get the detailed method on the manufacturer’s website. To find out it, google the Brand name + update BIOS and follow the instructions.
Incorrect BIOS can cause other errors in your PC. So if you are not sure about it, skip the process.
That’s all. Hope the above solutions helped you to solve Laptop Shutting Down Automatically Problem in Windows 10. If the above fixes didn’t work for you, the ultimate thing you can do is clean install.