Since the release of October update, bugs and problems keep coming in a series. Recently, users found themselves Unable Connect to Network Drive in Windows 10 1809. During the error, network drive looks broken along with a red ‘X’ as if they were disconnected. Even while running the ‘net use’ command in the command prompt, the network devices that’s been mapped is shown unavailable. Also, users are notified ‘Could not reconnect all network drives’. However, you can settle the issue by creating and running two scripts either using the Startup item or a scheduled task.
Drive mapping is not a new issue; it came out shortly after the feature got released. As it was causing data loss and other problems, soon it has been pulled offline. But some issue is still a headache for many. Though Microsoft is aware of this problem, they didn’t provide any permanent fix yet. In the meantime, the company is offering a workaround to lessen the trouble. If you are experiencing the problem, here are a few way-out you can try to fix the issue. Related –
Unable Connect to Network Drive in Windows 10 1809
Here is how to fix Unable Connect to Network Drive in Windows 10 1809 –
Create scripts
Emulate the below steps to create the required scripts.
Command Prompt script
Step-1: Go to Taskbar search, type notepad in the text field and when the result shows up, hit Enter.
Step-2: When it comes into the view, copy and paste the following script in the text file –
PowerShell -Command "Set-ExecutionPolicy -Scope CurrentUser Unrestricted" >> "%TEMP%\StartupLog.txt" 2>&1PowerShell -File "%SystemDrive%\Scripts\MapDrives.ps1" >> "%TEMP%\StartupLog.txt" 2>&1
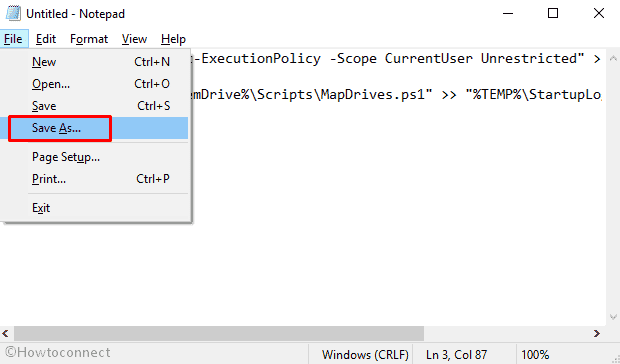
Step-3: Click on File menu and then select Save as.
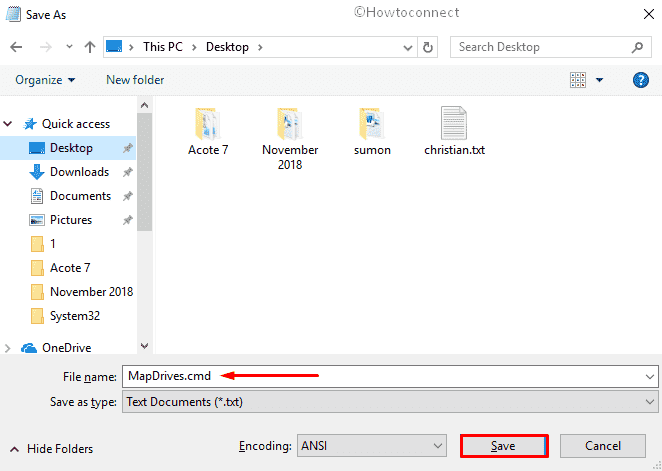
Step-4: Write down MapDrives.cmd in the text field next to File name and click on Save.
PowerShell script
- Open Notepad and paste the below text in it –
$i=3while($True){$error.clear()$MappedDrives = Get-SmbMapping |where -property Status -Value Unavailable -EQ | select LocalPath,RemotePathforeach( $MappedDrive in $MappedDrives){try {New-SmbMapping -LocalPath $MappedDrive.LocalPath -RemotePath $MappedDrive.RemotePath -Persistent $True} catch {Write-Host "There was an error mapping $MappedDrive.RemotePath to $MappedDrive.LocalPath"}}$i = $i - 1if($error.Count -eq 0 -Or $i -eq 0) {break}Start-Sleep -Seconds 30}
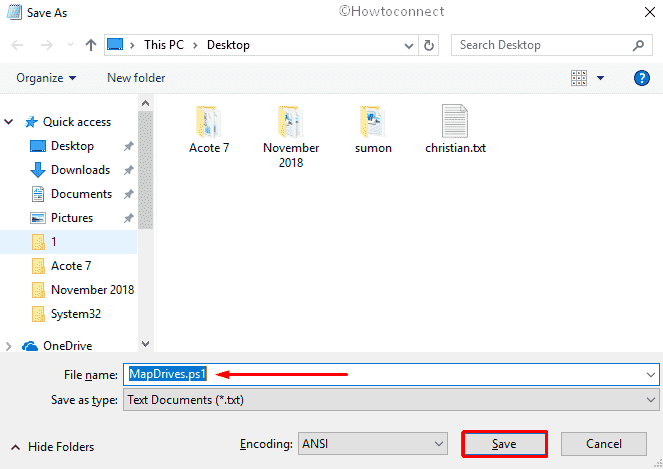
- Save the file as we showed earlier and this time name it MapDrives.ps1.
As you now created both the scripts, let’s see how to fix Unable Connect to Network Drive in Windows 10 1809. Before proceeding forward, make sure your device is connected the network at login.
Method-1: Run Scripts using Startup Folder
- Press Win+E simultaneously to brings up File Explorer in the display.
- Navigate the following directory –
%ProgramData%\Microsoft\Windows\Start Menu\Programs\StartUp- In the following window, copy MapDrives.cmd file you made previously.
- Browse the following location.
%SystemDrive%\ScriptsNote – If the folder doesn’t exist in your device, there is nothing to worry about. You just need to open the C drive with File Explorer and make a combined press of Ctrl + Shift + N on your keyboard to create a new folder. Name the folder Scripts.
- Copy MapDrives.ps1 in the Scripts folder.
- Once you are done, sign out and sign back into the account again. This should fix Unable Connect to Network Drive in Windows 10 1809.
Method-2: Run Scripts using Task Scheduler
Step-1: Open File Explorer and browse the below location –
%SystemDrive%\ScriptsIf you don’t get the folder Scripts, create a new one in the C drive.
Step-2: Move the MapDrives.ps1 file that you created earlier in the Scripts folder.
Step-3: Click on Cortana and type task scheduler in the search box. When the result turns up in the display, press Enter.
Step-4: Once it comes into the sight, click on Action and select Create Task from the available options.
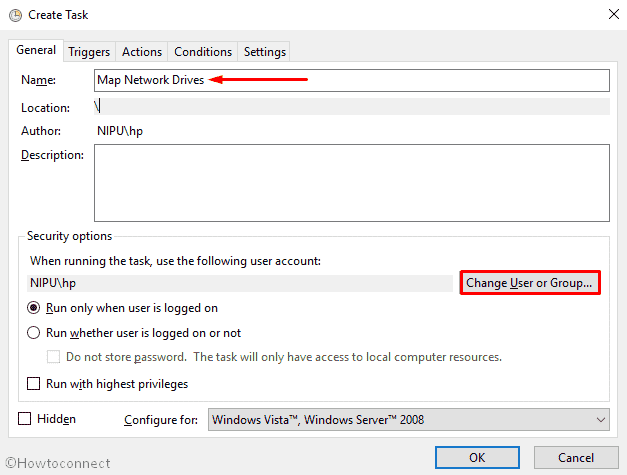
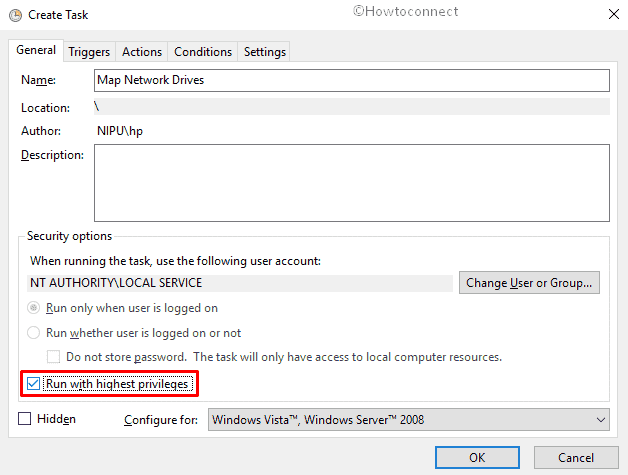
Step-5: A wizard will appear with General tab opened. In the name field, type a name for the task. For example, Map Network Drives.
Step-6: Click on Change User or Group.
Step-7: In the void text field, write down local and then click on Check Names.
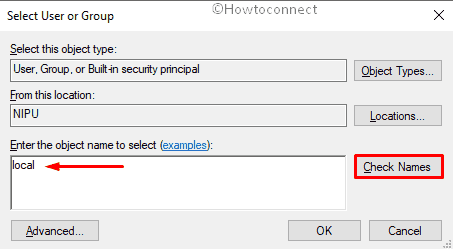
Step-8: Click on OK.
Step-9: Check the box corresponding to Run with highest privileges.
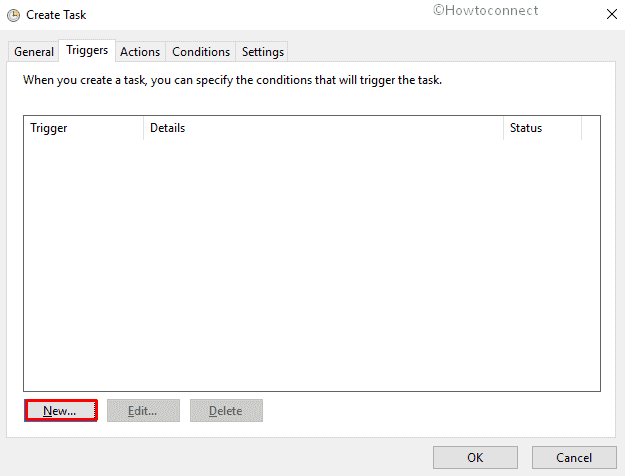
Step-10: Shift to Triggers tab.
Step-11: Click on New.
Step-12: Select At log on from the drop-down menu of Begin the task.
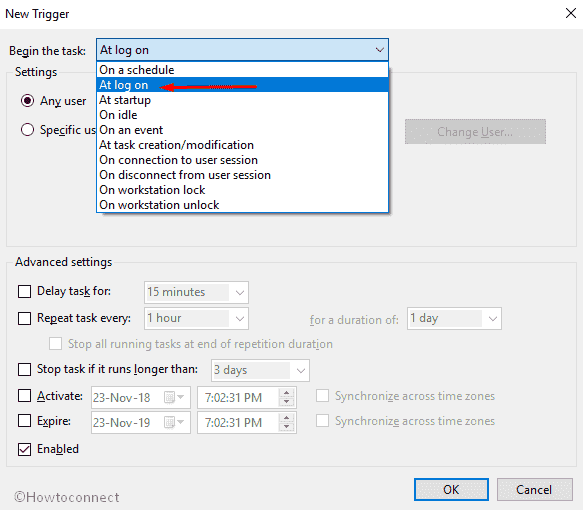
Step-13: Click on OK to save the change.
Step-14: Move to Actions tab and click on New.
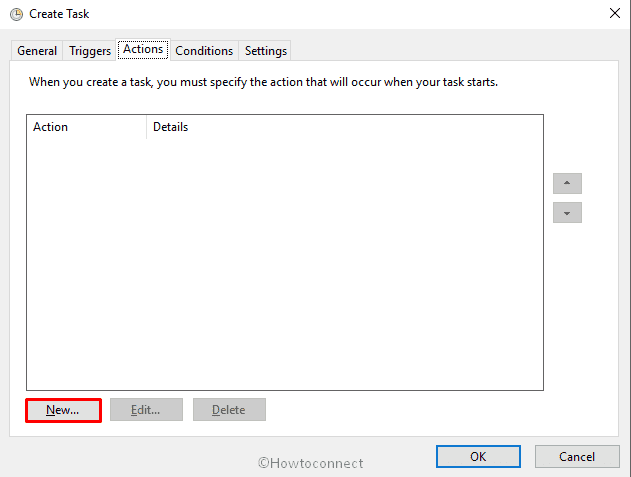
Step-15: Make sure the Action is set to Start a program.
Step-16: In the Program/script field, type Powershell.exe.
Step-17: Copy the following to Add arguments field –
-windowsstyle hidden -command .\MapDrives.ps1 >> %TEMP%\StartupLog.txt 2>&1Step-18: In the Start in field type the location you copied the script file to, i.e
.%SystemDrive%\Scripts\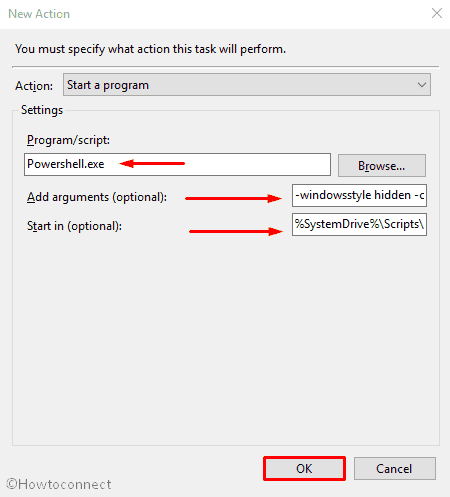
Step-19: Go to Conditions tab.
Step-20: Check the box of Start only if the following network connection is available and then select Any connection.
Step-21: Click on OK.
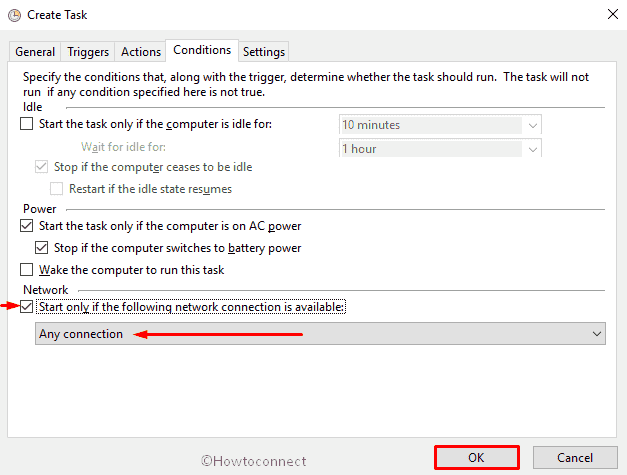
Step-22: Sign off and then sign back on to the device to run the scheduled task.
Hope that fix Unable Connect to Network Drive in Windows 10 1809.
Alternative method
Though this method is not proven to work in every case, you can give it a try –
Type regedit in the Taskbar search and once the result is visible hit Enter.
If a UAC prompts up, click on Yes to access Registry Editor.
Navigate the following directory from the left column –
HKEY_LOCAL_MACHINE\SOFTWARE\Microsoft\Windows\CurrentVersion\Policies\SystemHover the cursor to the right pane and create a DWORD (32-bit) value named EnableLinkedConnections.
Double-click on the value you just created and set the value to 1.
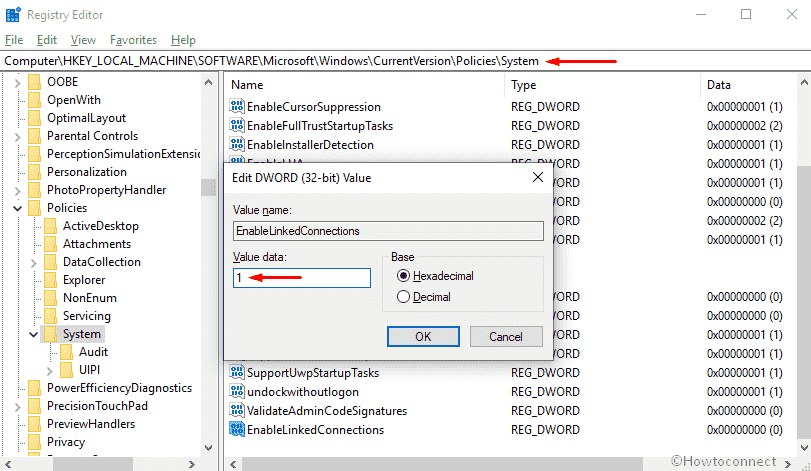
Click on OK to save the changes.
Restart your PC and check if Unable Connect to Network Drive in Windows 10 1809 is fixed.
That’s all!!
