Video Scheduler Internal Error in Windows 10 – Few users are facing Blue Screen when their systems are returning back from sleep. In the course of Waking up, BSOD appears with a note – search online later for this error Video_Scheduler_Internal_Error. After a while, the system goes to reboot and then behaves normally.
Video Scheduler Internal Error in Windows 10 mess up is kicked off due to the driver for the Intel HD or Nvidia HD Graphics card which is either disabled or outdated. So our main focus will be on the repairing of the drivers for both of the drivers.
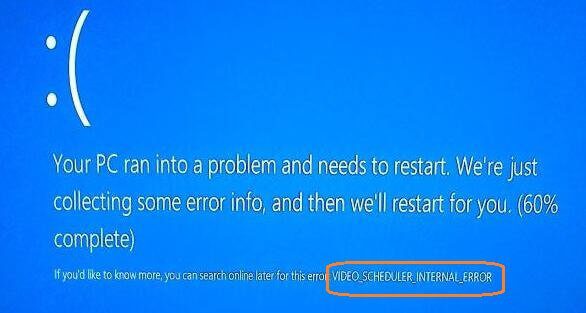
How to Fix Video Scheduler Internal Error in Windows 10
At first, it is advised to detect if any yellow colored exclamation mark exists in certain Devices, let us see how to perform the detection –
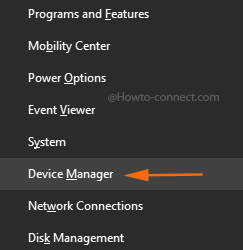
Step 1 – Device Manager is the utility to confirm yellow colored exclamation sign hence, press Win and X keys simultaneously and on the Power user menu, click the choice Device Manager.
Step 2 – Once the Device Manager appears on the screen, start checking out one by one if there are any devices that present a yellow colored exclamation symbol alongside them.
Step 3 – If you notice such driver, right-click on it and from the visible contextual menu, confirm if the driver is enabled. For this purpose, Perform a right-click on the device check whether which one is highlighted on the context menu – Enable or Disable. If Disable is highlighted then it is enabled and vice versa. If it is disabled then Enable it without being late.
Step 4 – Now, if there aren’t such drivers with a yellow color exclamation sign, you need to re-install the display driver. To re-install the display driver, it is best suggested to avail the current one from the device manufacturer web page.
Boot the Device into Safe Mode and uninstall the display drivers
Uninstall the Display Adapter Driver
Step 1 – Boot your system in Safe Mode.
Step 2 – Launch Device manager as told in the above step.
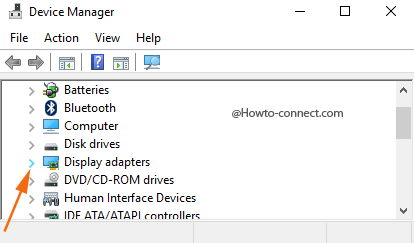
Step 3 – On the Device Manager, trace out Display Adapters and once you see it, click or hit its respective arrow to expand it.
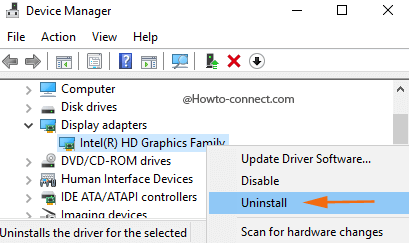
Step 4 – Right-click on the Display driver and click or hit the choice Uninstall in the visible contextual menu.
Install the Display Adapter Driver
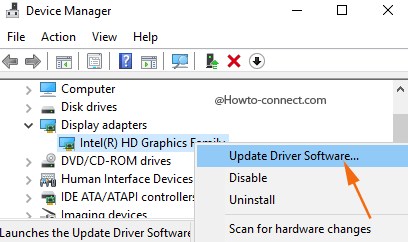
Step 2 – On the Device Manager, expand Display adapter and perform a right-click on Intel(R) HD Graphics Family and, click or hit the first choice that reads as Update Driver Software.
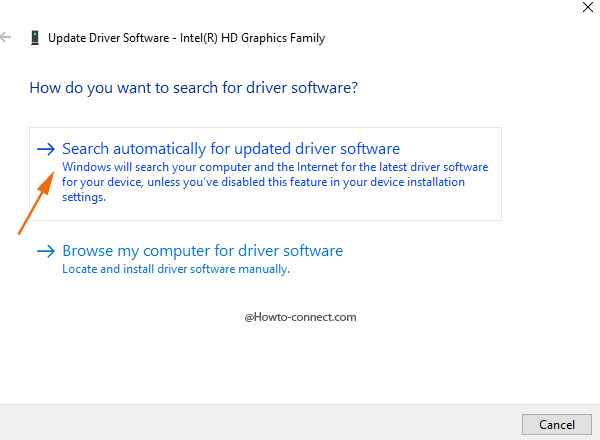
Step 4 – Upon the arrival of Update Driver Software wizard, you will notice two options in it, click or hit the one that is entitled as Search automatically for updated driver software.
Step 5 – After the download gets over, the driver will be installed.
Step 6 – Do the same operations for Nvidia graphics card.
Restore the machine to the Normal Mode by following the below-stated steps
Otherwise, you can get help from How to Come Out of Safe Mode in Windows 10.
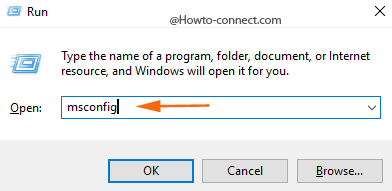
Step 1 – Hit the keys Win & R and in the succeeding box, write msconfig and hit Enter.
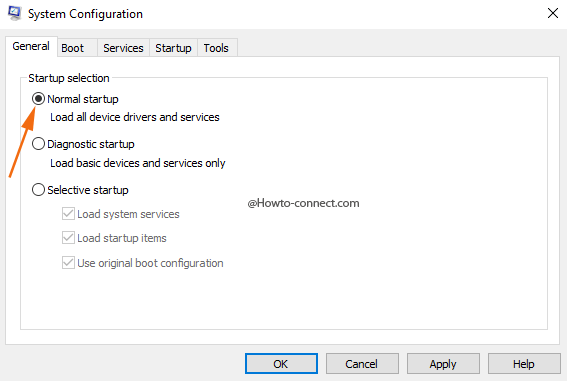
Step 2 – Once the System Configuration opens up, stay into General tab and there three radio buttons will be visible, click the first one Normal startup and then hit Apply and Ok.

If uninstalling the driver does not solve the problem, you need to update it. When you uninstall the driver and restart your PC it will be installed again.
if you uninstall the display adapter in step 2, how is it still there to update in the next step? When I click uninstall, “display adapters” disappears and I can no longer select it to update.