Did you also experience WmiPrvSE.exe Process High CPU Usage in Windows 10? Actually, WmiPrvSE indicates Windows Management Instrumentation Provider Service which sometimes consumes your system’s resources continuously. The unusual behavior of the process makes the PC lag, slow, and hot as well. See another fix for Windows Modules Installer Worker High CPU Usage in Windows 10.
WmiPrvSE.exe issue mainly occurs when the service fails to follow the patterns that it is intended to. However, this specific WmiPrvSE service is used by the Developers for Monitoring objectives and is mostly confronted with Production Environment after upgrading from Windows 10 to 7. Generally, users often open Task Manager and try to find out where the problem lies. The first thing they do is check the running processes in the Task Manager and try to find the cause of the problem. So, in this article, you will find a few possible workarounds that will bypass this issue.
WmiPrvSE.exe Process High CPU Usage in Windows 10 Solutions
How to find if WmiPrvSE.exe causes high CPU usage?
In Windows 10, the WmiPrvSE.exe process consumes high CPU (nearly 100%) for some minutes in every time period of 15-20 minutes.
To confirm whether the high CPU usage is because of WmiPrvSE.exe, you need to take the help of Task Manager. Here, find out the PID (Process Identifier) of exe that is responsible for high CPU usage.
Then, run this command in an elevated Command Prompt.
tasklist /m wmiperfclass.dll
You will come to see the WmiPrvSE.exe processes’ list with this module. Mostly, the index contains one single process but if you have 32-bit as well as 64-bit clients, two processes might be visible to you. However, if the listed processes PID is similar to that of Task Manager, there is a high possibility that you are facing the WmiPrvSE.exe process high CPU usage problem.
What causes WmiPrvSE.exe process high CPU usage?
There are mainly following two causes of WmiPrvSE.exe process high CPU usage:
- When single or more processes use several handles.
- When one or more processes running on your system use excessive memory.
Fixing the WmiPrvSE.exe process high CPU usage issue is an easy task and the below-given workarounds can help you.
Restart the WMI Service
After identifying the process that is using many handles or a lot of memory, you can restart it because most of the times, the issue is not bigger; it might be a handle or a memory leak. You can follow these steps:
Step-1: First and foremost, make a joint press Win + R on your keyboard in order to open Run dialog box.
Step-2: Here, type “services.msc” and click OK button. This will immediately launch Services console on your PC screen.
Step-3: Now, find out Windows Management Instrumentation Service and perform a right-click on it.
Step-4: Click on Restart. Once the restart of the service is complete you will no longer come across WmiPrvSE.exe Process High CPU Usage.

Update your PC
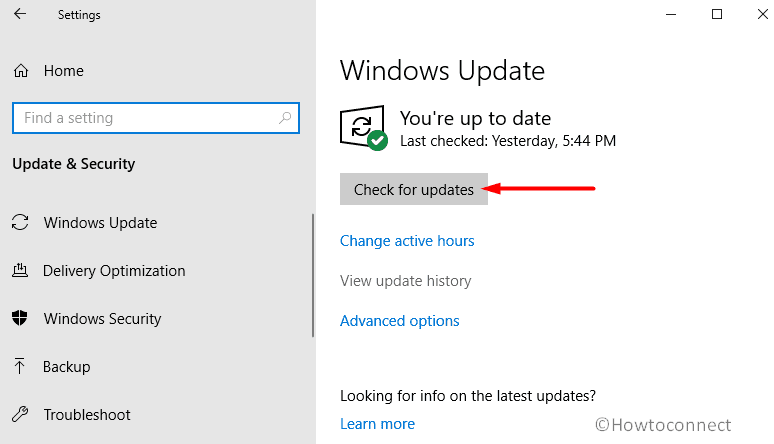
- Sometimes not getting the latest updates also cause this issue. So, all together make a hit on Windows + I hotkey and open Windows Settings app.
- Click Update & Security category on the following interface.
- On the left sidebar. click Windows Update. Switch to the right pane and click the button Check for updates.

If the scanning prompts a new update, install it. Finally, Restart Windows 10 PC and check for the occurrence of WmiPrvSE.exe Process High CPU Usage.
Restart other related services
Many experts are with a view that the high CPU usage of this specific service is caused by some other services related to WmiPrvSE.exe. Hence, when you restart them, you may likely resolve the problem of high consumption of CPU.
- Go to Cortana search and type “CMD”. Once the result shows up Command Prompt, execute a right-click on it. Choose “Run as administrator” to launch elevated Command Prompt.
- Click Yes on the prompt of UAC.
- When the Command Prompt opens, type these commands (one at a time). Note that after every command, hit the Enter key.
net stop iphlpsvc
net stop wscsvc
net stop Winmgmt
net start Winmgmt
net start wscsvc
net start iphlpsvc
So, once you run the above-mentioned commands, reboot the system. Upon the startup, check whether the problem is resolved or not. You will notice that the WmiPrvSE.exe process high CPU usage drops significantly and your computer runs normally.
Hopefully, these solutions will help you out to fix the issue of the WmiPrvSE.exe process. If you have some more tips, do share with us.
That’s all!!!
