How to Hide Selected Items Together in Windows 10 – File explorer renders a tool to secrete a bunch of confidential stuff at a time. This tool is Hide selected items positioned at the ribbon in View menu. When you employ it you are equipped with a group of choices and preferences in the course of hiding folders and files. We will here explain the methods to Hide Selected Items Together in Windows 10 using the aforementioned tool in file explorer.
Table of Contents
Method to Hide Selected Items Together in Windows 10
- Launch File Explorer using your favorable method, you can collectively strike on Windows & E buttons.
- Open the folder whose multiple items you want to hide together at a time.
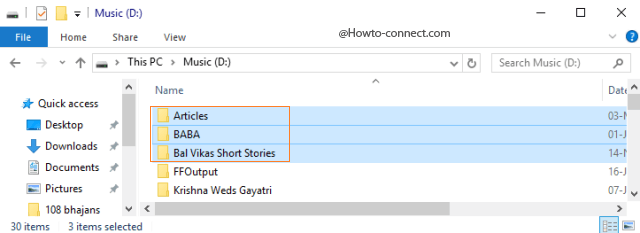
- In the navigated location, select the diverse items (files or folders) you would desire to hide together in a hurry with just one click.
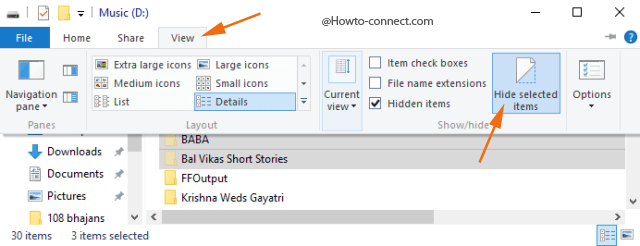
- Click or hit the View tab noticeable overhead the ribbon of the File Explorer.

- The File Explorer ribbon will come into sight, hit or tap the Hide selected items button that is present inside Show/Hide section.

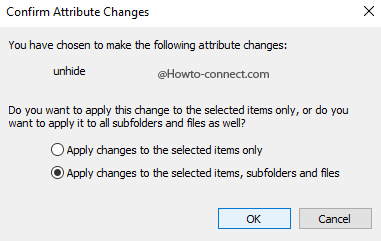
- A Confirm Attribute Changes box will arrive with a Hide attribute and two radio buttons – Apply changes to the selected items only and Apply changes to the selected items, subfolders and files.
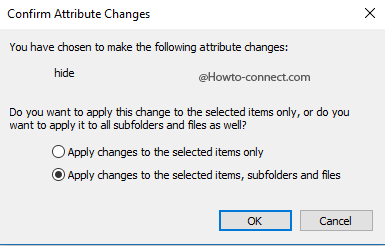
Apply changes to the selected items – This round cell only hides the required folders but its inside items remain unconverted. If you have set to show the hidden items, you notice that the hidden folders appear transparent but when you open those transparent folders, you see that their contents are not hidden.
Apply changes to the selected items, subfolders and files – Every little content that is there inside the opted folder will be hidden if you go with this radio button.
Note – Confirm Attribute Changes dialog box prompts on the screen when you hide folders but doesn’t prompt if you are in the course of hiding only file(s).
- Click or hit Ok after you have selected the needed attribute hidden.
- With this method, you can hide numerous files and folders together at a time with just one single click or hit.
How to Show or View Hidden Items at a Time
- Whenever you take a decision to display the hidden contents once more click or hit the View tab positioned at the top of the File explorer.
- On the ribbon, tick-mark the box that is termed as Hidden items under the section Show/hide.

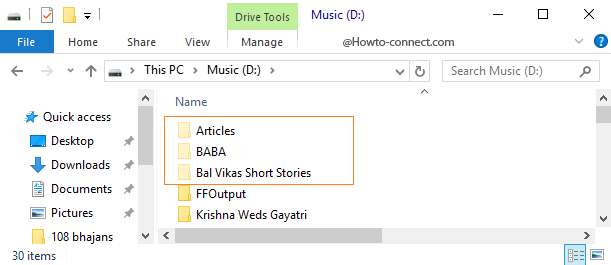
- All the hidden items will be noticeable at a time, however, this will not unhide them forever.
How to Unhide the Hidden Items at a Time
- In order to unhide the folders forever, navigate to the location, click or tap View tab and then input a check mark in the square shaped box termed as Hidden items extant in the Show/hide section.
- Select those hidden items that you can view now, again click View tab and then click or hit the button that is entitled Hide selected items.
- Confirm Attribute Changes box will again be shown up but this time with unhide attribute, so choose your preferred changes and click Ok.
When you hide Selected Items Together in Windows 10 at a time in File Explorer it is only a single click job and users are also capable of deciding whether they desire to stash only the folders or its inside contents also.