Google Chrome is a very handy browser as it works across devices such as desktops and smartphones. In addition, its best feature is the Desktop notification on news and other information of interest meeting with user’s need. But sometimes, such alert pop up including buzzer become innumerable and create annoyance while working. So, it’s imperative for you to know how to Allow and Block Specific Sites for Notifications in Chrome.
You might have experienced inconsequent small pop up on Chrome after you open a webpage. The sites start sending you notifications only after a click on Allow. Most often users provide affirmation unknowingly or mistakenly and they become the victim of unwanted alerts. Thankfully Google makes arrangement deal with the flooding pop up. Just minor modifications in Settings let Add moreover Block Specific Sites for Notifications in Chrome. See the method –
Add and Block Specific Sites for Notifications in Chrome
Here is how to Add and Block Sites for Notifications in Chrome –
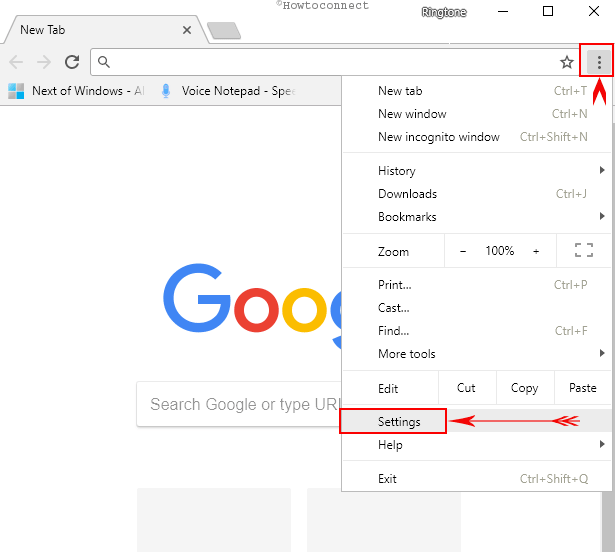
Step-1: Open Chrome Browser on your computer and find three dots on the extreme right of the toolbar. Click on this icon and choose Settings after a dropdown appears.
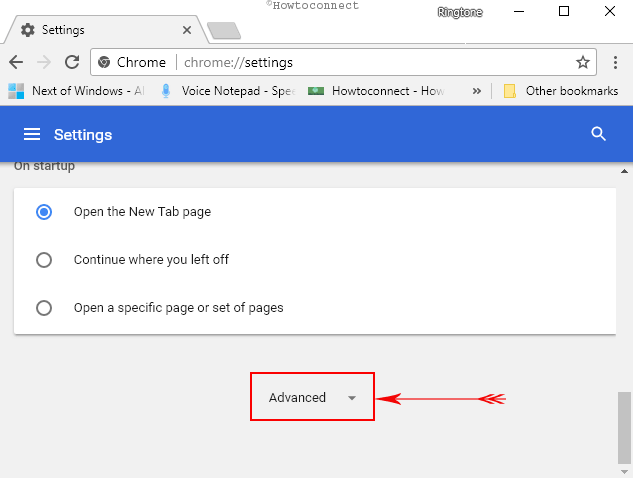
Step-3: A separate page will open in a new tab having all the options and buttons, scroll in the downward direction to the bottom. Click on Advanced from the middle part.
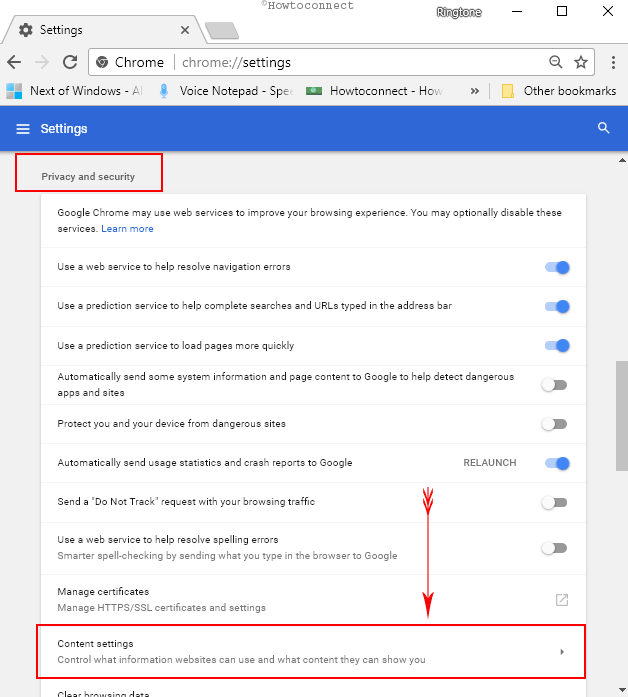
Step-4: The first section you will find here is Privacy and Security Locate Content settings from a slight bit lower portion and make a click on it.
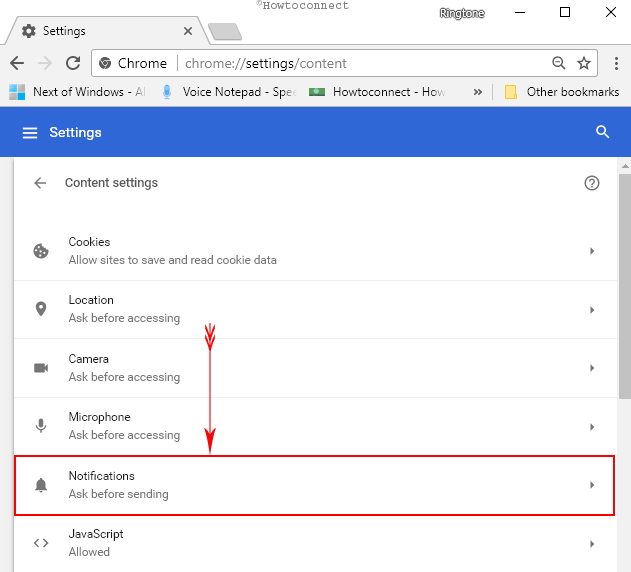
Step-5: Select Notifications (Ask before sending) to get access to a page to Allow and Block Specific Sites. (Alternatively, to access this setting page immediately you can copy and paste “chrome://settings/content/notifications” in the address bar and then hit Enter.)
Step-6: You see here 2 sections – Upper – Allow and lower Block.
Block a site
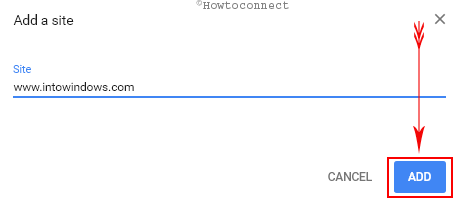
Click on ADD button from the Block section prompt a pop up.
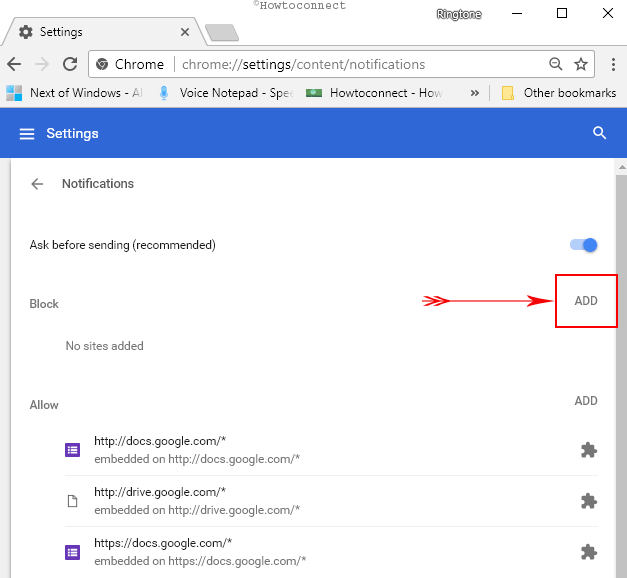
Type or copy paste the URL of the website and do a click on ADD.
Allow a Site
To avoid the Notifications follow the guideline –
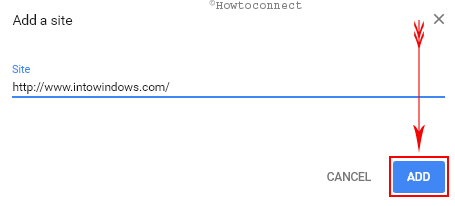
Perform a click on Add button.
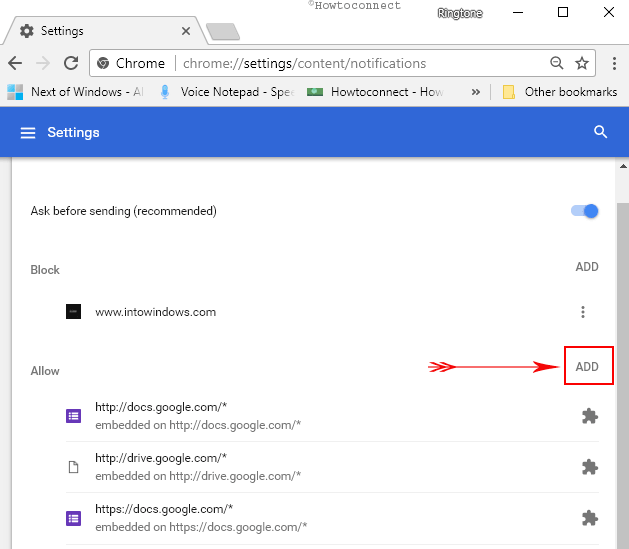
Enter the site address and select ADD.
Note – Leave the checkbox empty before Current incognito session in both the cases. When you select this, the notification will stop for only the time until you close the browser. In next session, they will again arrive to annoy you.
